11. Visual Studio Code and Other Tools#
Contents
While Jupyter notebooks are a great way to get started with the language, eventually you will want to use more powerful tools. Visual Studio Code (VS Code) in particular, is the most popular open source editor for programming - with a huge set of extensions and strong industry support.
While you can use source code control, run terminals and the REPL (“Read-Evaluate-Print Loop”) without VS Code, we will concentrate on using it as a full IDE for all of these features.
See Modern Julia Workflows for alternative approaches.
11.1. Installing VS Code#
To install VS Code and the Julia Extension,
First, ensure you followed the instructions for setting up Julia on your local computer.
In particular, ensure you did the initial VS Code setup
Install VS Code for your platform and open it
See the Julia VS Code Documentation for more details.
If you have done a typical Julia installation, then this may be all that is needed and no configuration may be necessary. However, if you have installed Julia in a non-standard location you may need to manually set the executable path. See here for instructions if it errors when starting Julia terminals.
Tip
“Open in Code” on MacOS and Linux VS Code supports the “Open with Code” action in File Explorer if chosen during the installation. This is convenient, but not necessary. To support it on MacOS you need to install a Automator script or separate package. Similarly, see here for support on linux.
While the general VS Code documentation is excellent, we will review a few of the key concepts directly. In addition, see here for other useful extensions when using VS Code not directly connected to these lectures.
11.1.1. Optional Extensions and Settings#
Open the settings with > Preferences: Open User Settings (see above for opening the command palette with <Ctrl-Shift-P>).
As a few optional suggestions for working with the settings,
In the settings, search for
Tab Sizeand you should findEditor: Tab Sizewhich you can modify to 4.If you are on Windows, search for
eoland changeFiles: Eolto be\n.
A key feature of VS Code is that it can synchronize your extensions and settings across all of your computers, and even when used in-browser (e.g. with GitHub CodeSpaces). To turn on,
Ensure you have a GitHub account, which will be useful for further lectures
Choose
Turn On Settings Sync...in the gear icon at the bottom of the screen
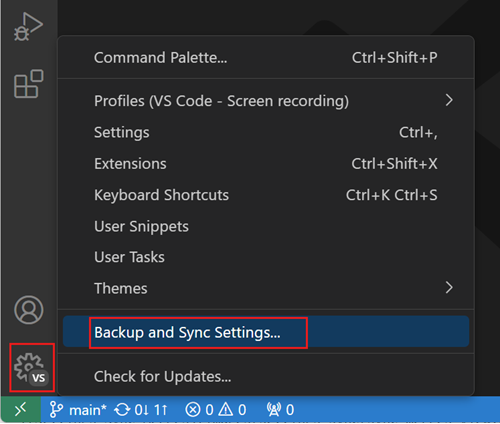
You can stick with all of the defaults, and read more in the instructions
11.1.2. Integrated Terminals in VS Code#
A key benefit of VS Code is that you can use terminals and command-line interfaces directly within the editor, and starting in the convenient location relative to an opened project.
Furthermore, in the case of julia (and other languages such as python) this will activate the project automatically. See the documentation for more details.
You can open the terminal panel with > View: Toggle Terminal , typing Ctrl+` , or by clicking on the list of warnings and errors bottom bar in VS Code. If no existing terminal exists, it will create a new one.
11.2. Using VS Code with Julia#
The documentation for the VS Code extension provides many examples:
In addition, there are excellent youtube videos about provide more background. For example, Package Development in VSCode shows advanced features.
11.2.1. Hello World#
To walk through a simple, but complete example.
Create a new directory on your computer, for example hello_world and then open VS Code in that folder This can be done several ways,
Within a terminal on your operating system, navigate that directory and type
code .On Windows, right click on the folder and choose
Open with Code- trusting the authors as required on opening the folder.In the VS Code Menu, choose
File/Open Folder...
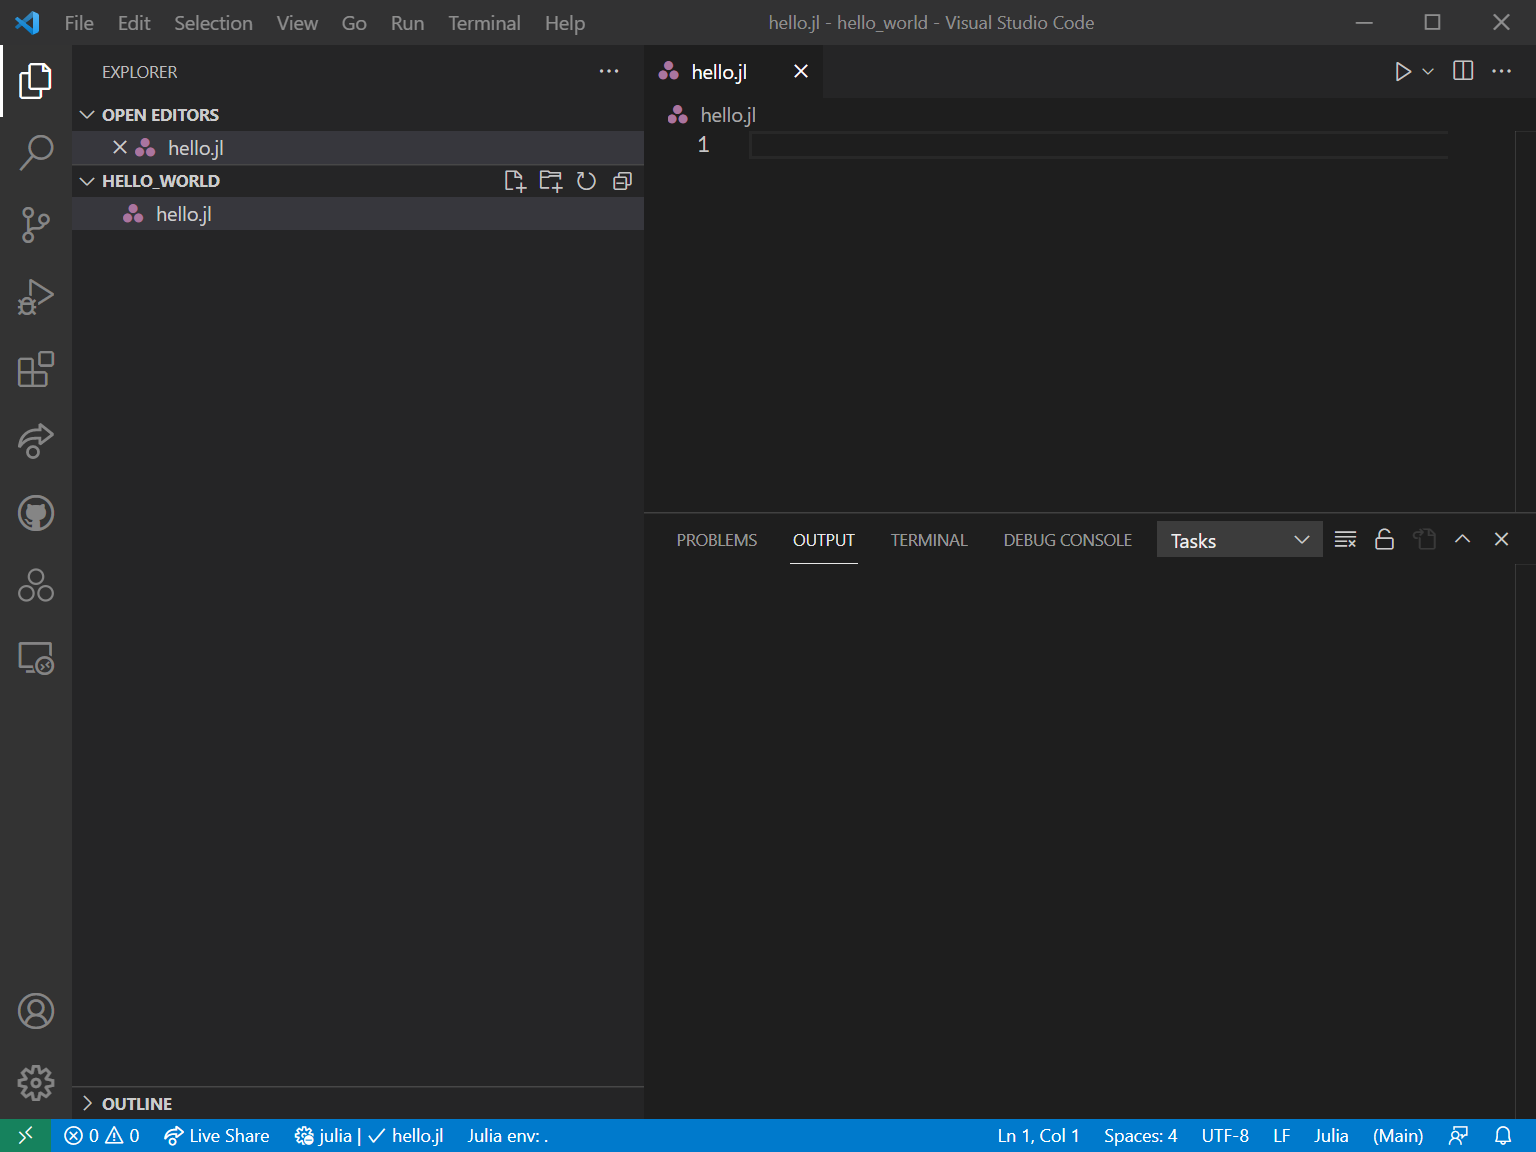
Next, in the left hand panel, under HELLO_WORLD, right click and choose New File and create as hello.jl. The screen should look something like
Type some code as such f(x) = x + 1 into the file, into the .jl file, save it, and while your mouse curser is on the line of code do <Shift-Enter>. If a julia REPL wasn’t already started, it will be started and the code will be run within its kernel
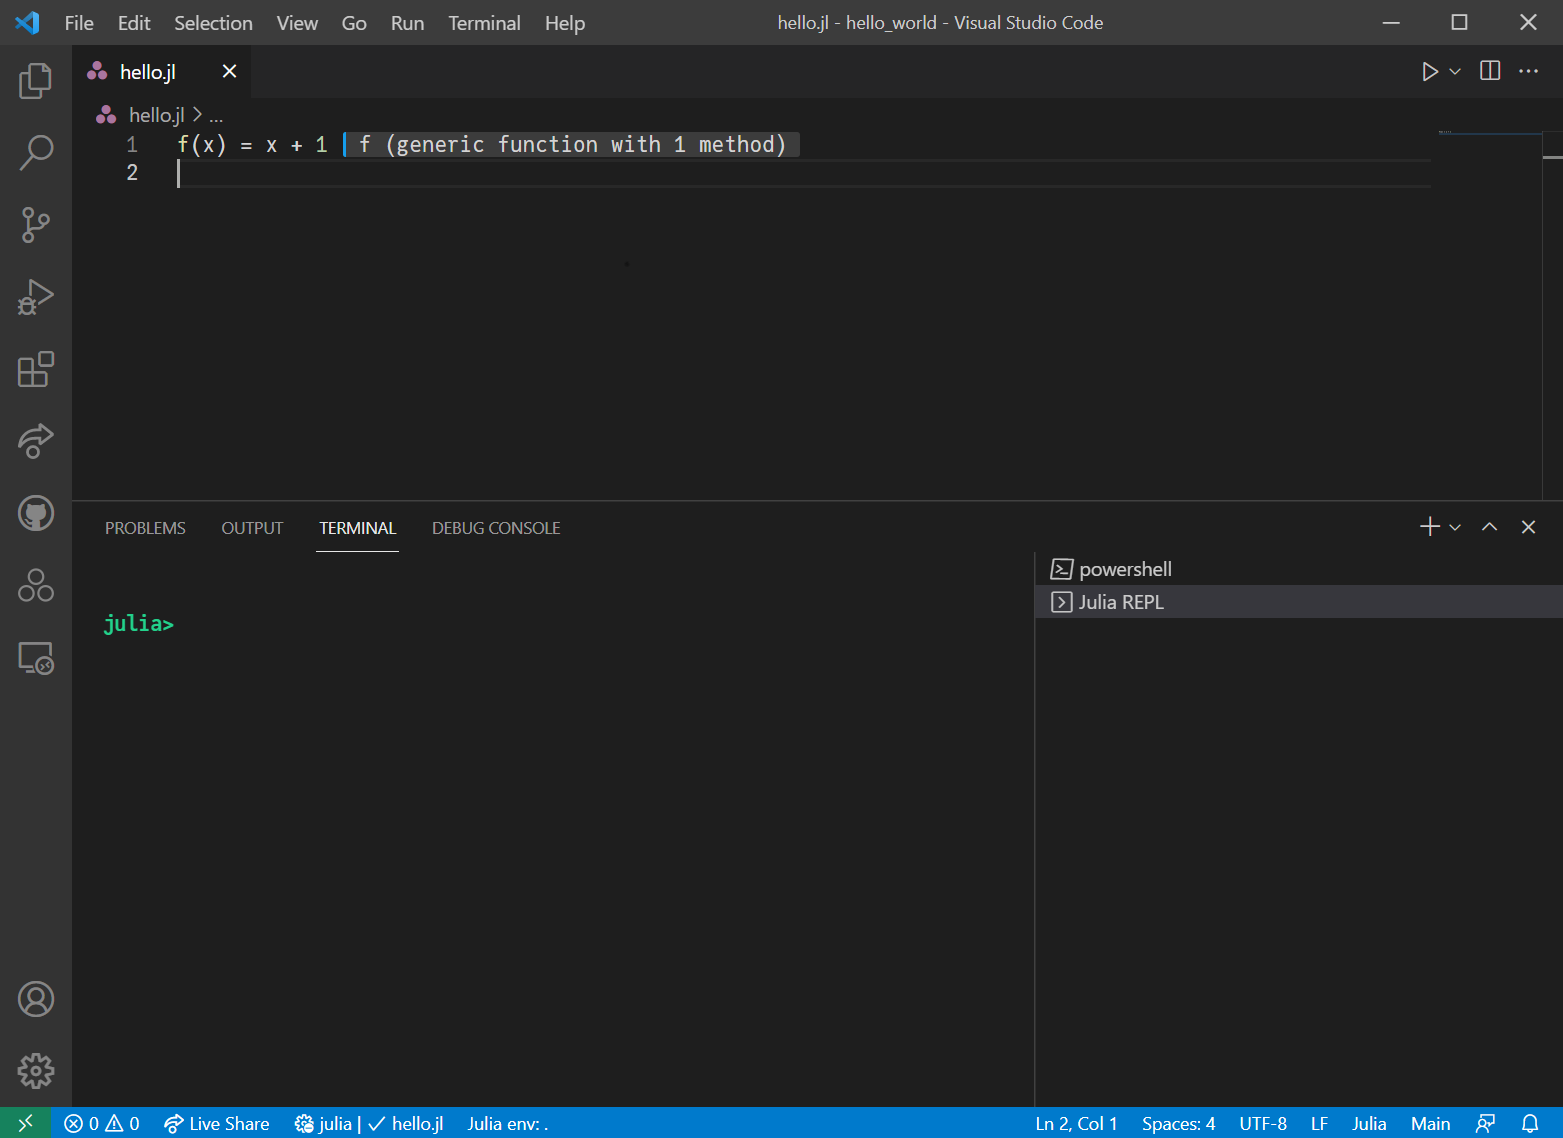
At this point, the function is available for use within either the code or the REPL. You can get inline results by adding more code to the file and executing each line with <Shift-Enter>.
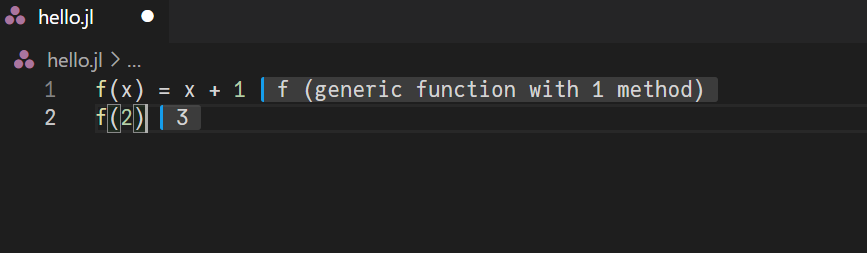
That code is also accessible within the REPL. Executing the function there,
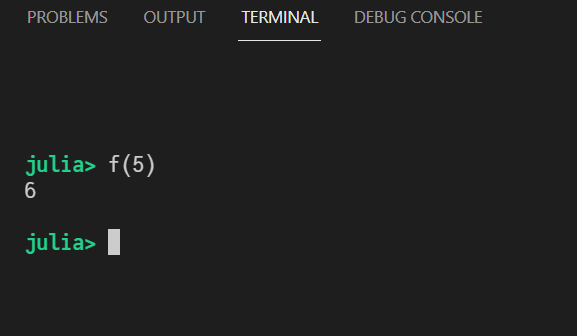
Because the REPL and the files are synchronized, you can modify functions and simple choose <shift-Enter> to update their definitions before analyzing the results in the REPL or in the file itself.
11.2.2. Adding Packages#
Next we will go through simple use of the plotting and package management.
Note
VS Code typically activates the current project correctly. However, when choosing to enter the package mode, if the prompt changes to (@v1.12) pkg> rather than (hello_world) pkg > then you will need to manually activate the project. In that case, ensure that you are in the correct location and choose ] activate ..
You can always see the current package location and details with ] st. See Julia Environments for more details.
The REPL. First, type ] to enter the package management mode, then add Plots. Depending on whether you have done similar operations before, this may download a lot of dependencies. See below for an example
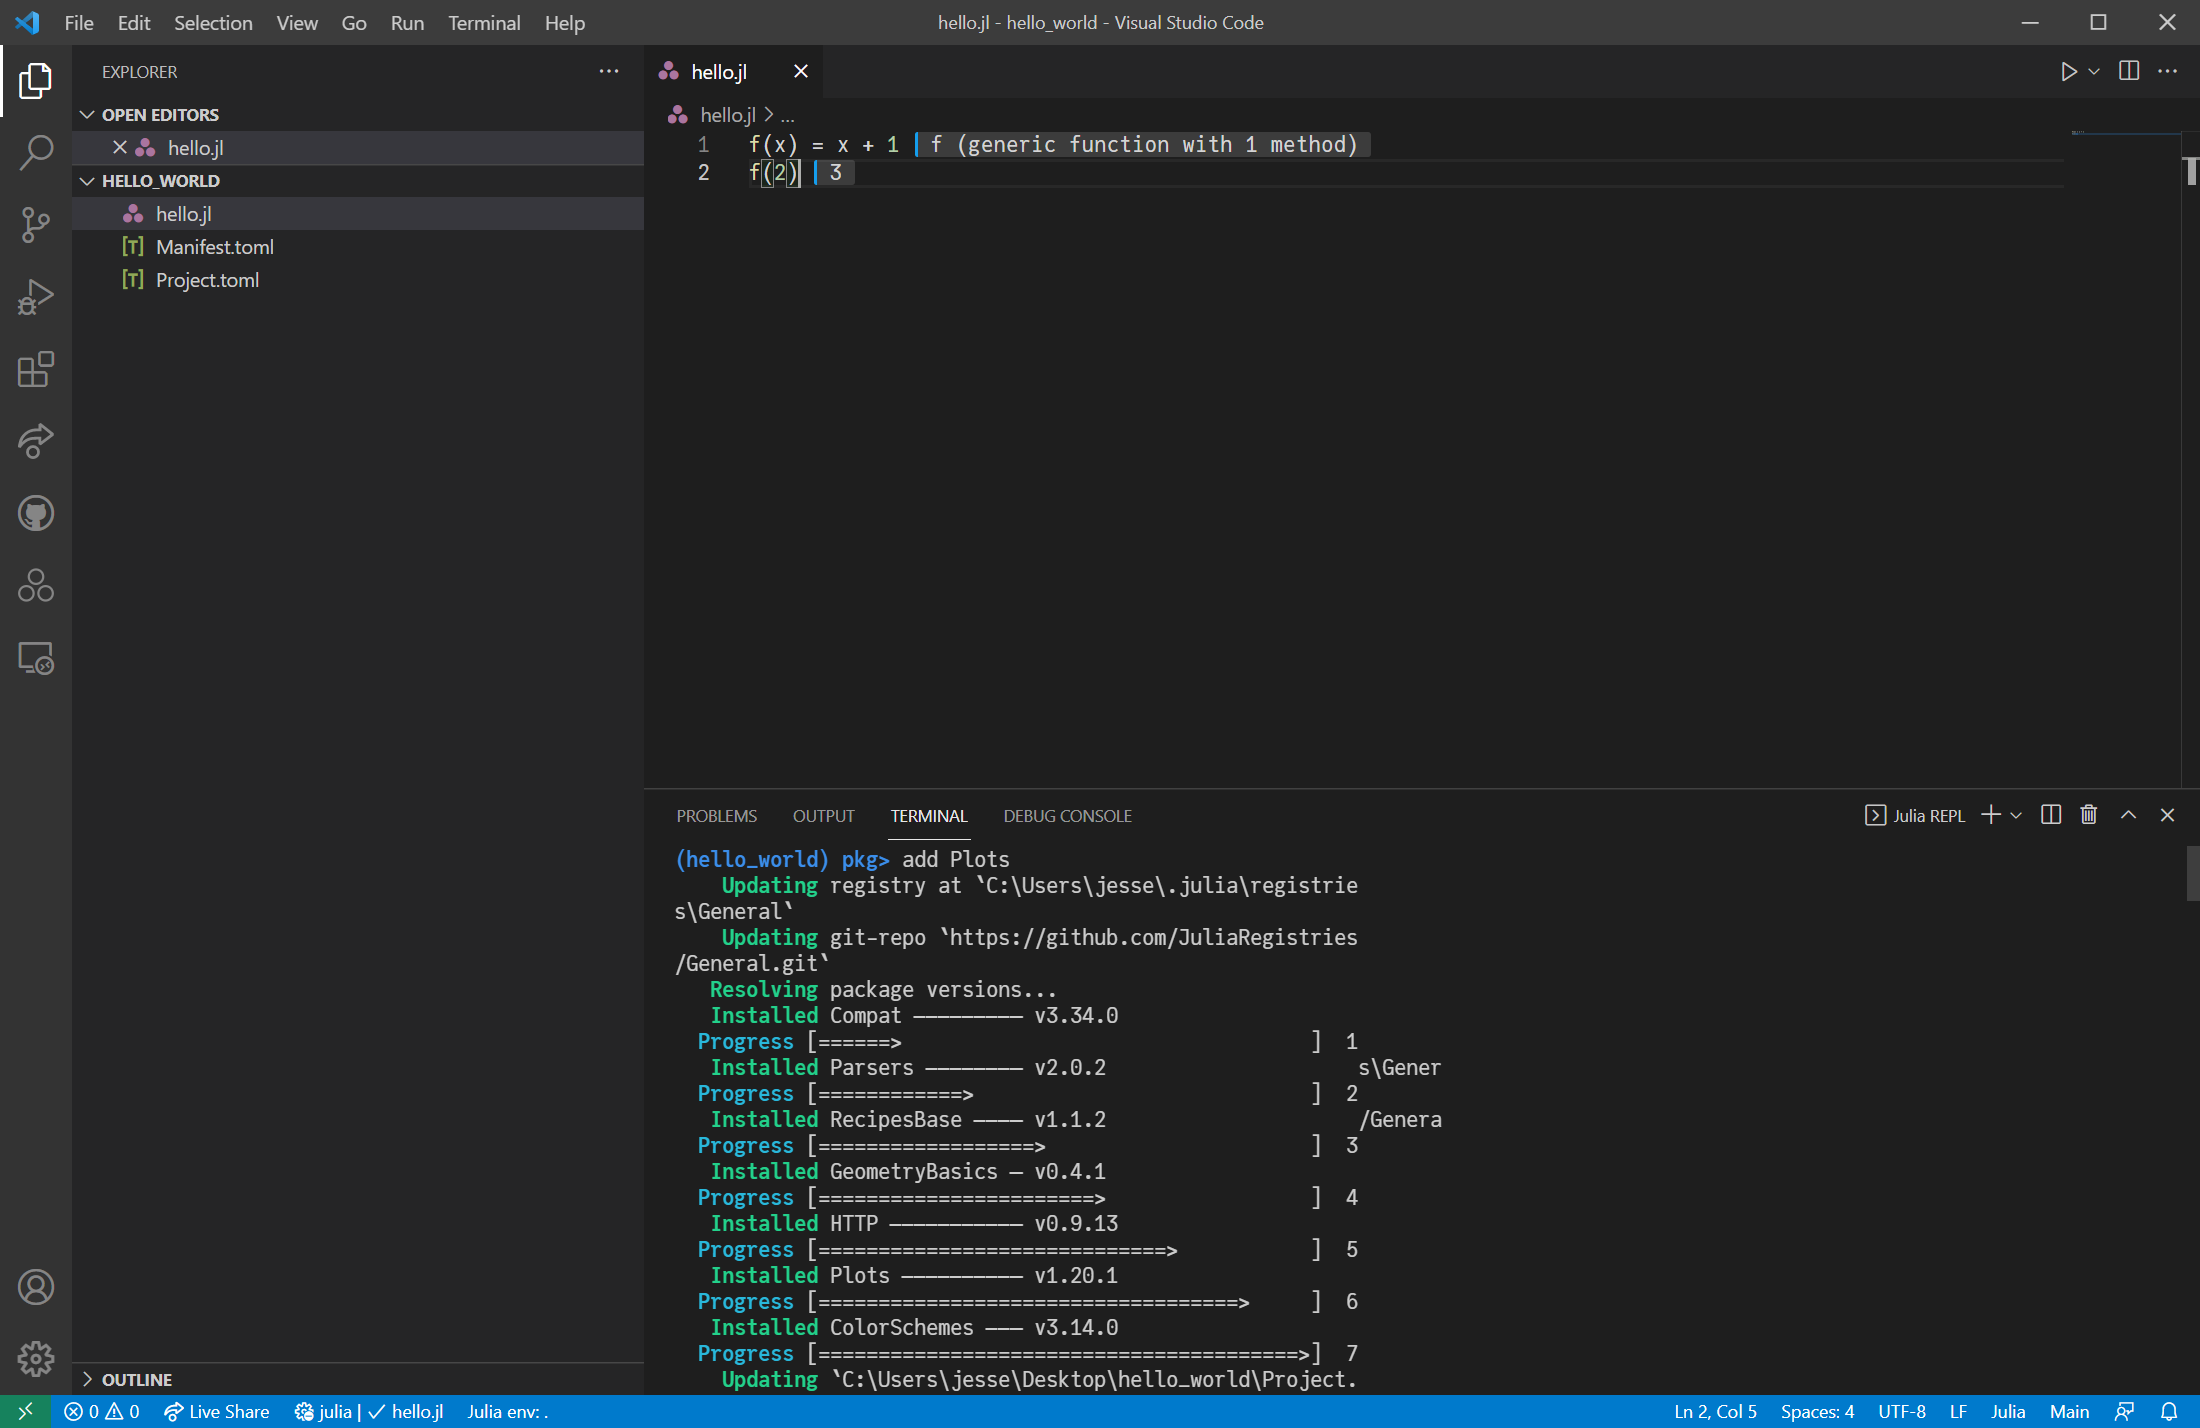
Crucially, you will notice that two new files are created. Project.toml and Manifest.toml. These provide a snapshot of all of the packages used in this particular project.
Add code in the .jl file for a simple plot, and it will be shown on a separate pane

To exit package management mode and return to the REPL, type Ctrl+C. To then go from the REPL back to the VS Code terminal, type Ctrl+D.
11.2.3. Executing Files#
First we will reorganize our file so that it is a set of functions with a call at the end rather than a script. Replace the code with
using Plots, Random

f(x) = x + 1
function plot_results()
    x = 1:5
    y = f.(x)
    plot(x, y)
    print(y)
end

# execute main function
plot_results()
While it is fine to use scripts with code not organized in functions for exploration, you will want to organize any serious computations inside of a function. While this may not matter for every problem, this will let the compiler avoid global variables and highly optimize the results.
Note
The behavior of global variables accessed in loops in the REPL, Debugger, inline code evaluations, and Jupyter notebooks is different from executed files. See the documentation on soft scoping for more background. A good heuristic which will avoid these issues is to (1) never use loops outside of a function when you write .jl files; and (2) if you ever use the global keyword, assume something is wrong and you should put something in a function.
You can execute a .jl file in several ways.
Within a terminal, you can provide the path to the file. For example,
julia --threads auto --project hello.jl
See the REPL section for more details on the commandline options.
Alternatively, within VS Code itself you can use the <Ctrl-F5> to run the new file.
11.2.4. Using the Debugger#
To debug your function, first click to the left of a line of code to create a breakpoint (seen as a red dot).
Next, use <Ctrl-Shift-D> or select the run and debug tab on the left in Julia to see
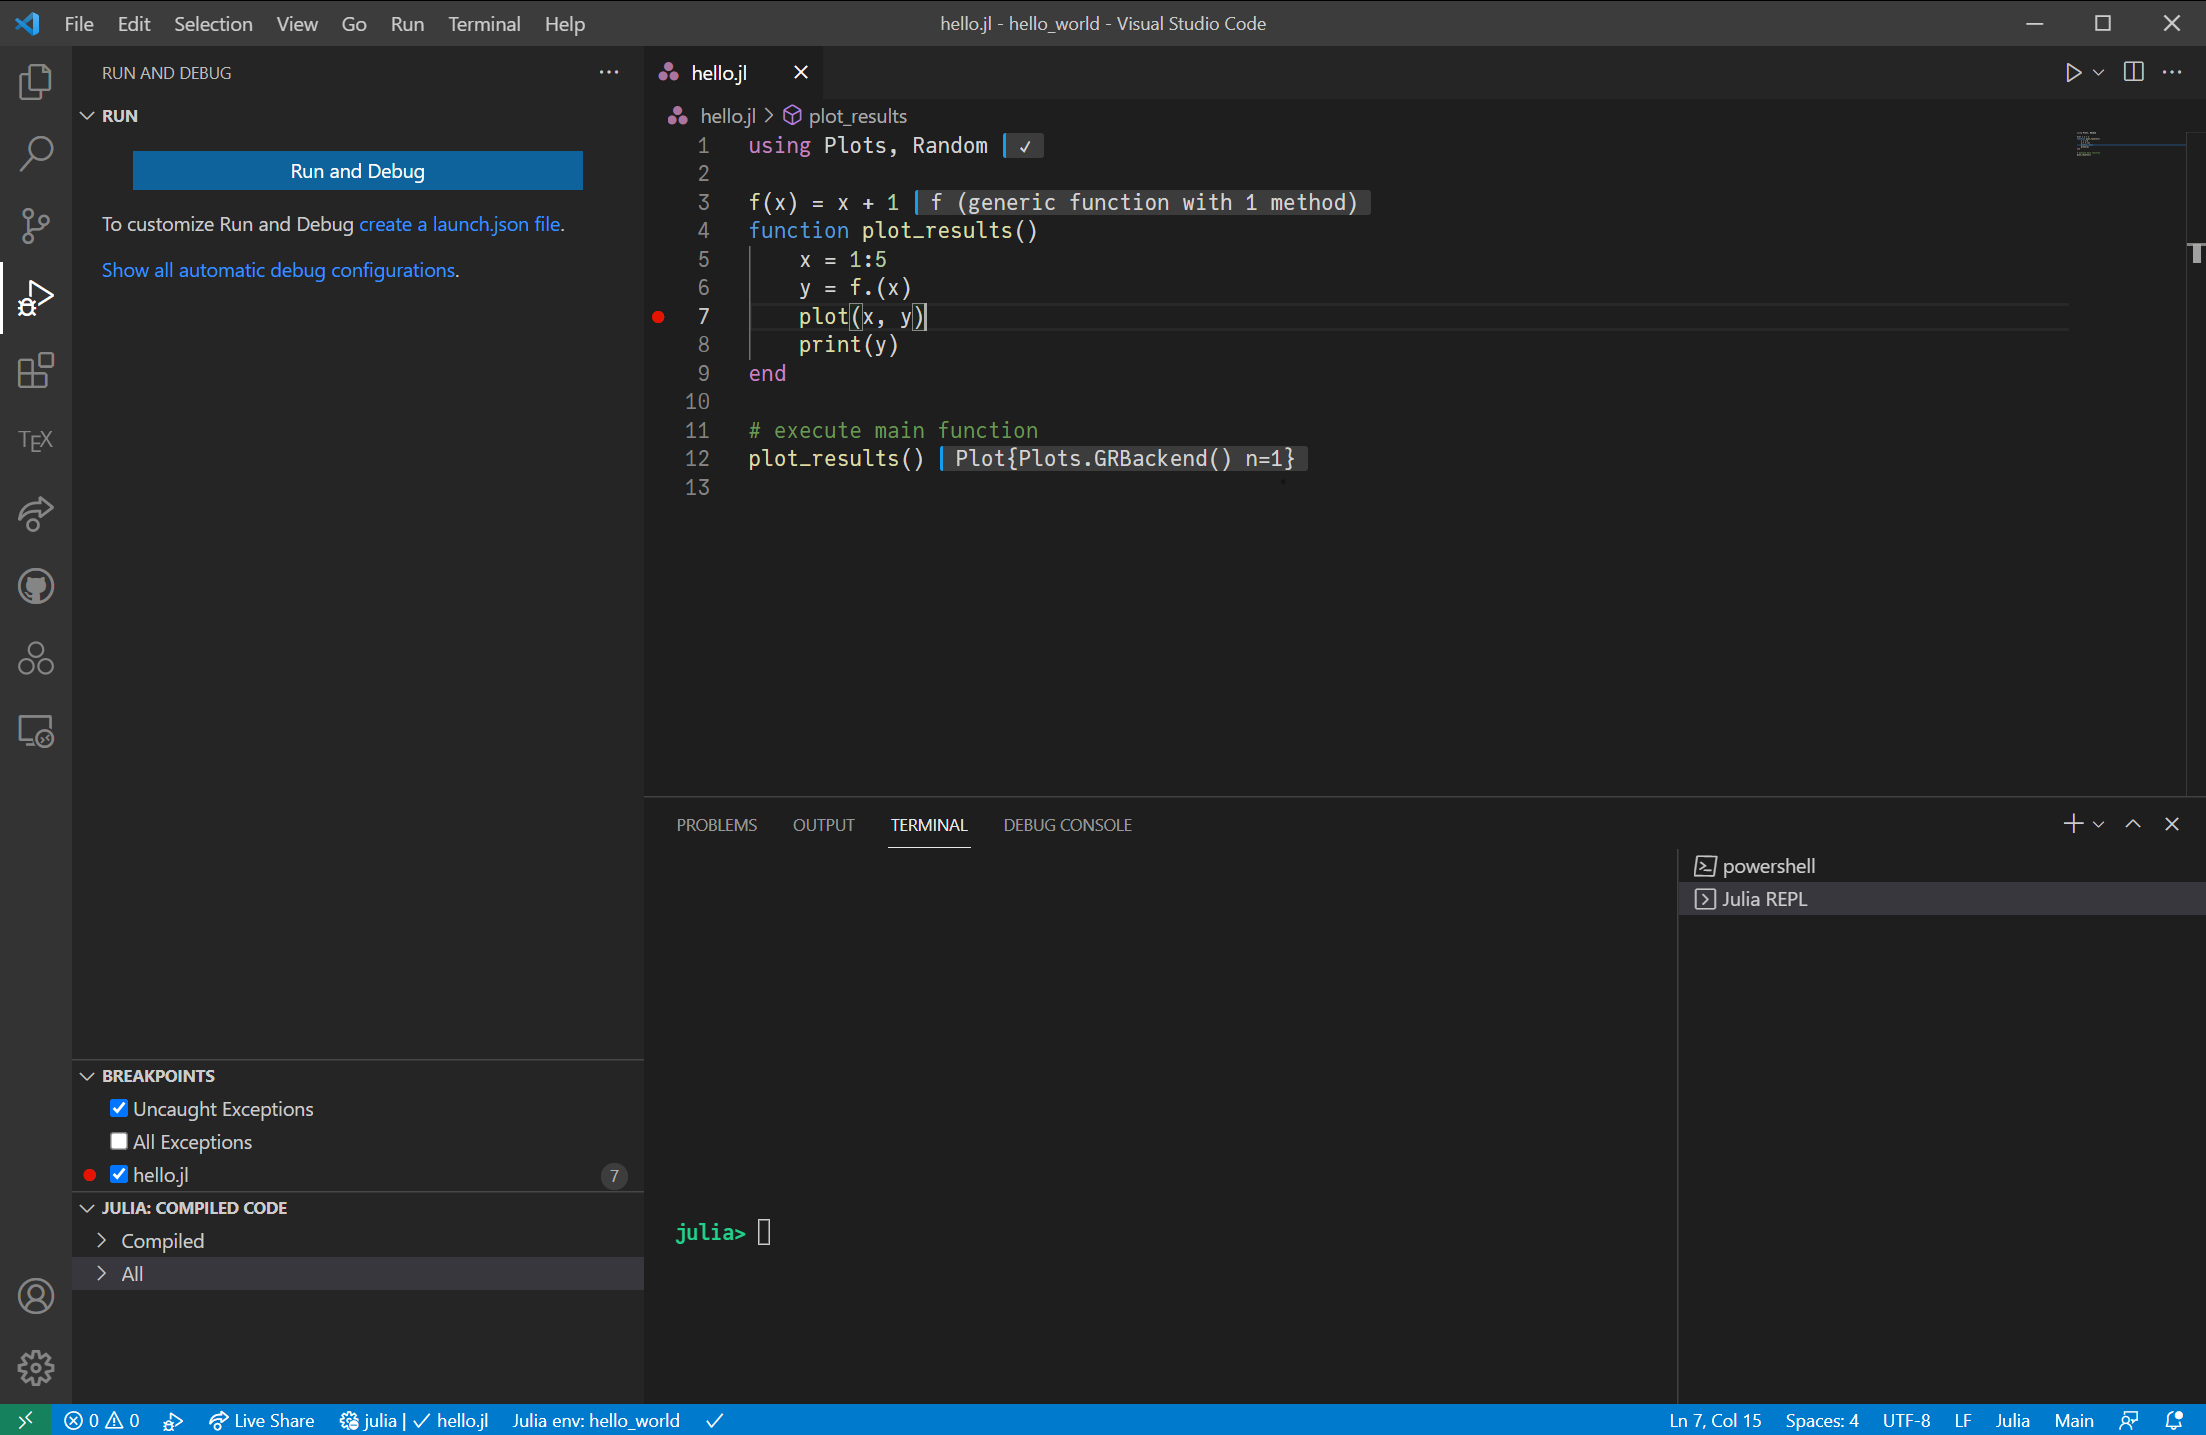
Then choose the Run and Debug option and it will execute plot_results() at the bottom of the file, and then stop inside at the breakpoint.
Note
Some users may see other options like Run active Julia file instead of Run and Debug in the run and debug tab.
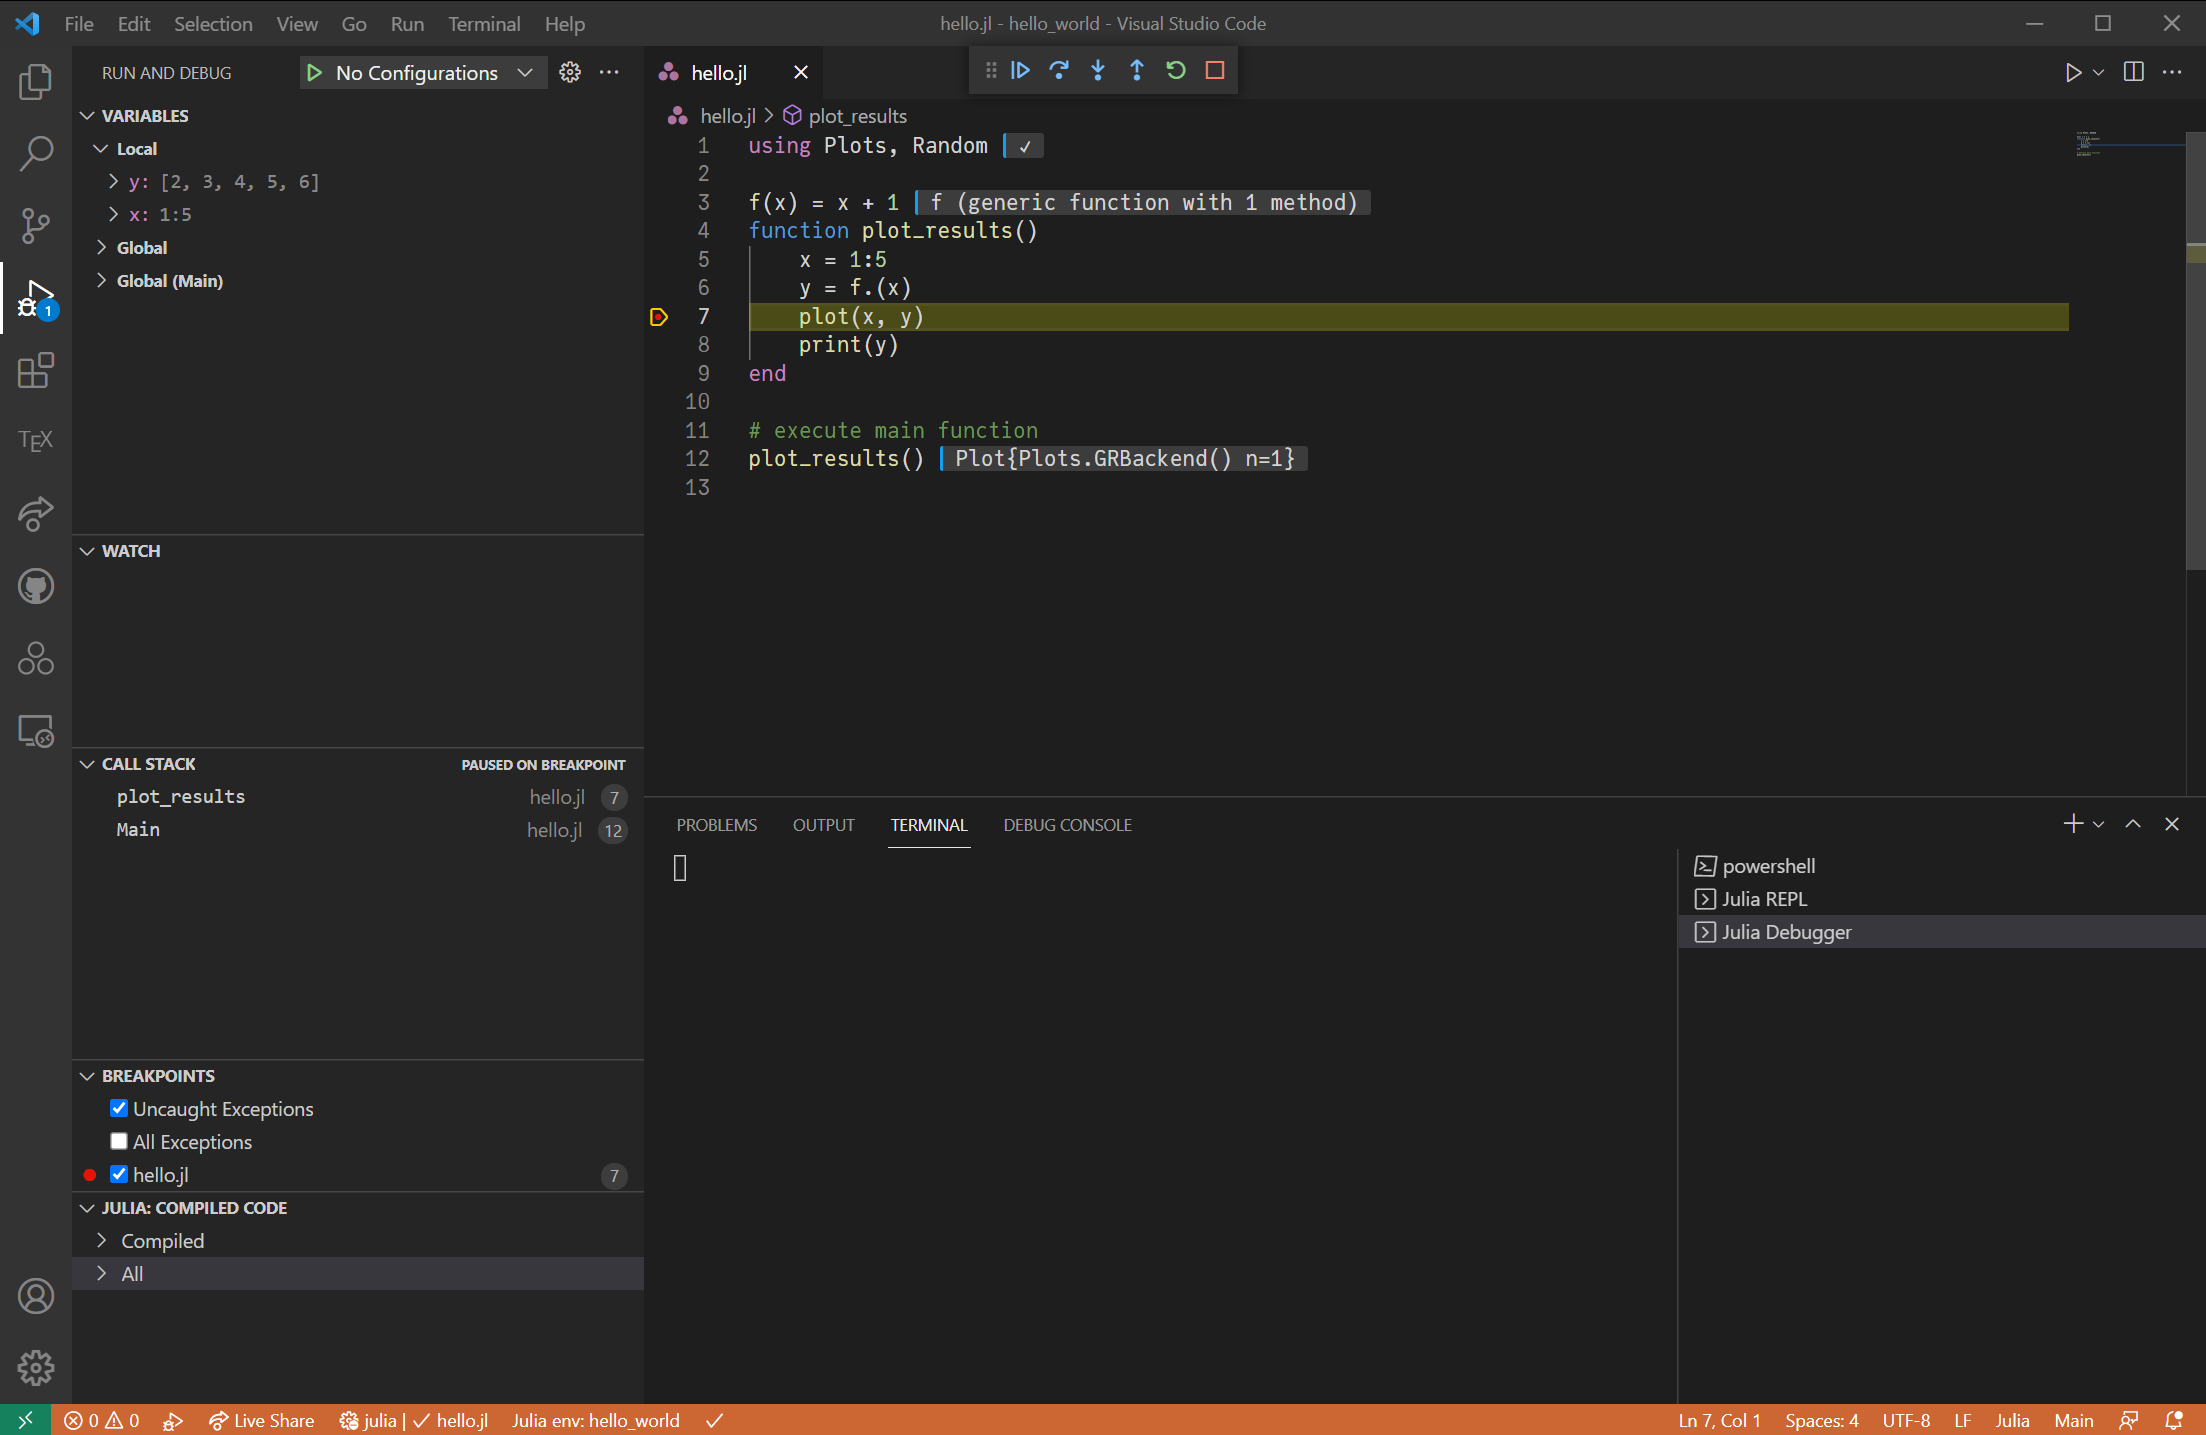
You can use the toolbar at the top to step through the code, as described in the documentation.
As an alternative way to start the debugger, you can instead debug a call within the REPL with commands like @run plot_results().
Note
The Julia Debugger runs some of the code in an interpreted mode that might be far slower than typical compiled and optimized code. For this reason, it may not be possible to use it in all the same ways you might use something like the Matlab debugger. However, if you organize your code appropriately, you may find that the compile mode enables you to concentrate on debugging only some of the functions, while letting slow functions remain compiled.
11.3. The REPL#
Even if you are working primarily in .jl and/or Jupyter Notebooks in Julia, you will need to become comfortable with the REPL. We saw some initial use of this when adding packages and exploring the code above, but the REPL has many more features.
11.3.1. Starting a REPL#
There are several ways to start the REPL.
Within VS Code, executing code inline will start it as required.
In the command palette of VS Code, choose
> Julia: Start REPLOutside of VS Code, if julia was installed on your system path, you can simply type
juliaor with other options
The command line options for starting Julia are set to decent defaults for terminals running within VS Code, but you will want to set them yourself if starting the REPL otherwise.
As an example, the argument --threads determines the number of threads that Julia starts with. If starting julia on the command line without specifying any arguments, it will default to 1 (or check an environment variable). To have Julia automatically choose the number of threads based on the number of processors for your machine, pass the --threads auto argument.
Note
VS Code sets the number of threads automatically based on the number of cores on your machine, but the value can be modified in its > Preferences: Open User Settings and then search for Julia: Num Threads.
The most important choice is the --project toggle which determines whether you want to activate an existing project (or create a new one) when starting the interpreter. Since a key feature of Julia is to have fully reproducible environments, you will want to do this whenever possible.
To emphasize this point, this is an example of the ]st showing the global environment has only the bare minimum of packages installed. With this workflow, all other packages are installed only when a given project is activated.
(@v1.12) pkg> st
Status `~/.julia/environments/v1.12/Project.toml`
  [7073ff75] IJulia v1.30.6
  [14b8a8f1] PkgTemplates v0.7.56
  [295af30f] Revise v3.10.0
Note
A key difference between Julia and some other package managers is that it is capable of having different versions of each package for different projects - which ensures all projects are fully reproducible by you, your future self, and any other collaborators. While there is a global set of packages available (e.g. IJulia.jl to ensure Jupyter support) you should try to keep the packages in different projects separated. See the documentation on environments and the package manager for more.
If you start the terminal without activating a project, you can activate it afterwards with ] activate . or using Pkg; Pkg.activate().
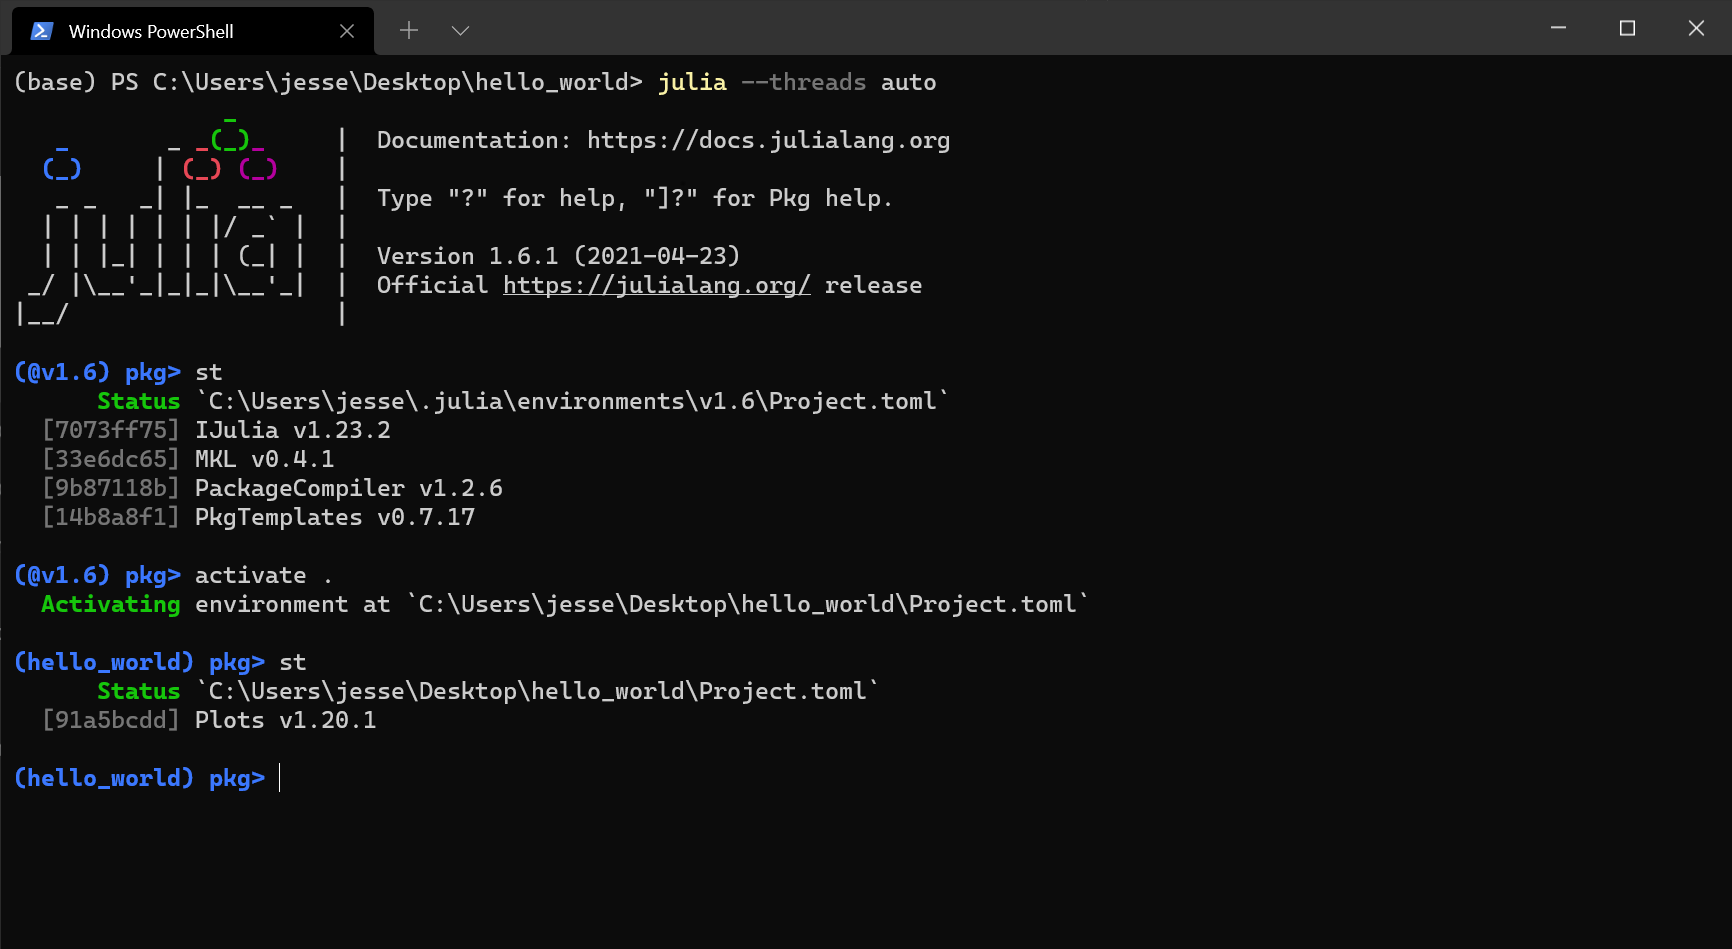
To see this in action, within an external terminal we will open it using both methods, and then use ] st to see which project is activated and which packages are available.
First, with julia --threads auto we see that the globally installed packages are available at first, but that the existing Project.toml and Manifest.toml in that folder are chosen after we choose ] activate .
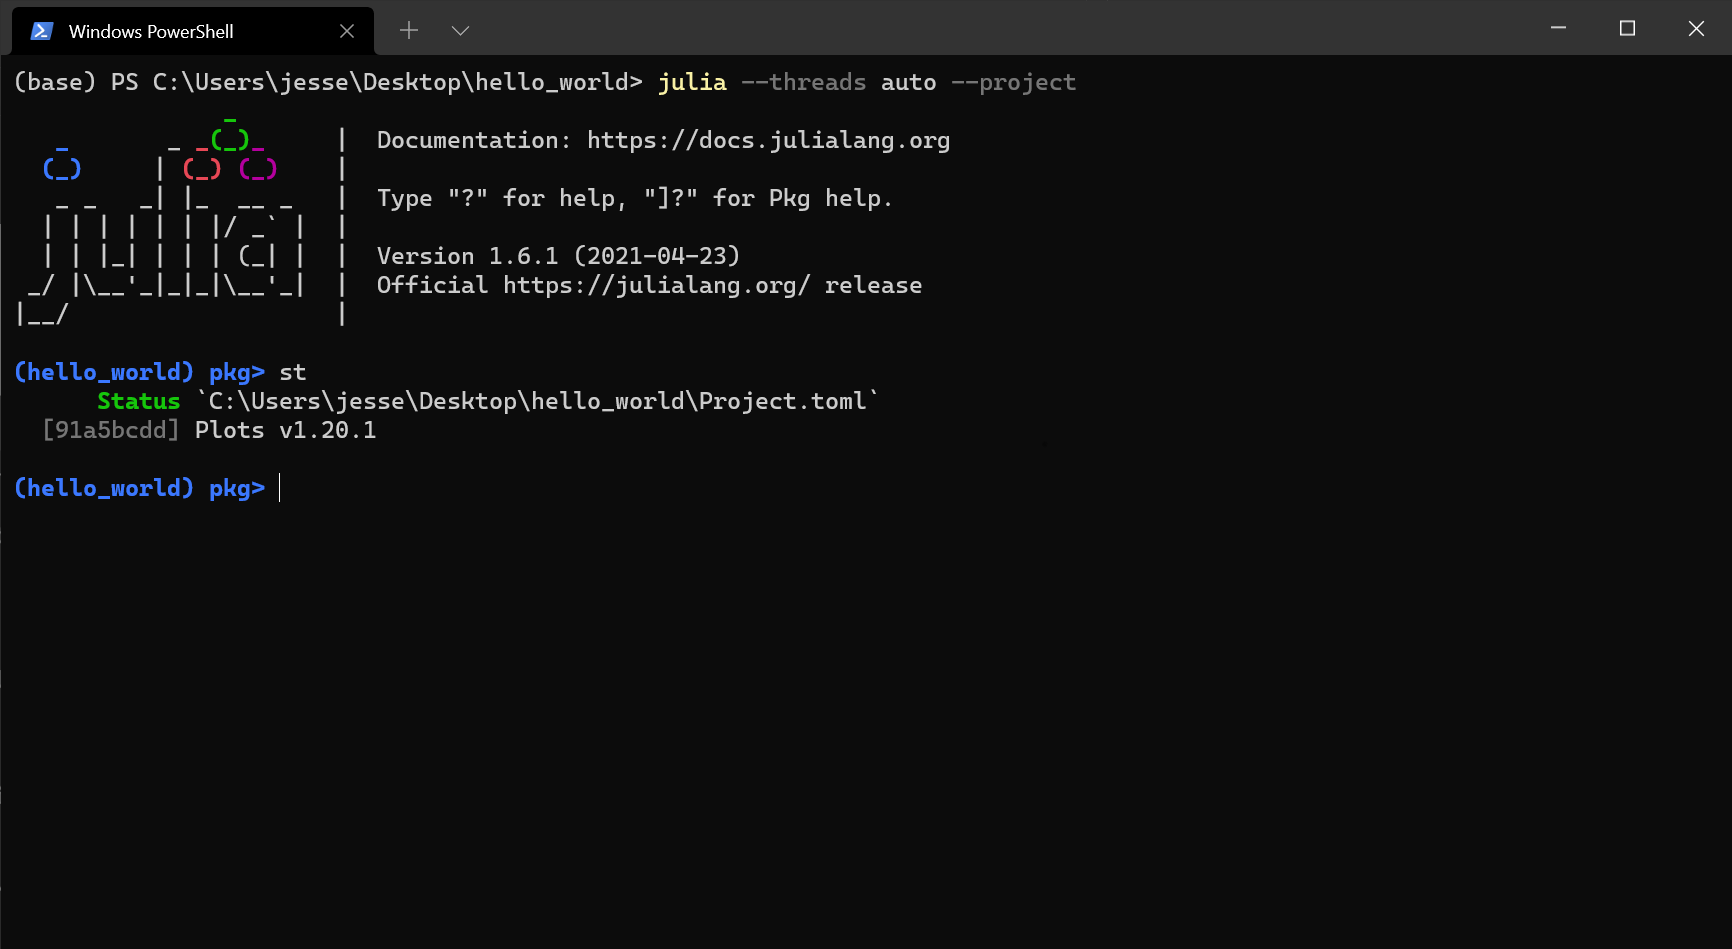
Next, with julia --threads auto --project the project is automatically activated
Finally, if you choose the --project option in a folder which doesn’t have an existing project file, it will create them as required.
A few other features of the REPL include,
11.3.2. More Features and Modes#
Hitting ; brings you into shell mode, which lets you run bash commands (PowerShell on Windows)
; pwd
In addition, ? will bring you into help mode.
The key use case is to find docstrings for functions and macros, e.g.
? print
11.4. Package Environments#
As discussed, the Julia package manager allowed you to create fully reproducible environments (in the same spirit as Python’s and Conda virtual environments).
As we saw before, ] brings you into package mode. Some of the key choices are
] instantiate(orusing Pkg; Pkg.instantiate()in the normal julia mode) will check if you have all of the packages and versions mentioned in theProject.tomlandManifest.tomlfiles, and install as required.This feature will let you reproduce the entire environment and, if a
Manifest.tomlis available, the exact package versions used for a project. For example, these lecture notes use Project.toml and Manifest.toml - which you likely instantiated during installation after downloading these notebooks.
] add Distributionswill add a package (here,Distributions.jl) to the activated project file (or the global environment if none is activated).Likewise,
] rm Distributionswill remove that package.] stwill show you a snapshot of what you have installed.] upwill upgrade versions of your packages to the latest versions possible given the graph of compatibility used in each.
Note
On some operating systems (such as OSX) REPL pasting may not work for package mode, and you will need to access it in the standard way (i.e., hit ] first and then run your commands).
11.5. More Options and Configuration Choices#
VS Code and the related ecosystem have an enormous number of features and additional options.
The following are some optional choices, not all directly connected to Julia.
11.5.1. Optional Extensions#
While not required for these lectures, consider installing the following extensions. As before, you can search for them on the Marketplace or choose Install from the webpages themselves.
Jupyter: VS Code increasingly supports Jupyter notebooks directly, and this extension provides the ability to open and edit
.ipynbnotebook files without installing Conda and runningjupyter lab.GitHub Pull Requests and Issues: while VS Code supports the git version control natively, these extension provides additional features for working with repositories on GitHub itself.
GitHub Copilot: AI-assisted code completion. See GitHub Education Pack for free access if you are a student or educator.
OpenAI Codex: official ChatGPT-powered coding agent for VS Code. Works best if you already have ChatGPT Plus/Pro (or higher) and provides Copilot-like chat, edits, and inline help inside the editor.
Claude Code: Anthropic’s agentic coding tool that can edit files, run commands, and search your codebase. Available as a VS Code extension. See the Claude Code documentation for setup and usage.
11.6. Using LLMs with VS Code#
GitHub Copilot, Google Gemini Code Assist, OpenAI Codex, and Claude Code can provide completions, refactors, and documentation suggestions directly in VS Code.
For consistent answers across a project you can add short “instructions” files that the assistants read to understand your style and constraints:
GitHub Copilot: Place
.github/copilot-instructions.mdin the repo root to define project-wide guidance (file name and location are fixed; see the Copilot docs). You can also create a personalglobal-copilot-instructions.mdin your user settings directory if you want defaults across repos.Google Gemini:
VS Code: Install the Gemini Code Assist extension (part of Google Cloud Code). While Gemini does not yet auto-ingest a hidden config file, the convention is to place a
GEMINI.mdin your repo root and explicitly reference it (e.g., keep it open or@mentionit) at the start of a session.CLI: You can use the Google Cloud CLI (
gcloud gemini ...) for pipe-based operations, or use the API directly. For repo-chat on the command line, many use community tools (likellmoraider) configured with a Gemini API key.
OpenAI Codex: Codex looks for
AGENTS.md(orAGENTS.override.md) starting from your repo root and up to the current directory, plus a global copy at~/.codex/AGENTS.md(Codex home defaults to~/.codex, but you can pointCODEX_HOMEelsewhere if you want it under~/.openai). You can add other fallback names—such asinstructions.mdat the repo root—viaproject_doc_fallback_filenamesin~/.codex/config.toml. See the AGENTS.md guide for details.Claude Code: Place a
CLAUDE.mdfile in your repo root to provide project-specific instructions. Claude Code automatically reads this file at the start of each session. You can also create a personal~/.claude/CLAUDE.mdfor global defaults across all projects, and folder-levelCLAUDE.mdfiles for directory-specific guidance. Beyond instructions, Claude Code supports “skills”—custom slash commands (e.g.,/commit,/review-pr) that you define in~/.claude/commands/or.claude/commands/within a project. See the Claude Code memory documentation for details onCLAUDE.mdand the slash commands guide for creating custom skills.
A minimal example you can adapt (drop this same content into .github/copilot-instructions.md, GEMINI.md, AGENTS.md, and/or CLAUDE.md):
## Project context
- Julia lectures and demos targeting Julia 1.12.

## Style
- Follow the SciML style guide where applicable: [https://docs.sciml.ai/SciMLStyle/stable/](https://docs.sciml.ai/SciMLStyle/stable/).
- Use snake_case for files, functions, and variables; 4-space indent; concise comments.
- Prefer pure functions and keep logic inside modules.

## Tests
- Always add or update unit tests with code changes.
- Recommend `julia --project -e 'using Pkg; Pkg.test()'` before claiming completion; if tests are slow, state what would be run.

## Structure
- Keep the existing layout:
  - /src for package code
  - /test for tests
  - Project.toml and Manifest.toml tracked and updated only as needed
- Avoid adding new top-level folders unless requested.

## Safety
- Avoid destructive git commands; prefer minimal diffs (apply_patch) and cite file paths/lines.
11.6.2. Using Claude for Code Review with GitHub Actions#
Beyond using LLMs inside your editor, you can integrate Claude directly into your GitHub workflow so that it automatically reviews pull requests, responds to questions in issues, and even implements changes — all triggered by mentioning @claude in a comment.
This is powered by Claude Code GitHub Actions, an official GitHub Action maintained by Anthropic. Once installed, any collaborator can tag @claude in a PR comment or issue and receive an AI-powered response that follows your project’s CLAUDE.md guidelines.
11.6.2.1. Quick Setup#
The fastest way to set up the action is from the Claude Code CLI:
claude            # start Claude Code
/install-github-app   # guided installer
This command walks you through installing the Claude GitHub app, adding your ANTHROPIC_API_KEY as a repository secret, and creating the workflow file.
Note
You must be a repository admin to install the GitHub app and add secrets. The app requests read & write permissions for Contents, Issues, and Pull requests.
11.6.2.2. Manual Setup#
If you prefer to configure things yourself:
Install the Claude GitHub app at github.com/apps/claude and grant it access to your repository.
Add your
ANTHROPIC_API_KEYto the repository secrets (Settings → Secrets and variables → Actions).Create a workflow file at
.github/workflows/claude.yml:
name: Claude Code
on:
  issue_comment:
    types: [created]
  pull_request_review_comment:
    types: [created]
jobs:
  claude:
    runs-on: ubuntu-latest
    permissions:
      contents: read
      pull-requests: write
      issues: write
    steps:
      - uses: actions/checkout@v4
      - uses: anthropics/claude-code-action@v1
        with:
          anthropic_api_key: ${{ secrets.ANTHROPIC_API_KEY }}
With this workflow in place, mentioning @claude in any PR or issue comment triggers the action. For example:
@claude review this PR for correctness and style
@claude how should I handle the edge case in this function?
@claude fix the type instability in the inner loop
11.6.2.3. Automated Review on Every PR#
You can also configure Claude to review every pull request automatically, without needing an @claude mention:
name: Code Review
on:
  pull_request:
    types: [opened, synchronize]
jobs:
  review:
    runs-on: ubuntu-latest
    permissions:
      contents: read
      pull-requests: write
      issues: write
    steps:
      - uses: actions/checkout@v4
      - uses: anthropics/claude-code-action@v1
        with:
          anthropic_api_key: ${{ secrets.ANTHROPIC_API_KEY }}
          prompt: "/review"
          claude_args: "--max-turns 5"
See the Claude Code GitHub Actions documentation and the action repository for the full set of configuration options, including use with AWS Bedrock and Google Vertex AI.
11.7. VS Code as a LaTeX Editor#
VS Code has an outstanding LaTeX editing extension, which provides a good way to become comfortable with the tool and managing source code online.
Install a recent copy of tex
With a new VS Code session, install the following extensions
(Optional) Code Spell Checker
(Optional) If you wish to have the editor automatically compile and display the document when you save your
.texfile: Then open the VS Code settings, and search forautobuildto set the optionLatex-workshop > Latex > Auto Build: RuntoonSave.
No further configuration should be required, but see the manual if you have problems.
While there many ways to execute a compilation workflow, one method is to use “magic comments” at the top of a latex file. This is not specific to LaTeX Workshop, and can be used by other tools.
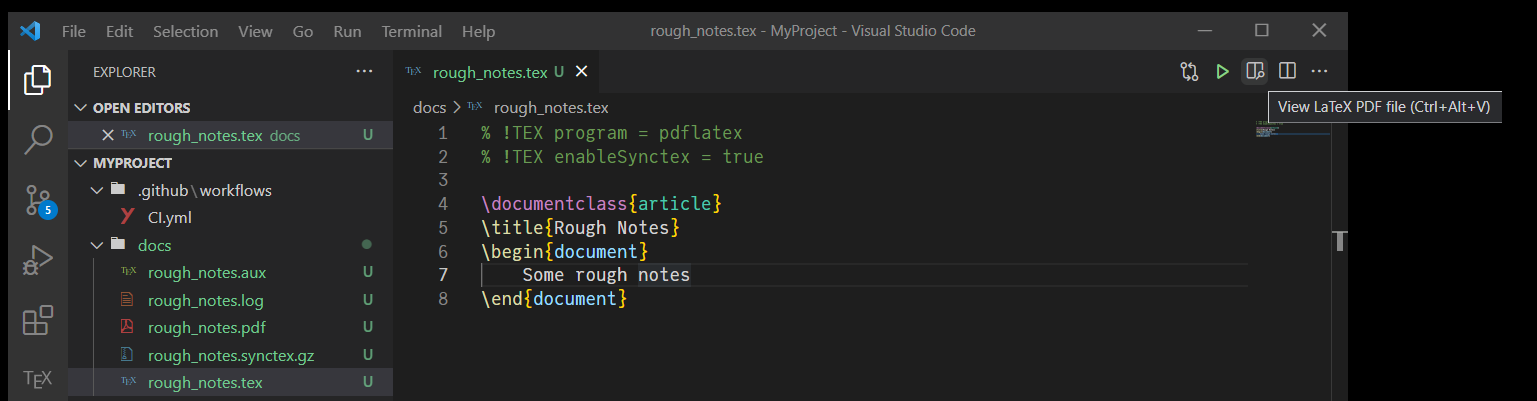
In VS Code, create a new file, such as
rough_notes.texand copy in the following% !TEX program = pdflatex % !TEX enableSynctex = true \documentclass{article} \title{Rough Notes} \begin{document} \maketitle Some rough notes \end{document}
Save the document. If you enabled the automatic build option in your settings, this should compile it. Otherwise, use
F5or the command palette> Latex Workshop: Build Latex Project.If you hover over the magnifying glass icon near the top right hand corner, It should look something like,
Click on that link, or use
<Ctrl+Alt+V>to get display the PDF Preview.The first time you do this, it will ask you to choose the PDF display. Choose
VSCode tabIf you modify the document and save (or manually rebuild) the view will update
If you double-click on the PDF it can take you to the synced section of the latex. Conversely, if you use the
<Ctrl+Alt+J>or the palette> TeX Workshop: SyncTex from Cursorit will find the appropriate section of the PDF based on your current cursor position in the.texfile.
Select the Problems pane at the bottom of the screen (which likely shows 1 warning and no error) or open it with
<Ctrl+Shift+M>
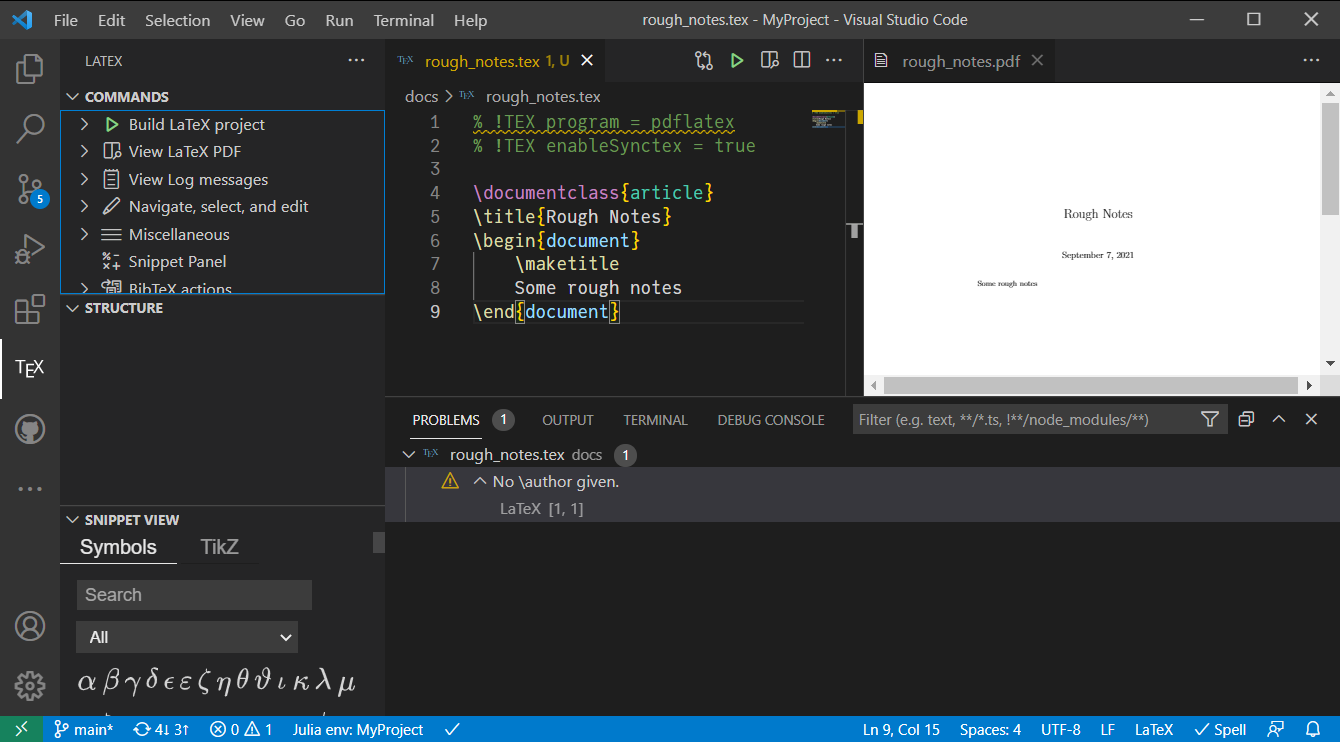
In that screenshot, we have also selected the TeX pane on the left hand side, which provides additional options for you to explore. All of them have command-palette equivalents.
If you wanted to have a bibliography, you would add it into the tex file as normal, and just add in the additional magic comment % !BIB program = bibtex
Finally, when using source code control, you will want to make sure you add the intermediate files to your .gitignore (see here for more). Typically, you would want to ignore
*.aux
*.log
*.synctex.gz
*.pdf
Ignoring the *.pdf is optional but strongly encouraged as it will ensure you don’t clog the repository with the binary pdf files, and make collaboration easier by preventing clashes on this file.