13. Packages, Testing, and Continuous Integration#
Contents
A complex system that works is invariably found to have evolved from a simple system that worked. The inverse proposition also appears to be true: A complex system designed from scratch never works and cannot be made to work. You have to start over, beginning with a working simple system – Gall’s Law.
This lecture discusses structuring a project as a Julia module, and testing it with tools from GitHub.
Benefits include:
Specifying dependencies (and their versions) so that your project works across Julia setups and over time.
Being able to load your project’s functions from outside without copy/pasting.
Writing tests that run locally, and automatically on the GitHub server.
Having GitHub test your project across operating systems, Julia versions, etc.
Note: Throughout this lecture, important points and sequential workflow steps are listed as bullets.
The goal of this style of coding is to ensure that test driven development is possible, which will help ensure that your research is reproducible by yourself, your future self, and others - while avoiding accidental mistakes that can silently break old code and change results.
Furthermore, it makes collaboration on code much more feasible - allowing individuals to work on different parts of the code without fear of breaking others’ work.
Finally, since many economics projects occur over multiple years - this will help your future self to reproduce your results and make changes without remembering all of the subtle tricks required to get things operational.
13.1. Introduction and Setup#
Much of the software engineering and continuous integration (CI) will be done through GitHub Actions.
The GitHub actions execute as isolated and fully reproducible environments on the cloud (using containers), and are initiated through various actions on the GitHub repo. In particular, these are typically initiated through:
Making commits on the main branch of a repository.
Creating a PR on a repository, or pushing commits to it.
Tagging a release of a repository, which provides a snapshot at a particular commit.
For publicly available repositories, GitHub provides free minutes for executing these actions, whereas there are limits on the execution time for private repositories - though signing up for the GitHub academic plans previously discussed (i.e, the Student Developer Pack or Academic/Researcher plans) provides additional free minutes.
While you may think of a ‘’Package’’ as a shared and maintained set of reusable code, with Julia it will turn out to be the most useful way to organize personal and private projects or the code associated with a particular paper. The primary benefit of using a package workflow is reproducibility for yourself, your future self, and collaborators.
In addition, you will find the testing workflow as an essential element of working on even individual projects, since it will prevent you from making accidental breaking changes at points in the future - or when you come back to the code after several years.
13.1.1. GitHub and Codecov Account Setup#
This lecture assumes you have completed the setup of VS Code and Git in the version control and tools lectures. In particular,
Ensure you have setup a GitHub account, and connected it to VS Code.
Installed and setup VS Code’s Julia extension.
Ensure you have completed the
gitconfiguration steps in your terminalgit config --global user.email "you@example.com" git config --global user.name "Your Name" git config --global github.user "GITHUBUSERNAME"
The only other service that is necessary for the complete software engineering stack is a code coverage provider such as Codecov
Installation instructions are here.
You may need to provide permissions for Codecov to access GitHub, follow the provided authorization instructions.
13.1.2. PkgTemplates.jl and Revise.jl#
While you can create your Julia package manually, using a template will ensure that you have everything in the standard format.
If you have activated the notebook repositories, then PkgTemplates.jl will already be installed.
Otherwise, start a julia REPL outside of a particular project (or do an ] activate to deactivate the existing project, and use the global environment) and
Install PkgTemplates and Revise with
] add PkgTemplates Revise JuliaFormatter
While we typically insist on having very few packages in the global environment, and always working with a Project.toml file, PkgTemplates needs to be used in the global environment as it will create those files.
While the Revise.jl package is optional, it is strongly encouraged since it automatically compiling functions in your package as they are changed. See below for more.
Similarly, JuliaFormatter.jl is optional, but recommended to maintain consistent code style.
13.2. Project Setup#
To create a project, first choose the parent directory where you wish to create the project, and navigate to this parent directory in a terminal.
Start a julia terminal with
julia, making sure you are in the global environment (i.e. not in an activated project).Then run
using PkgTemplates
Create a template for your project.
This specifies metadata like the license we’ll be using (MIT by default), the location, etc.
We will create this with a number of useful options, but see the documentation for more.
t = Template(;dir = ".", julia = v"1.12",
              plugins = [
                Git(; manifest=true, branch = "main"),
                Codecov(),
                GitHubActions(),
                Formatter(; style = "sciml"),
                !CompatHelper,
                !TagBot
              ])
Note
If you did not set the github.user in the setup, you may need to pass in user = "YOURUSERNAME" as an additional argument in the first line. In addition, this turns off some important features (e.g. CompatHelper and TagBot) and leaves out others (e.g. Documenter{GitHubActions}) which you would want for a more formal package.
Alternatively, PkgTemplates has an interactive mode, which you can prompt with t = Template(;interactive = true) to choose all of your selections within the terminal.
Create a specific project based off this template
t("MyProject")
Open the project in VS Code by either using your finder/explorer, or exiting the Julia REPL (via
exit()) and then
cd MyProject
code .
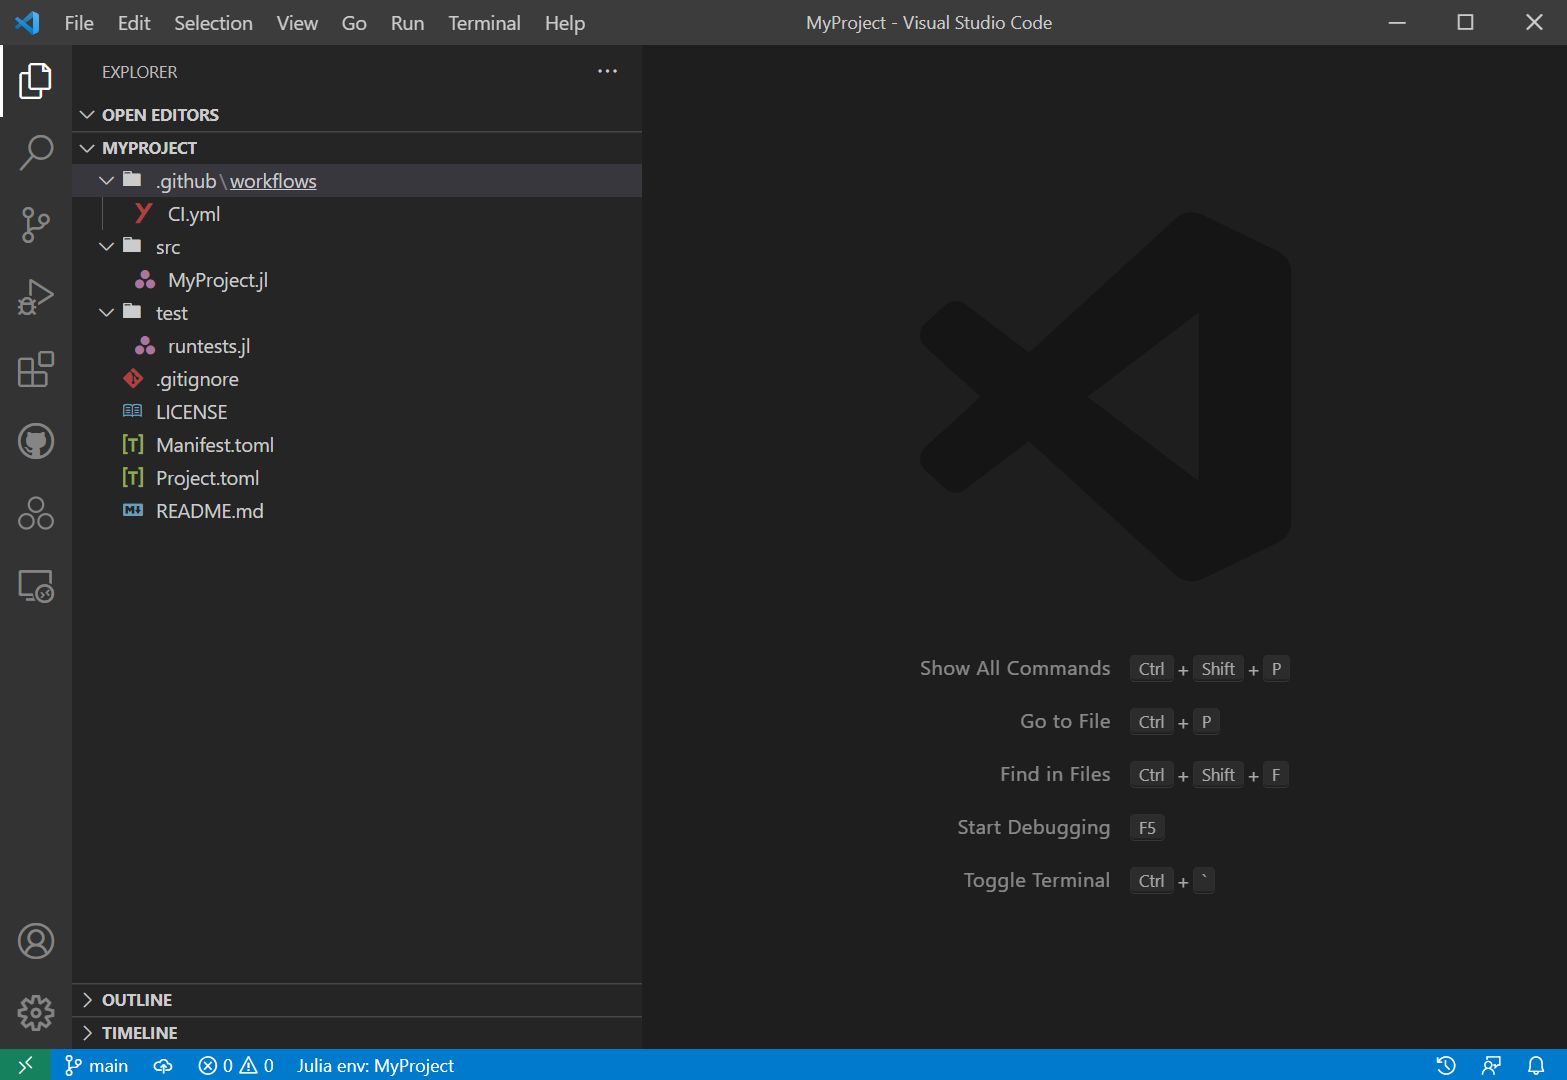
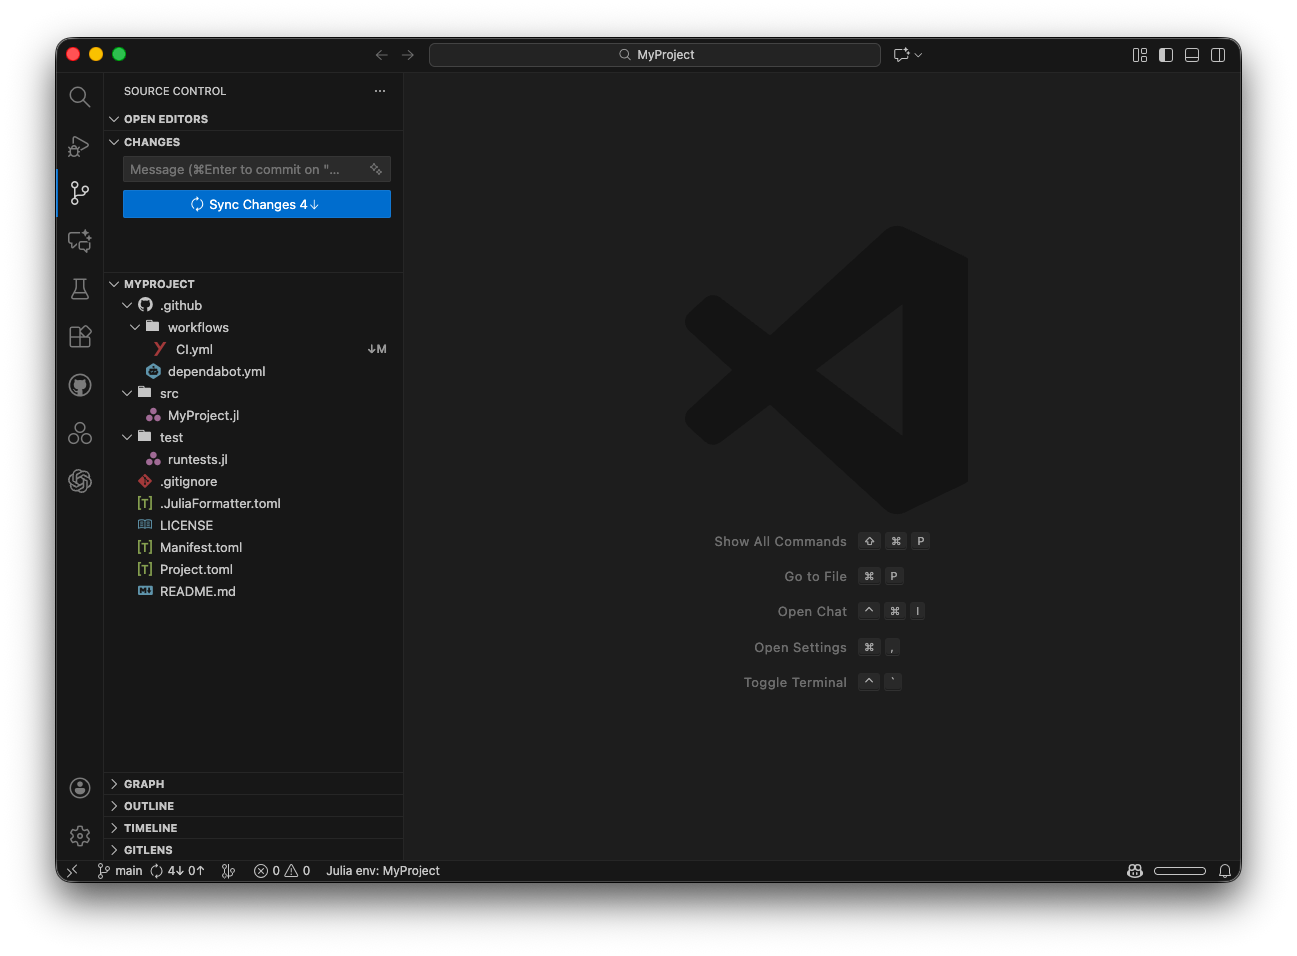
The project should open in VS Code, and look something like
13.2.1. Adding a Project to GitHub#
The next step is to add this project to Git version control.
First, we will need to create an empty GitHub Repository of the same name (but with a
.jlextension). Choose to create a “new” repository from the Repositories tab on GitHub.
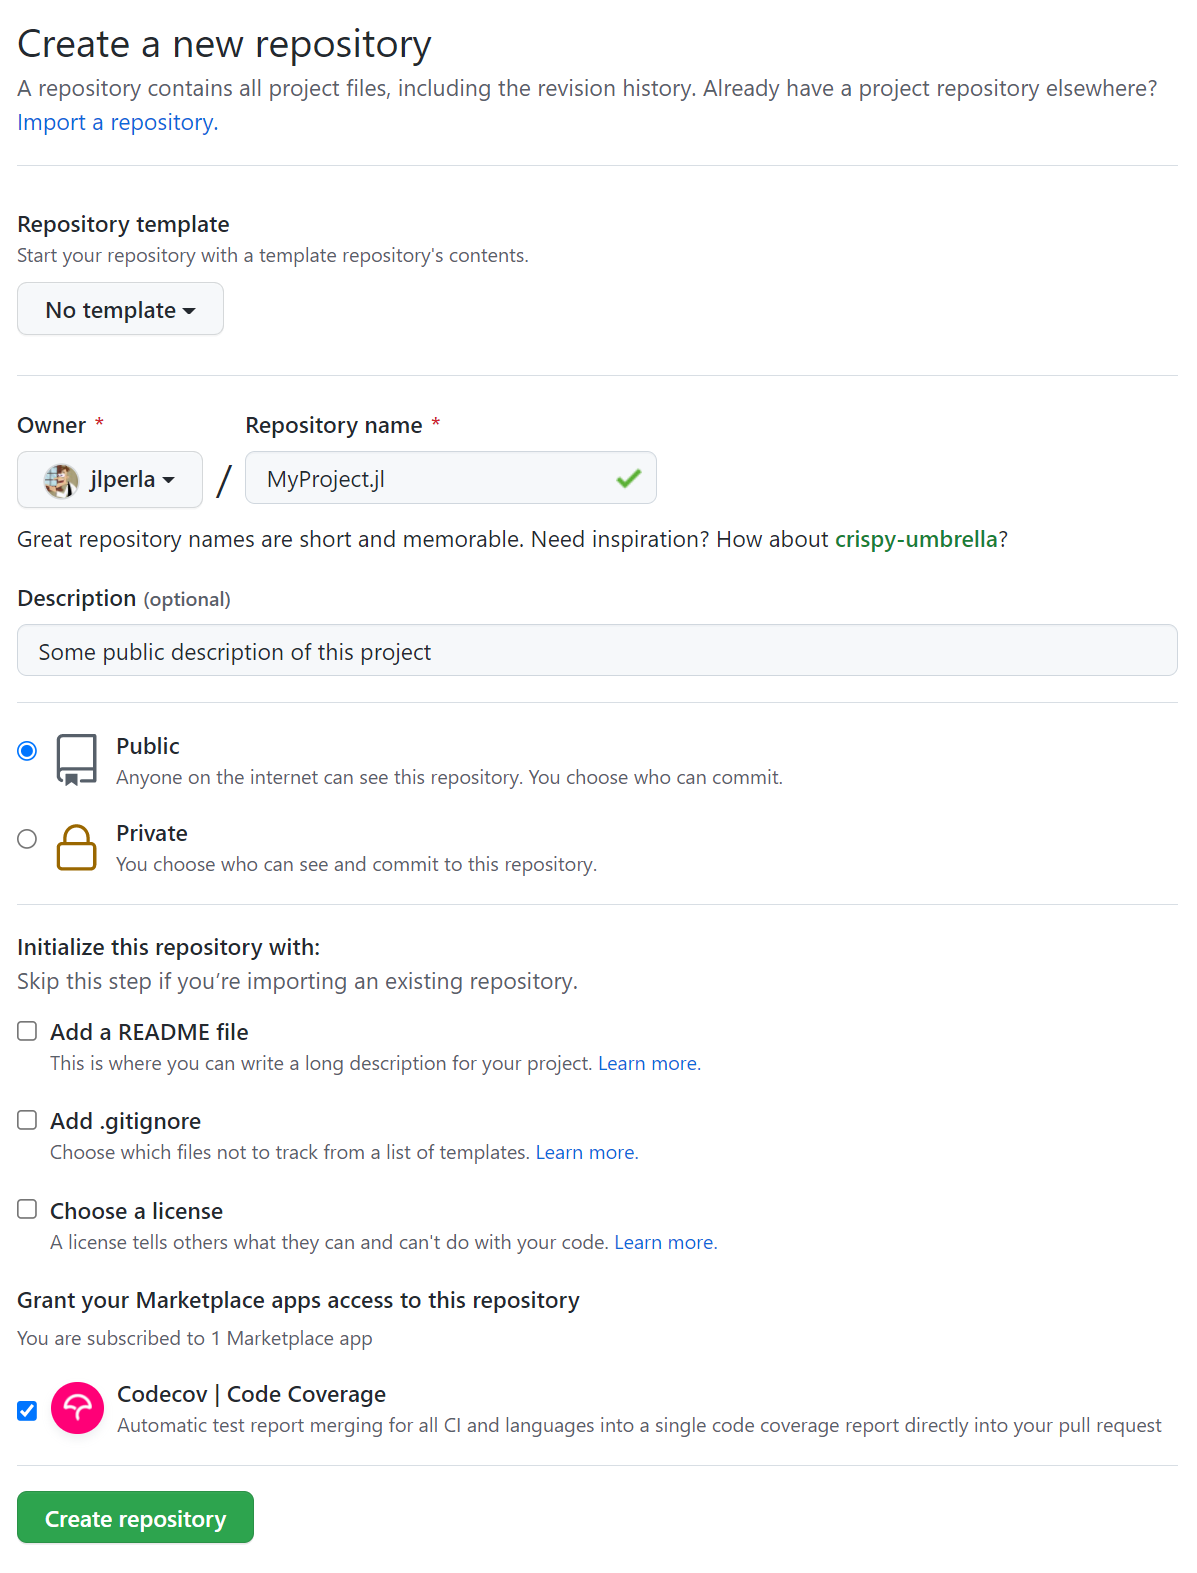
In particular, ensure that
The repo you create should have the same name as the project we added (except with a
.jlextension).We should leave the boxes unchecked for the
README.md,LICENSE, and.gitignore, since these are handled byPkgTemplates.Select the “Choose GiHub Apps” and give access to Codecov if available.
Then, we can now publish the generated package in VS Code to this empty repository.
Choose the icon to publish the branch as we did in previous lectures

Refresh the webpage on GitHub, and you should see the files appear in the repository.
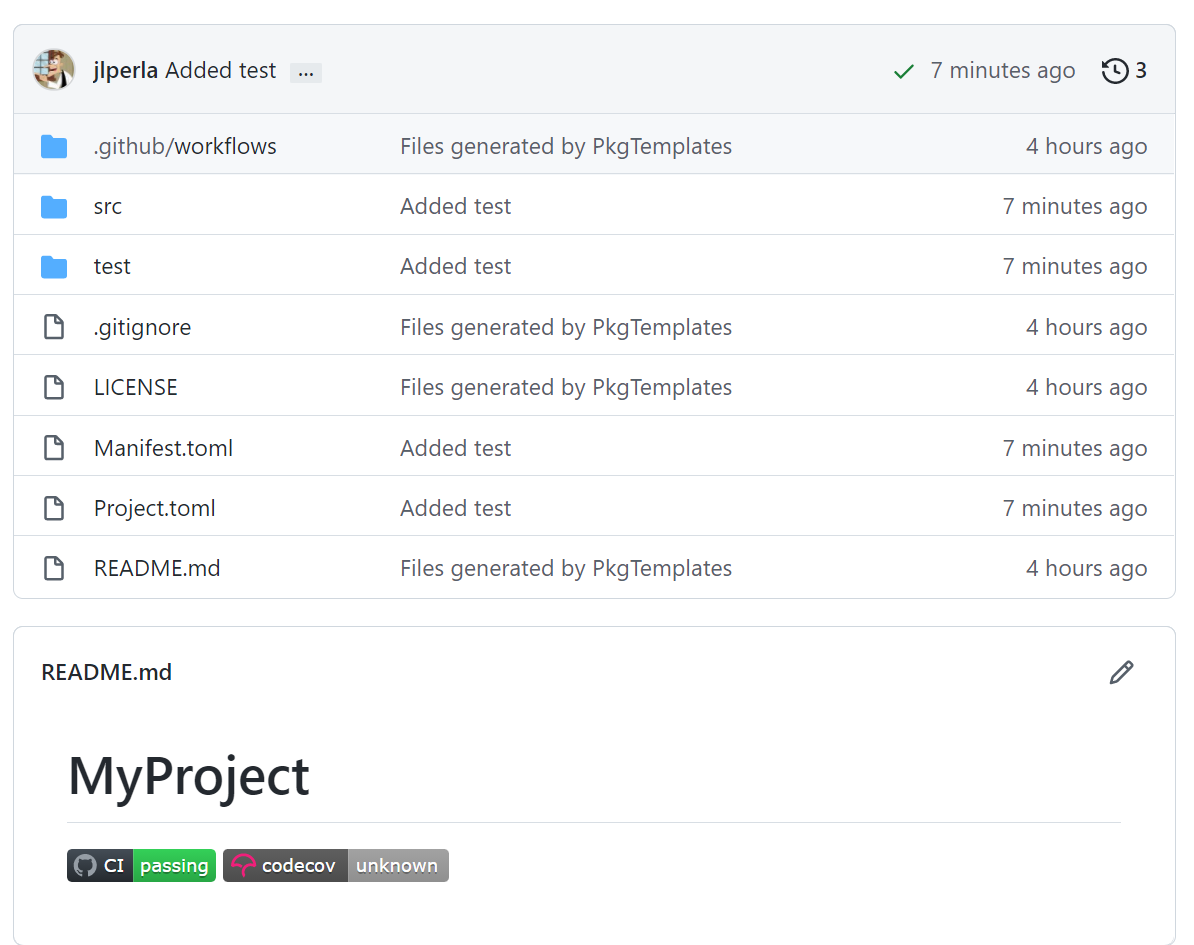
At which point, if you refresh the webpage, it should be filled with the generated files
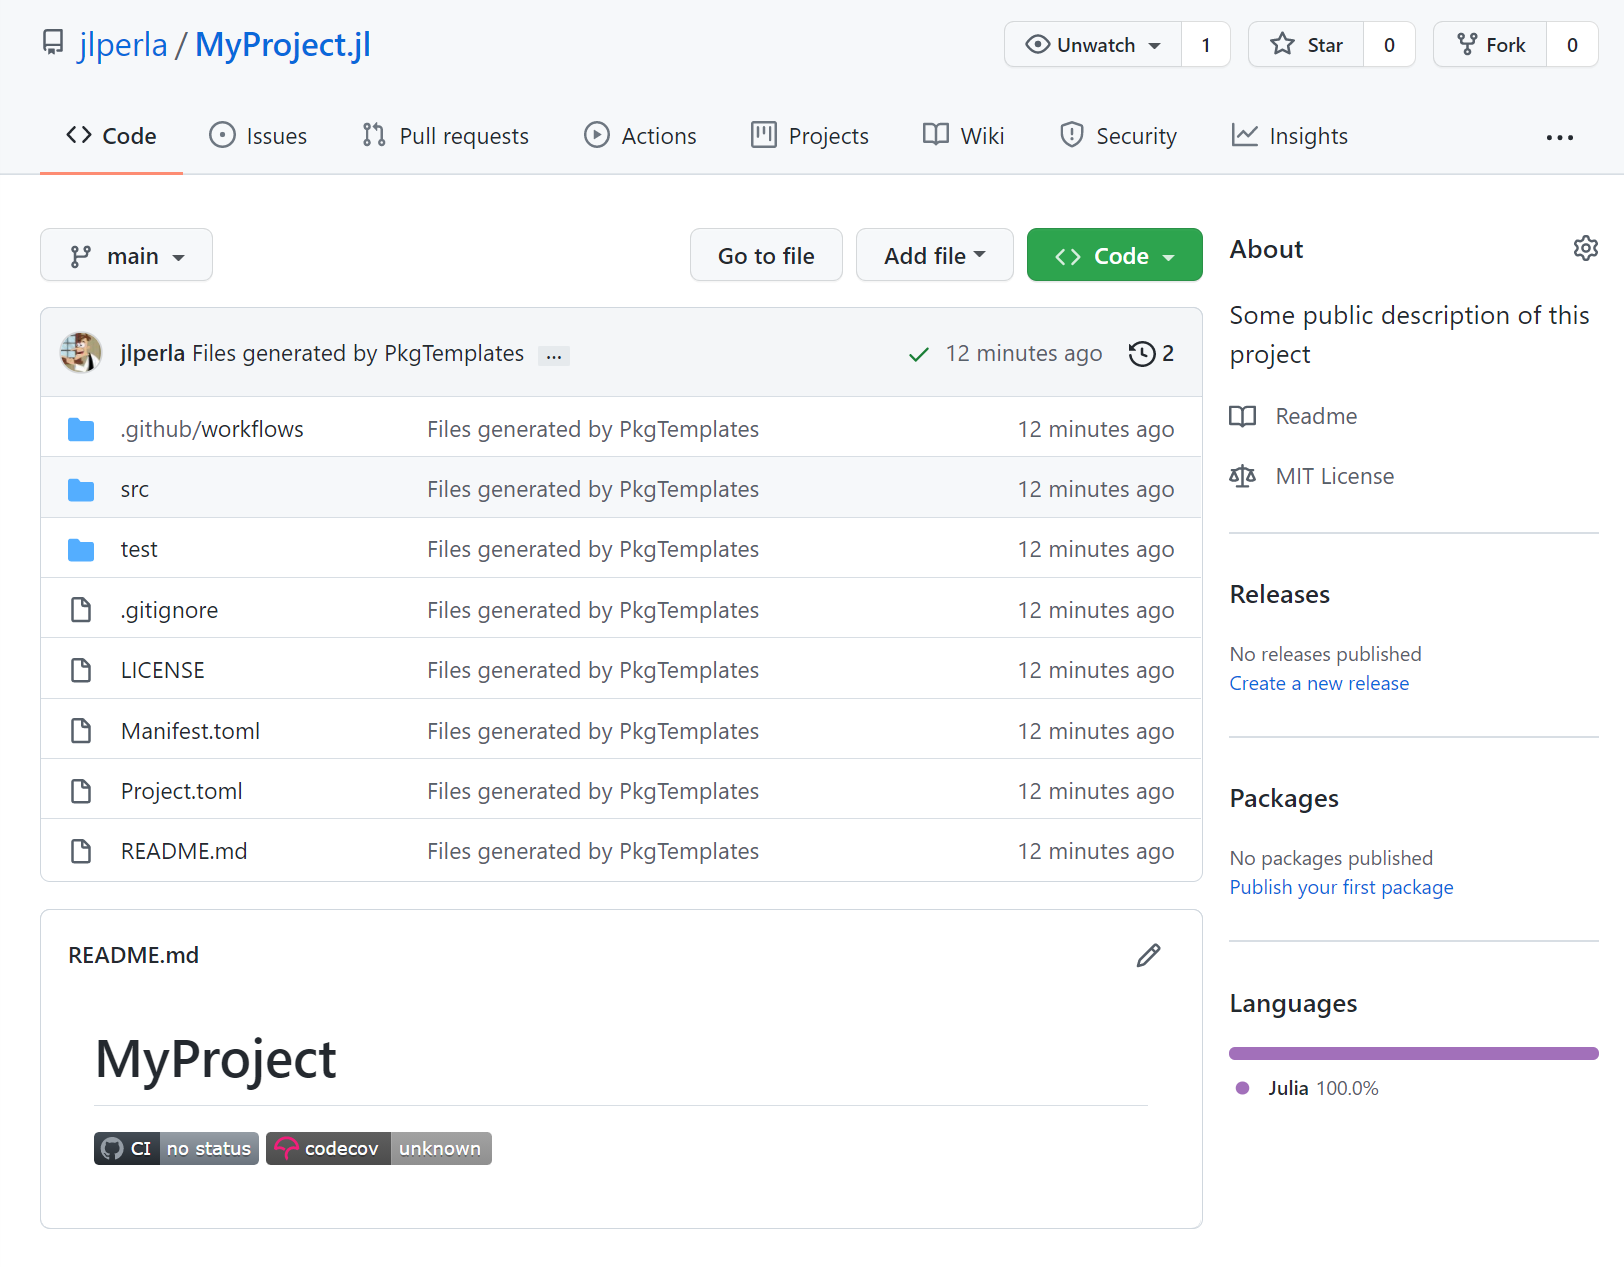
Furthermore, you will see a badge either saying CI | passing or CI | unknown next to another for codecov | unknown.
These badges provide a summary of the current state of the main branch relative to the GitHub Actions, as we will see below. If a repository has broken any tests on the main branch, it will show CI | failed in red.
Finally, you may notice some Pull Requests have already been created, depending on the versions. These come from GitHub Actions such as CompatHelper which automatically check for updates to dependencies. For example,
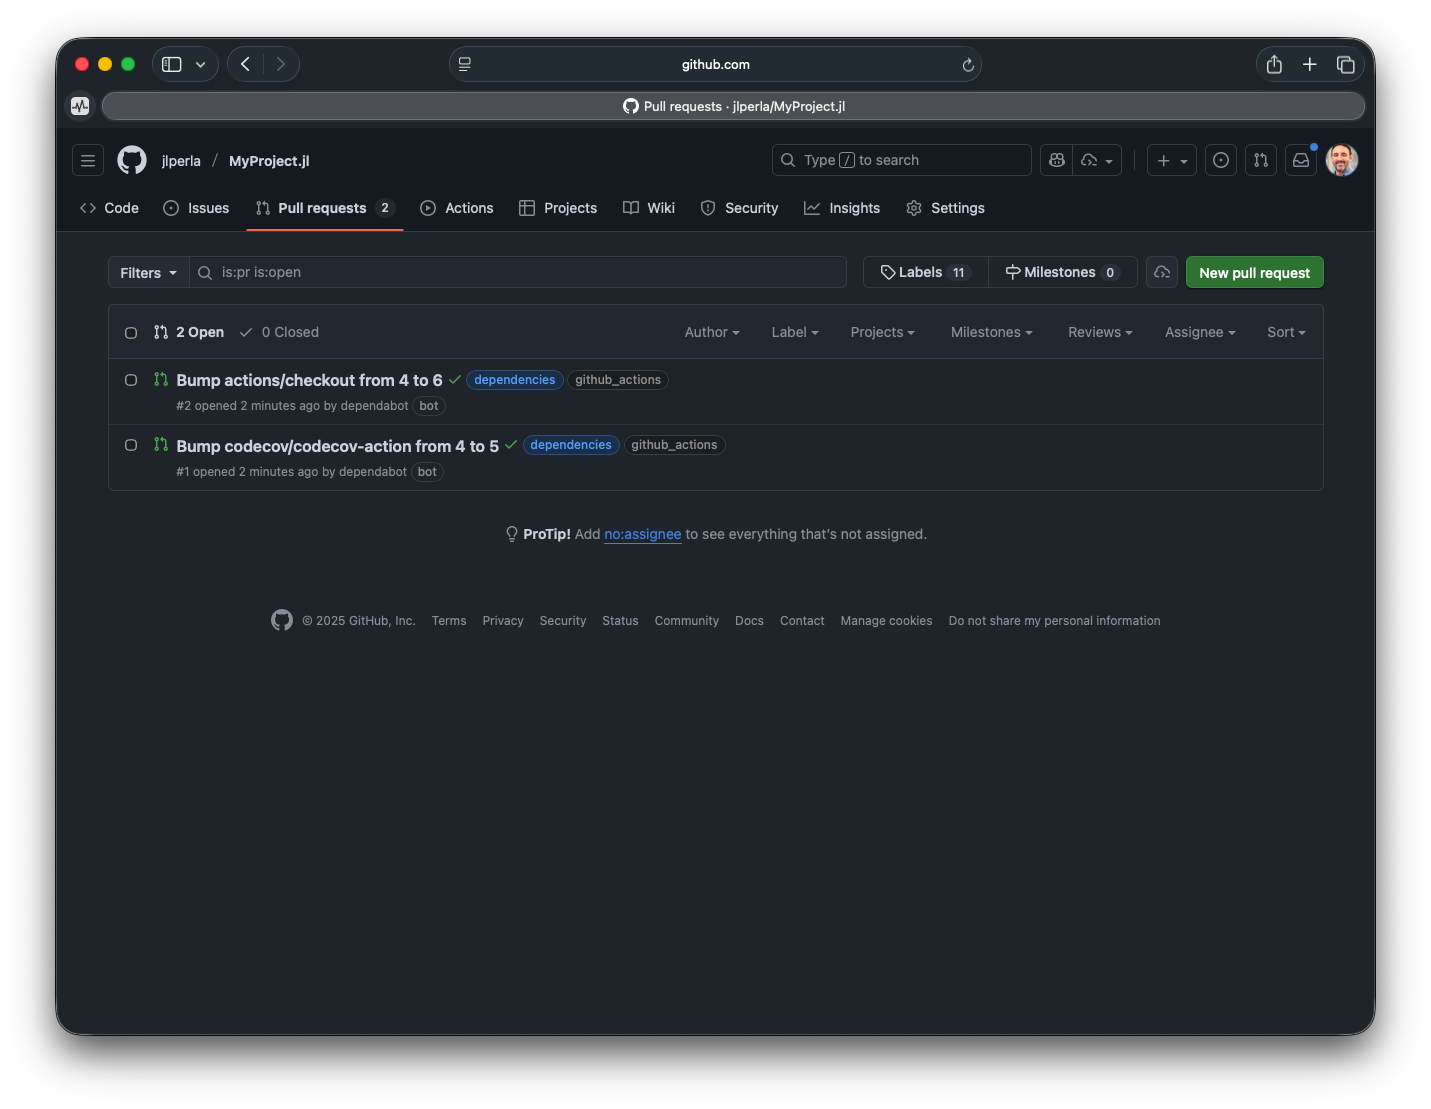
If you see those, you typically can open them and immediately choose to “Merge Pull Request”.
After merging, you will need to update your local repository to pull the changes. For example, VS Code may now show there are changes
If so, “Sync Changes” to update your local git repository.
Note
As always in Julia, it is best to avoid any packages other than IJulia, Revise, PkgTemplates, JuliaFormatter, etc. in your global environment. Everything project specific should be added to the Project.toml file of a particular project to ensure maximum reproducibility.
Because of this, we advise not to use ] dev . to add your local package to the global environment.
Assuming you had a local installation of a different package in a parallel directory to this, with its own Project.toml file, you can point it at the local copy of MyProject with first activating the new one, and then ] dev ../MyProject
13.3. Project Structure#
Let’s unpack the structure of the generated project
A hidden directory,
.git, holds the version control information.The
srcdirectory contains the project’s source code – it should contain only one file (MyProject.jl), which readsmodule MyProject # Write your package code here. end
Likewise, the
testdirectory should have only one file (runtests.jl), which readsusing MyProject using Test @testset "MyProject.jl" begin # Write your tests here. end
In particular, the workflow is to export objects we want to test (using MyProject), and test them using Julia’s Test module.
The other important text files for now are
Project.tomlandManifest.toml, which contain dependency information.
In particular, the Project.toml contains a list of dependencies, and the Manifest.toml specifies their exact versions and sub-dependencies.
The
.gitignorefile (which may display as an untitled file), which contains files and paths forgitto ignore.
13.3.1. GitHub Actions and CI#
The final file is a GitHub Actions file in the .github/workflows folder, called CI.yml with the text similar to the following (though it may change over time as new versions of the actions are released):
name: CI
on:
  push:
    branches:
      - main
    tags: ['*']
  pull_request:
  workflow_dispatch:
concurrency:
  # Skip intermediate builds: always.
  # Cancel intermediate builds: only if it is a pull request build.
  group: ${{ github.workflow }}-${{ github.ref }}
  cancel-in-progress: ${{ startsWith(github.ref, 'refs/pull/') }}
jobs:
  test:
    name: Julia ${{ matrix.version }} - ${{ matrix.os }} - ${{ matrix.arch }}
    runs-on: ${{ matrix.os }}
    timeout-minutes: 60
    permissions: # needed to allow julia-actions/cache to proactively delete old caches that it has created
      actions: write
      contents: read
    strategy:
      fail-fast: false
      matrix:
        version:
          - '1.12'
          - 'pre'
        os:
          - ubuntu-latest
        arch:
          - x64
    steps:
      - uses: actions/checkout@v6
      - uses: julia-actions/setup-julia@v2
        with:
          version: ${{ matrix.version }}
          arch: ${{ matrix.arch }}
      - uses: julia-actions/cache@v2
      - uses: julia-actions/julia-buildpkg@v1
      - uses: julia-actions/julia-runtest@v1
      - uses: julia-actions/julia-processcoverage@v1
      - uses: codecov/codecov-action@v5
        with:
          files: lcov.info
          token: ${{ secrets.CODECOV_TOKEN }}
          fail_ci_if_error: false
This file provides the rules for continuous integration running on changes to this repository. You will not need to modify it.
To summarize some of the features, the
pushandpull_requestat the top says that any push to the repository or creation of a pull request will trigger this workflow.matrixestablishes the set of operating systems, architectures, and Julia versions to testjulia-actions/cachespeeds up execution by storing dependent packages and artifactsjulia-actions/julia-runtestwill execute thetest/runtests.jlautomatically and determine whether it is successfuljulia-actions/julia-processcoverageandcodecov/codecov-actionanalyzes which lines of code were executed bytest/runtests.jland uploads to Codecov
13.4. Project Workflow#
13.4.1. Dependency Management#
13.4.1.1. Environments#
As before, the .toml files define an environment for our project, or a set of files which represent the dependency information.
The files are written in the TOML language, which is a lightweight format to specify configuration options.
This information is the name of every package we depend on, along with the exact versions of those packages.
This information (in practice, the result of package operations we execute) will
be reflected in our MyProject.jl directory’s TOML, once that environment is activated (selected).
This allows us to share the project with others, who can exactly reproduce the state used to build and test it.
See the Pkg docs for more information.
13.4.1.2. Pkg Operations#
For now, let’s just try adding a dependency. Recall the package operations described in the tools and editors lecture.
Within VS Code, start a REPL (e.g.
> Julia: Start REPL), type]to enter the Pkg mode. Verify that the cursor says(My Project) pkg>to ensure that it has activated your particular project. Otherwise, if it says(@1.12) pkg>, then you have launched Julia outside of VSCode or through a different mechanism, and you might need to ensure you are in the correct directory and then] activate .to activate the project file in it.Then, add in the
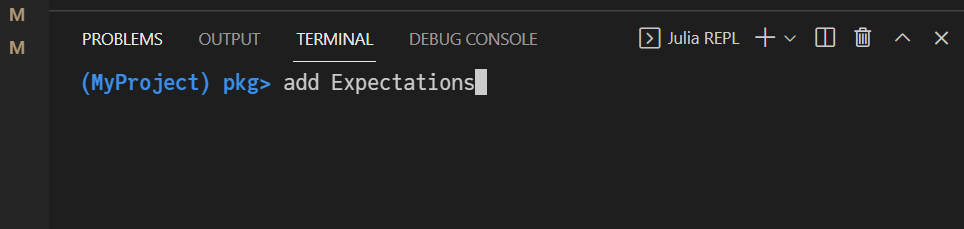
Distributions.jlpackage, which be downloaded, and theLinearAlgebraandTestpackage which is part of the standard library, but still needs to be added to the project file.
] add Distributions LinearAlgebra Test
It will install a web of dependencies for those packages, and the console should look something like
When complete, the Julia Project.toml file, which should now now be similar to
name = "MyProject"
uuid = "b6623268-9a17-423c-b045-25aa7927e6ad"
version = "1.0.0-DEV"
authors = ["Jesse Perla <jesseperla@gmail.com> and contributors"]

[deps]
Distributions = "31c24e10-a181-5473-b8eb-7969acd0382f"
LinearAlgebra = "37e2e46d-f89d-539d-b4ee-838fcccc9c8e"
Test = "8dfed614-e22c-5e08-85e1-65c5234f0b40"

[compat]
Distributions = "0.25.122"
LinearAlgebra = "1.12.0"
Test = "1.11.0"
julia = "1.12"

[extras]
Test = "8dfed614-e22c-5e08-85e1-65c5234f0b40"

[targets]
test = ["Test"]
From this point, anytime the project is activated, the Distributions, LinearAlgebra and Test packages will be available for use with using statements.
Furthermore, different projects could use different versions of this package. We could add additional instructions on compatability within the file if we choose.
But almost more importantly, the Manifest.toml file now contains a complete snapshot of the particular Distributions package and every other dependency used in your project.
For example, the following is an example snippet of one manifest here:
[[deps.Distributions]]
deps = ["AliasTables", "FillArrays", "LinearAlgebra", "PDMats", "Printf", "QuadGK", "Random", "SpecialFunctions", "Statistics", "StatsAPI", "StatsBase", "StatsFuns"]
git-tree-sha1 = "3bc002af51045ca3b47d2e1787d6ce02e68b943a"
uuid = "31c24e10-a181-5473-b8eb-7969acd0382f"
version = "0.25.122"

    [deps.Distributions.extensions]
    DistributionsChainRulesCoreExt = "ChainRulesCore"
    DistributionsDensityInterfaceExt = "DensityInterface"
    DistributionsTestExt = "Test"

    [deps.Distributions.weakdeps]
    ChainRulesCore = "d360d2e6-b24c-11e9-a2a3-2a2ae2dbcce4"
    DensityInterface = "b429d917-457f-4dbc-8f4c-0cc954292b1d"
    Test = "8dfed614-e22c-5e08-85e1-65c5234f0b40"
...
[[deps.FillArrays]]
deps = ["LinearAlgebra"]
git-tree-sha1 = "5bfcd42851cf2f1b303f51525a54dc5e98d408a3"
uuid = "1a297f60-69ca-5386-bcde-b61e274b549b"
version = "1.15.0"
weakdeps = ["PDMats", "SparseArrays", "Statistics"]
...
This shows that that the current manifest has:
version 0.25.122 of the
Distributionspackagesit depends on a variety of other packages including
LinearAlgebraandFillArraysthe
FillArrayspackage is at version 1.15.0, and itself depends onLinearAlgebraetc.
The manifest file then provides a fully reproducible environment with which someone can install not only the specific version of this package, but also a feasible network of all dependencies which all fulfill the compatability requirements of each.
We have used this feature before in our setup process, where we activated a Project.toml and used ] instantiate. If there is a manifest file in the same directory as the package, then that command will install the exact set of versions listed in the manifest for all packages. If a manifest file does not exist, then it will attempt to find a compatible set of packages that fulfill your Project.toml file, and generate one.
Note
For a typical project intended to be for reproducible research, you should always keep the Manifest.toml in source control so that you can reproduce every stage of the project. This can save you when you need to roll back to an older version to track down changes. However, when creating reusable packages largely intended for others to have as dependencies, you will typically not include the Manifest.toml.
13.4.2. Test-driven Development#
The basic idea of test-driven development is to create a set of tests of individual functions in test/runtests.jl (and files it includes), while keeping the core functionality in src/MyProject.jl (and files it includes).
This will be part of a coherent set of strategies to ensure everything is reproducible since:
Writing all of the checks on your underlying functions to be called from
test/runtests.jllets you can avoid accidentally breaking old functionality. Breaking of old code is called a test regression and is especially problematic with research code.With the full snapshot of all of the packages associated with a particular version of the project (i.e. a commmit) in a
Manifest.toml, anyone can reproduce the exact environment simply from that point in the source code tree.Any changes to the code automatically run in the CI (i.e. the GitHub Action) after every modification, so you and any collaborators will be able to automatically track changes.
The code coverage will give you a sense of how much of the code you have actually executed in your tests, which can give you a sense of how much faith should be given to the automatic tracking of changes.
The visual badges and displays on GitHub (e.g. the CI badge and the display of checks on each PR) provides an easy way to track when problems occur.
13.4.3. Writing Code in the Package#
Modify the src/MyProject.jl to include
module MyProject

using Distributions

function norm_pdf_val(x, mu = 1.0, sigma = 2.0)
    d = Normal(mu, sigma)
    return pdf(d, x)
end

export norm_pdf_val

end # module
Note
This defines a function, norm_pdf_val in the package, and exports it so that it is available to be called directly with norm_pdf_val() after using MyProject. Alternatively, you can leave off the export norm_pdf_val and instead call the function with the package name as a prefix MyProject.norm_pdf_val().
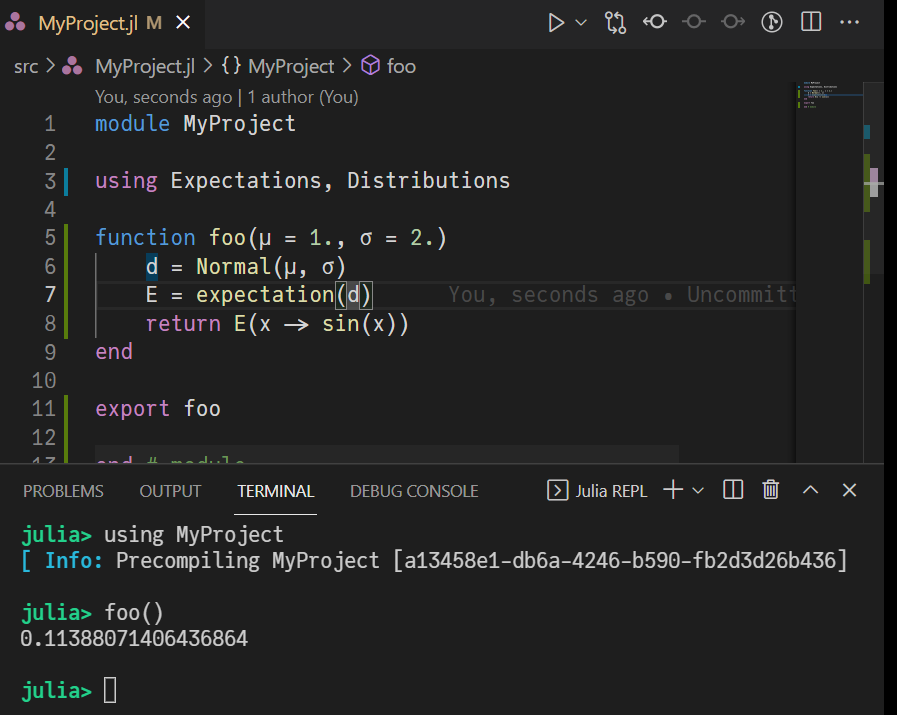
Then, we can call this function within a REPL by first including our package
using MyProject
Then calling norm_pdf_val(1.5). This should lead to something like
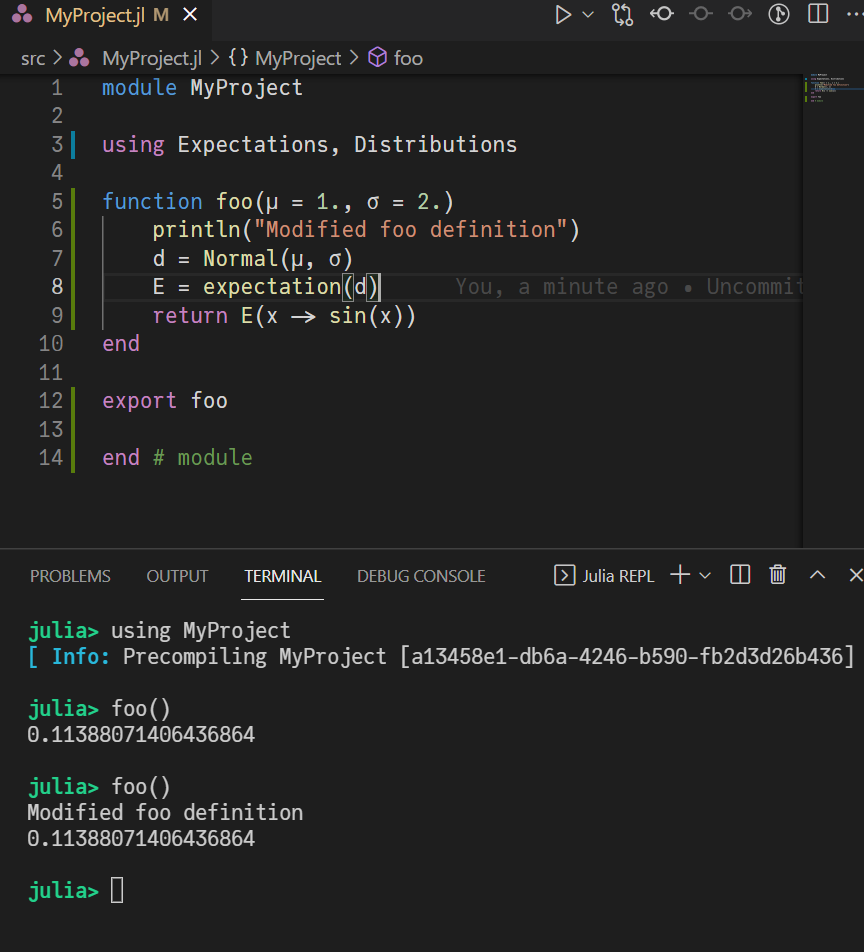
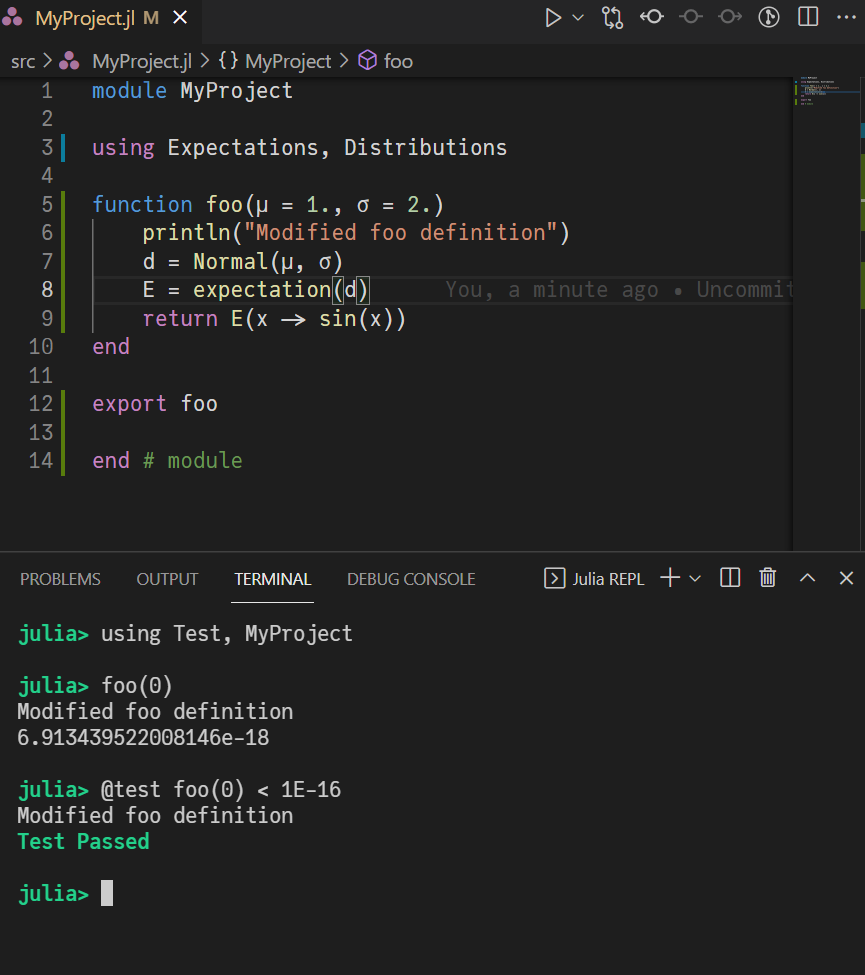
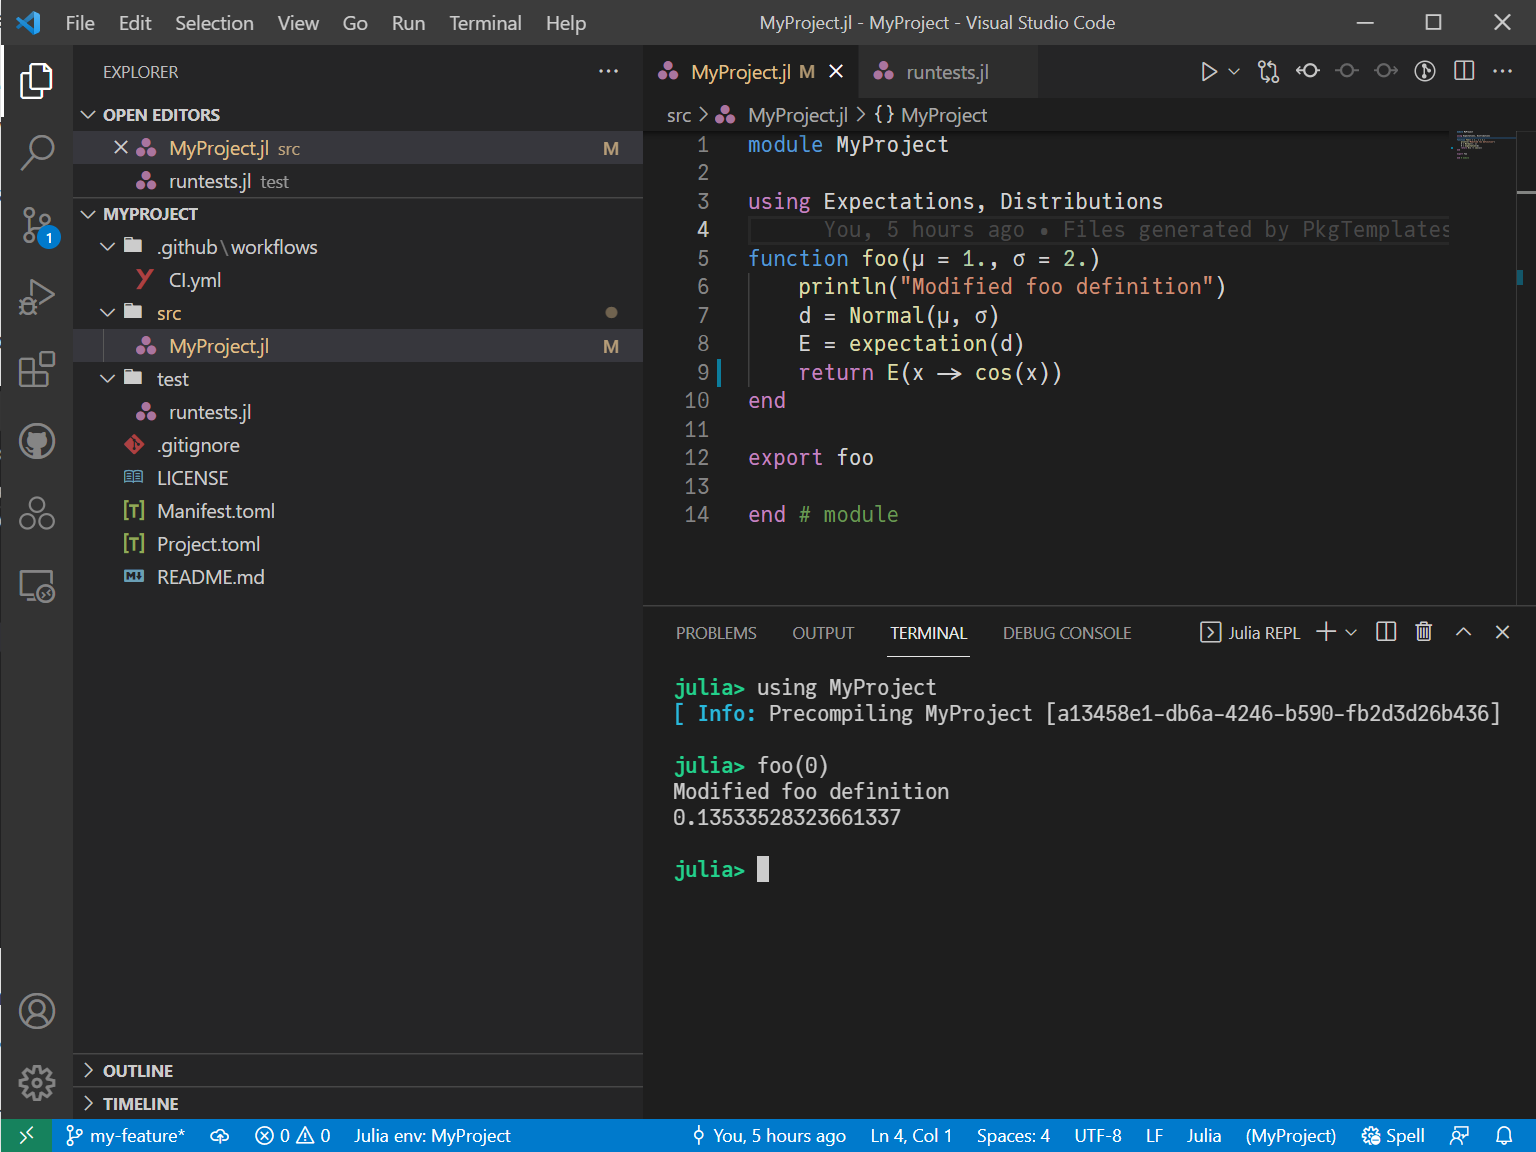
Next, we will change the function in the package and call it again in the REPL:
Modify the
foofunction definition to addprintln("Modified foo definition")inside the function
function norm_pdf_val(x, mu = 1.0, sigma = 2.0)
    println("Modified definition")
    d = Normal(mu, sigma)
    return pdf(d, x)
end
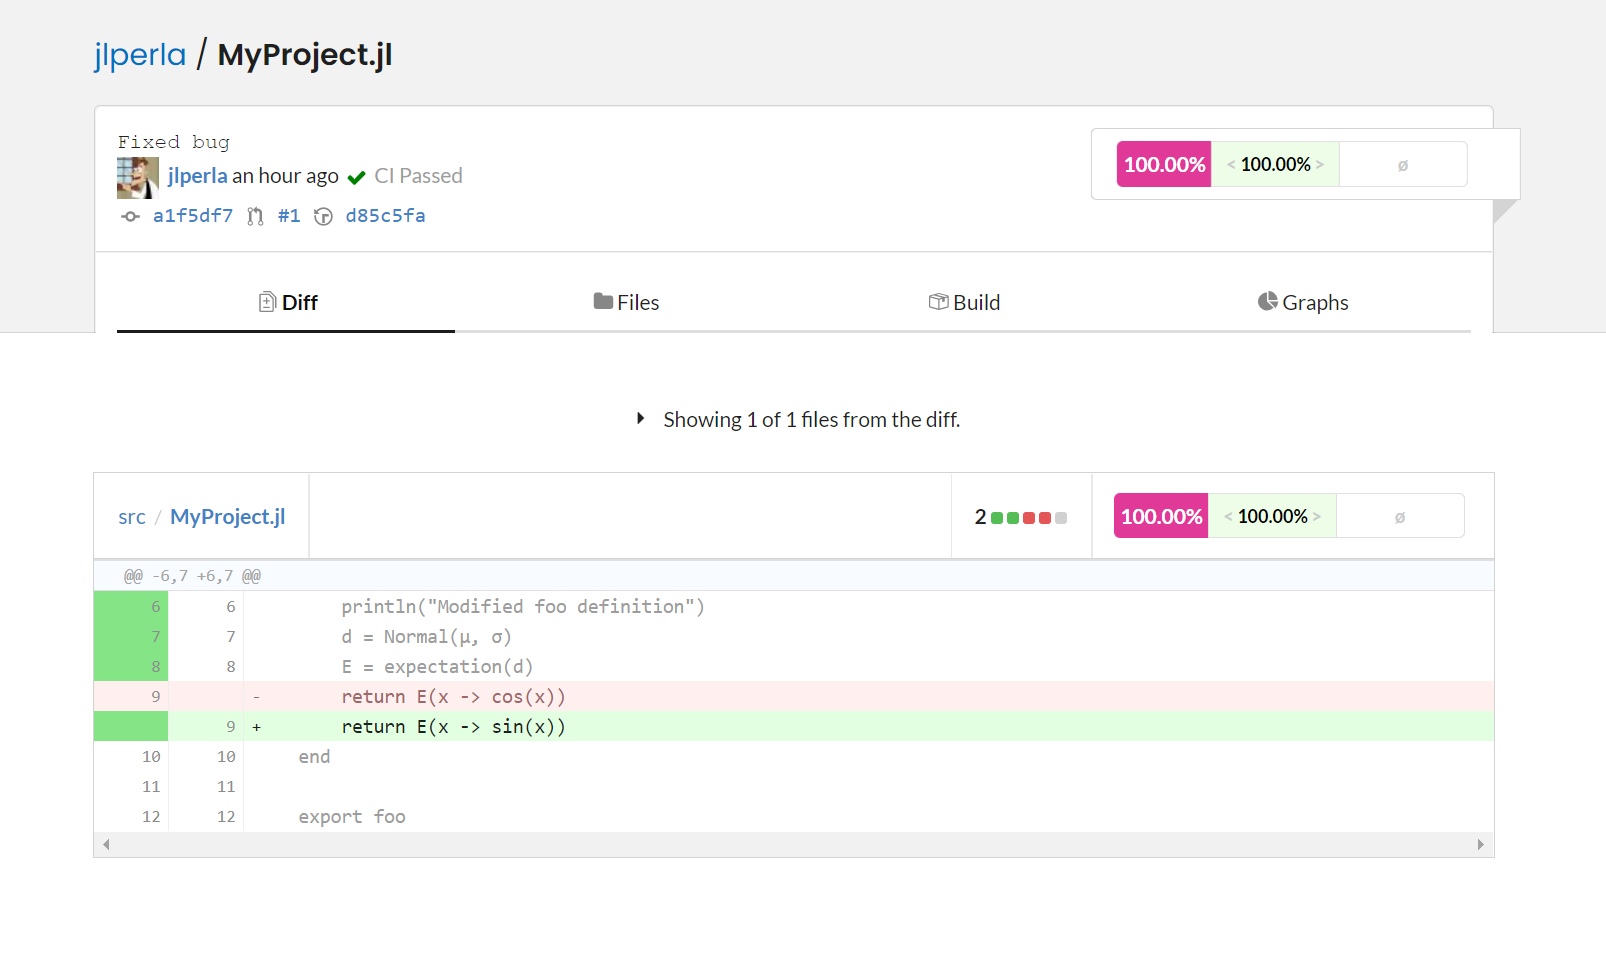
And then call the norm_pdf_val(1.5) function again in the REPL, which shows that it is now using the modified function.
Note
This behavior, where modifying code within the package is detected and immediately compiled, relies on the installation of Revise.jl. An alternative workflow without Revise.jl is to make modifications to the underlying package files, and then simply use <Shift+Enter> in the editor to recompile them. Both approaches are fully defensible and tastes are idiosyncratic.
Regardless, if you modify functions outside of the package (e.g. a function in the runtests.jl) you will need to use the <Shift+Enter> to compile it, as Revise only tracks code within loaded packages.
To ensure our implementation is correct, we can use the Test package built-into julia, and added to our project file above. The @test macro within it verifies a condition, and fails if it is incorrect.
In the REPL, use the Test package and then check that norm_pdf_val(1.5) is close to the value computed by the known formula for the normal density.
using Test, MyProject, Distributions
@test norm_pdf_val(1.5) ≈ pdf(Normal(1.0, 2.0), 1.5)
Which should show that the “Test Passed”.
Note
To test floating points, you typically will want to use the ≈ operator (typed with \approx<Tab>) rather than ==, since floating point arithmetic can lead to small round-off errors. This is equivalent to isapprox().
See the Julia documentation and here for more information.
13.4.4. Writing Test Code#
The core of test driven development is that if a value was worth checking once, then it is probably worth checking every time the code changes.
For this reason, the change to this workflow means moving much of the code you would use to explore in a Jupyter notebook into the runtests.jl (or files they include) themselves.
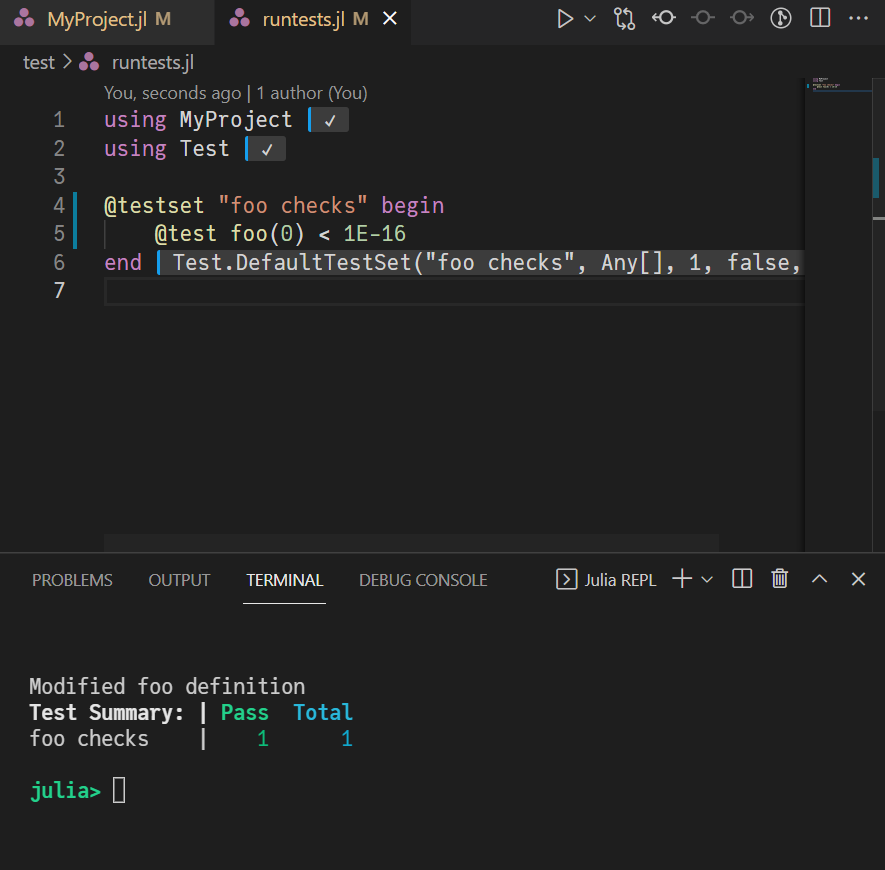
Update your test/runtests.jl file to include the following code:
using MyProject
using Test
using Distributions

@testset "MyProject.jl" begin
    @test norm_pdf_val(1.0) ≈ pdf(Normal(1.0, 2.0), 1.0)
end
The
@testsetare just optional ways to group the tests, and are not required for organization.Then
<Shift-Enter>through each line of theruntests.jlfile. As you execute each line of code, it will provide the result or a checkmark to indicate success
You should have output within both the REPL and the editor that the test passed.
Note
Note that for the runtests.jl file, we need to manually execute lines of code as we wish to explore the results, in contrast to the changes in the package where Revise automatically compiled them. This includes function definitions inside of these files.
Checks on individual functions in your test suite are called unit tests.
13.4.5. Executing Tests Locally and on CI#
As you develop your project, you may find yourself adding in many small checks and organizing them into files included from runtests. After modifying a large amount of code, you may want to run through the entire set of unit tests to ensure you didn’t break anything.
To do this, the package mode in Julia has a convenient function which will create a separate environment using your Project/Manifest and execute the entire runtests.jl function.
If you have already activated the project, then ] test will run it, likely after setting up a temporary environment and reinstalling packages.
Run this test to see the output.
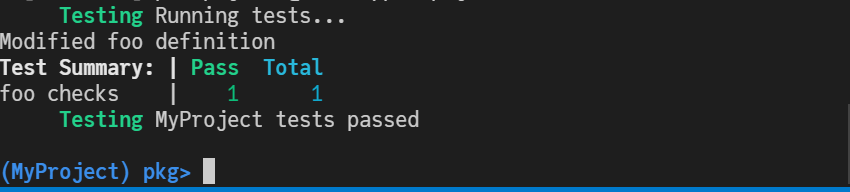
This shows that the individual test passed, but also that the entire test suite was without errors.
Now that we have a functional test suite, it is a good time to upload our code to the server.
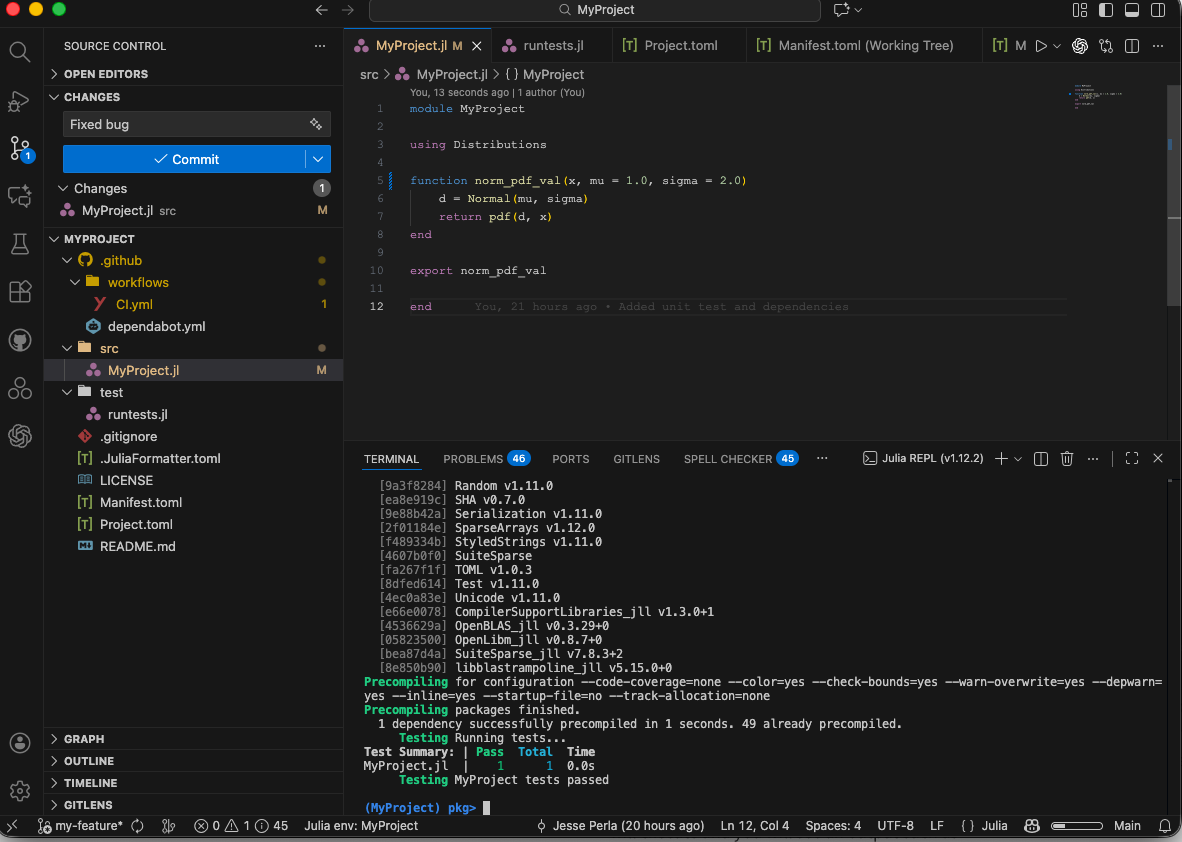
In VS Code add in a commit message, such as Added unit test and dependencies, which should look something like
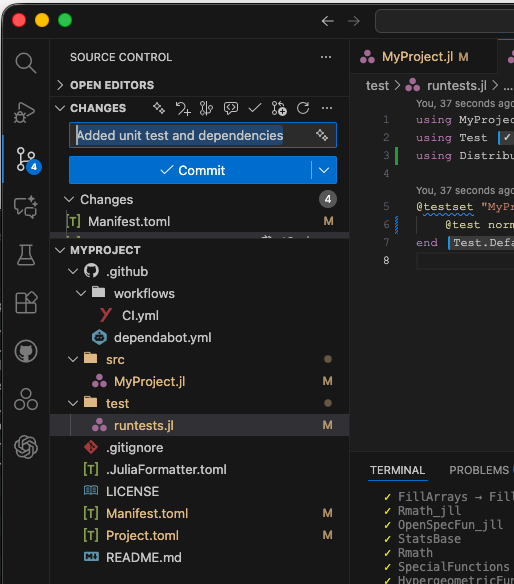
Push the Commit button and Sync changes.
If you reload the webpage, you will notice that the commit is now on the server, but also that a small orange circle is next to the commit.
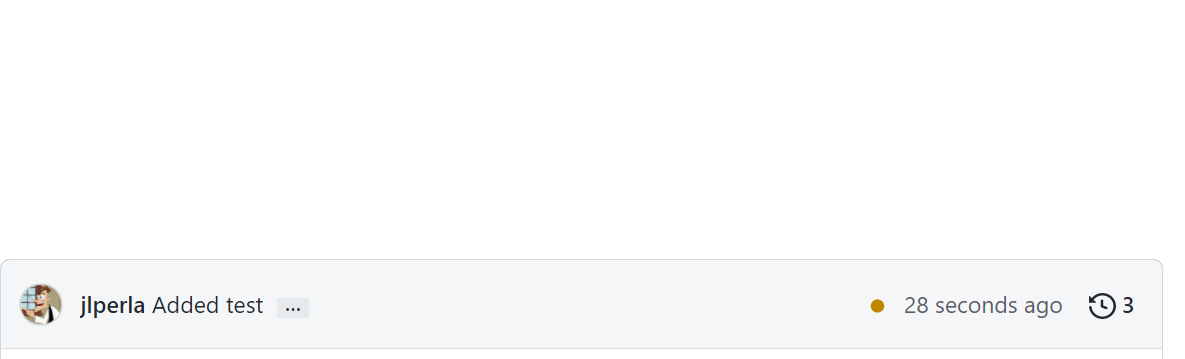
This indicates that a GitHub Action is executing based on that push to the main branch.
You can see these actions in progress on the Actions tab, where the action may be complete by the time you open it.
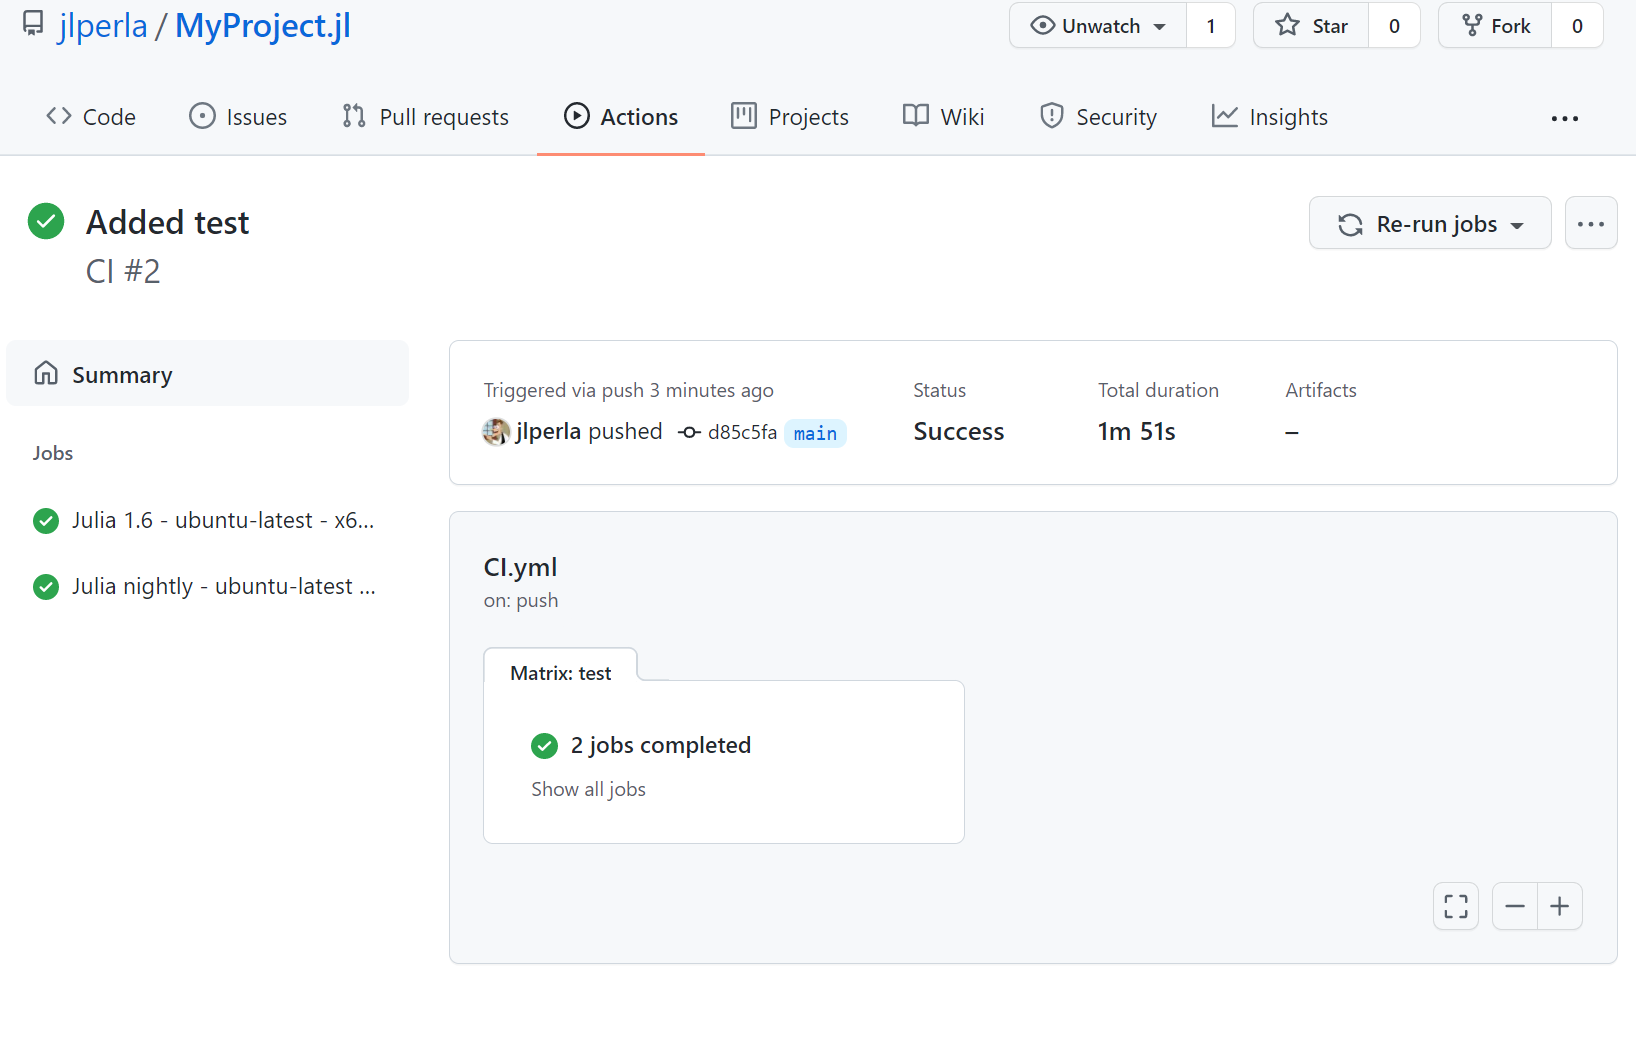
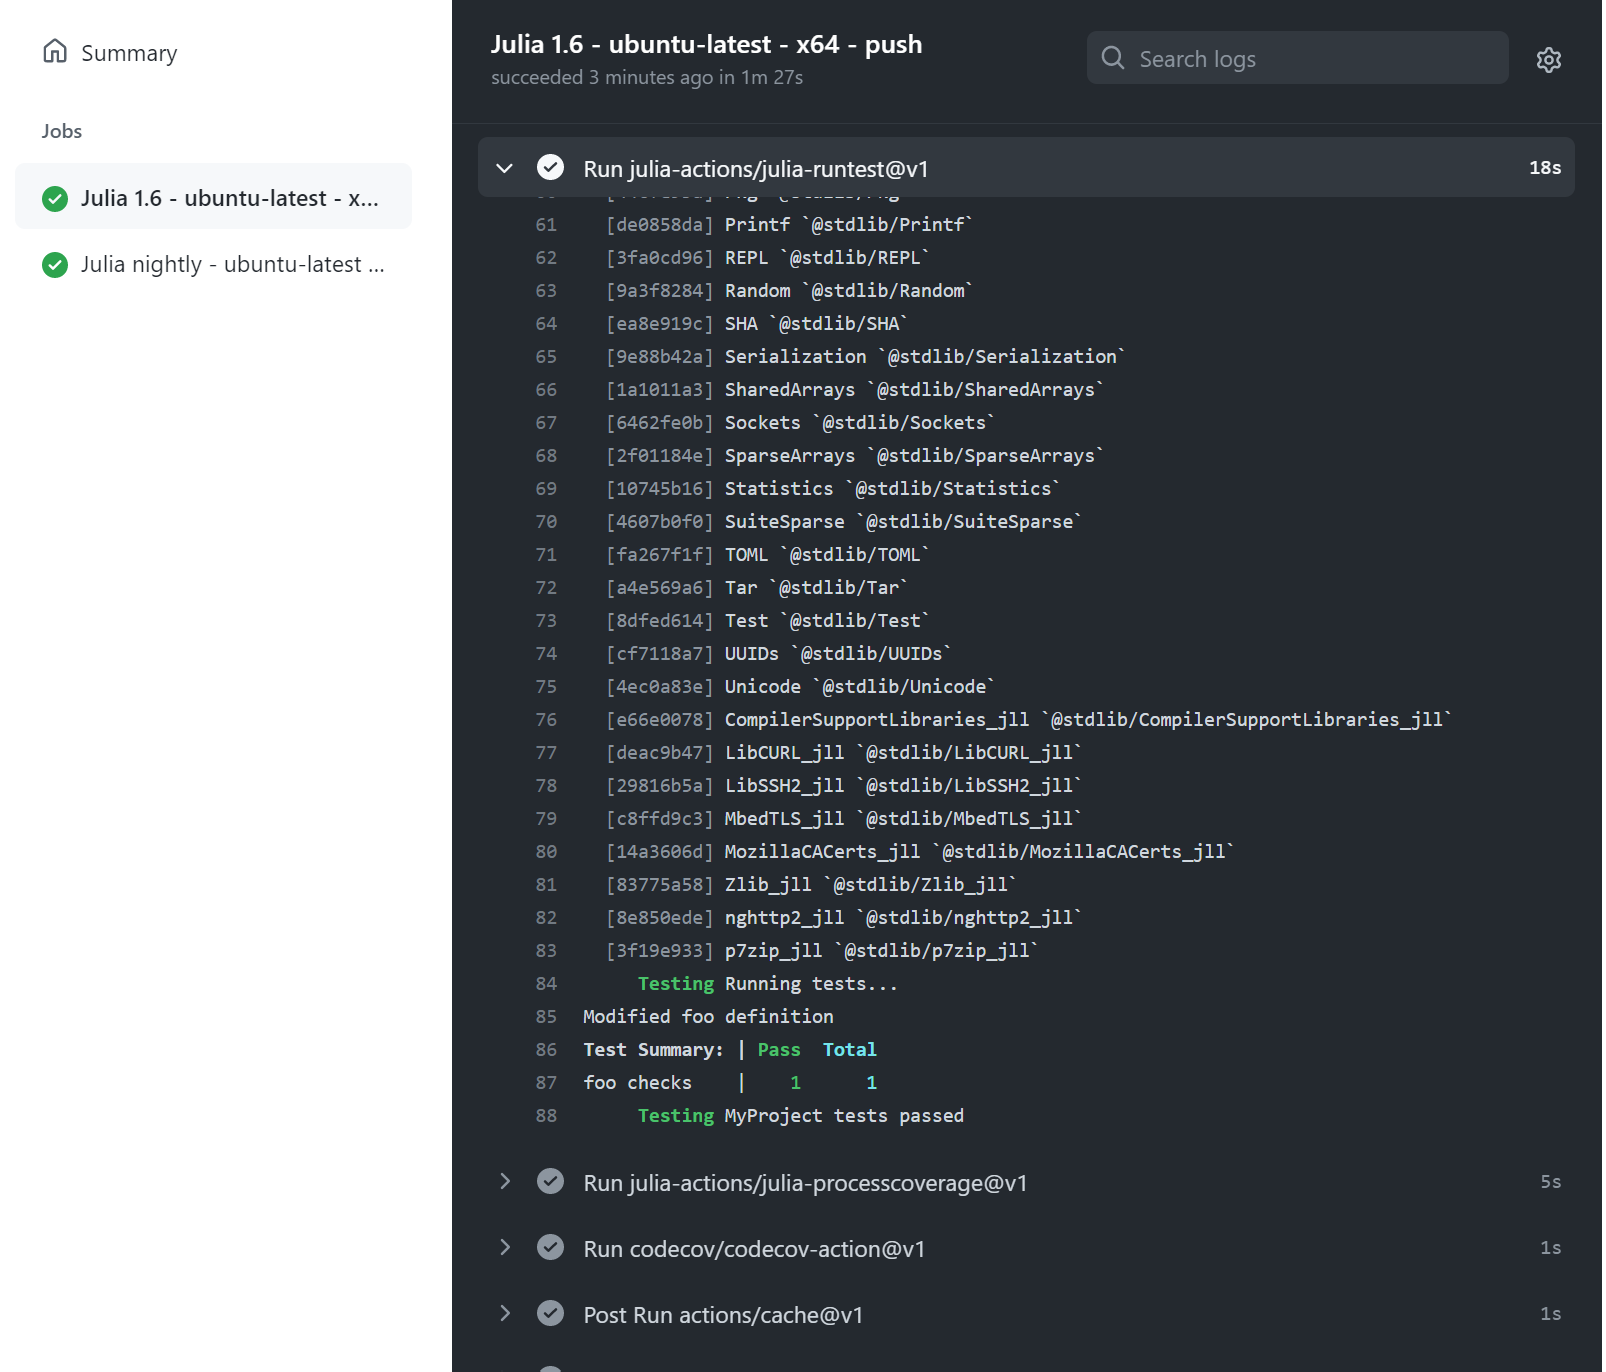
If you further click on one of the jobs and select the julia-runtest you can see the output on the server. It ran your test suite on its isolated environment and is showing a check mark because the tests passed.
By this point, if you navigate back to the web page you will see that the commit has a checkmark (rather than an orange circle) and the badge at the bottom says “CI | passing” to indicate that the last action was successful.
13.4.6. “Feature” Branches and Continuous Integration#
The previous example showed how the CI will automatically execution an action when you push it to the main branch.
These actions will also apply, separately, to any branches and Pull Requests (PRs) that you create, as discussed in the previous lecture.
Separate testing and CI is one of the primary motivations for creating a branch when collaborating on a project.
To demonstrate this, we can first create a new branch on our local machine.
To do so, click on the main branch at the bottom of the VS Code window to open the branch selection menu.
It should look something like the following
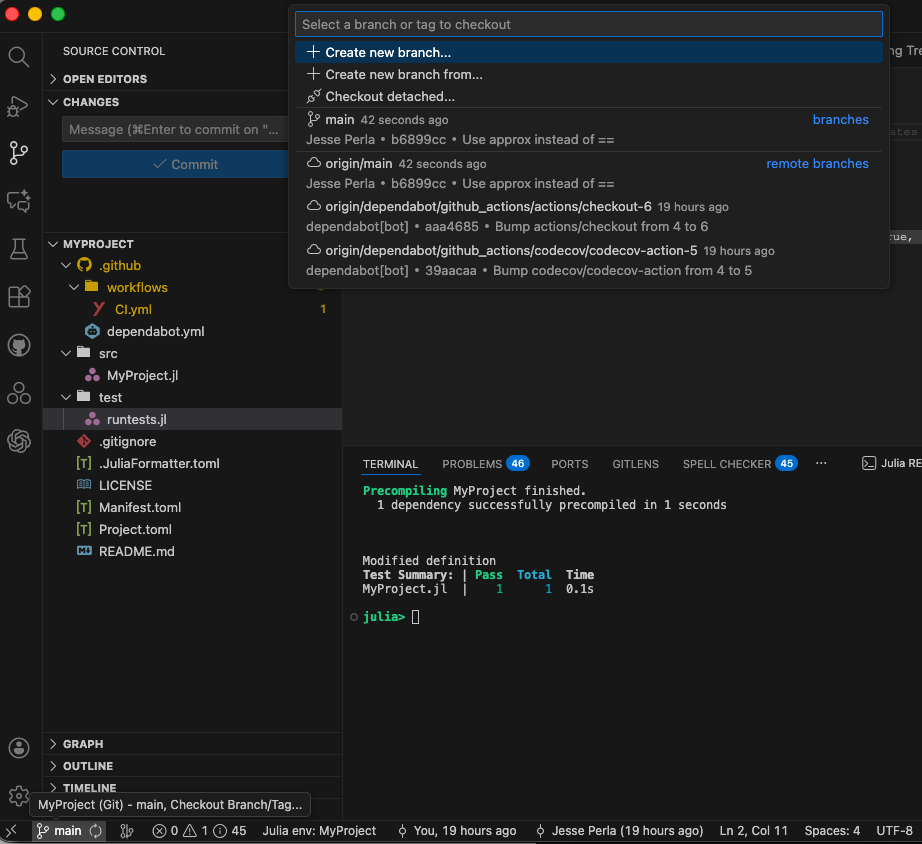
With “Create new branch…” name a branch my-feature and ensure it is based off of the main branch. The change in the branch in the bottom-left of the VS Code window
In MyProject.jl, change the default value of mu to 0.0. i.e.,
function norm_pdf_val(x, mu = 0.0, sigma = 2.0)
    d = Normal(mu, sigma)
    return pdf(d, x)
end
Then we will push this change to github server.
Type in a Commit message such as Modified default mu, and “Commit” and “Publish Branch”
Note
Of course, one would typically run ] test locally before pushing changes to the server to ensure that your new branch didn’t break any existing code
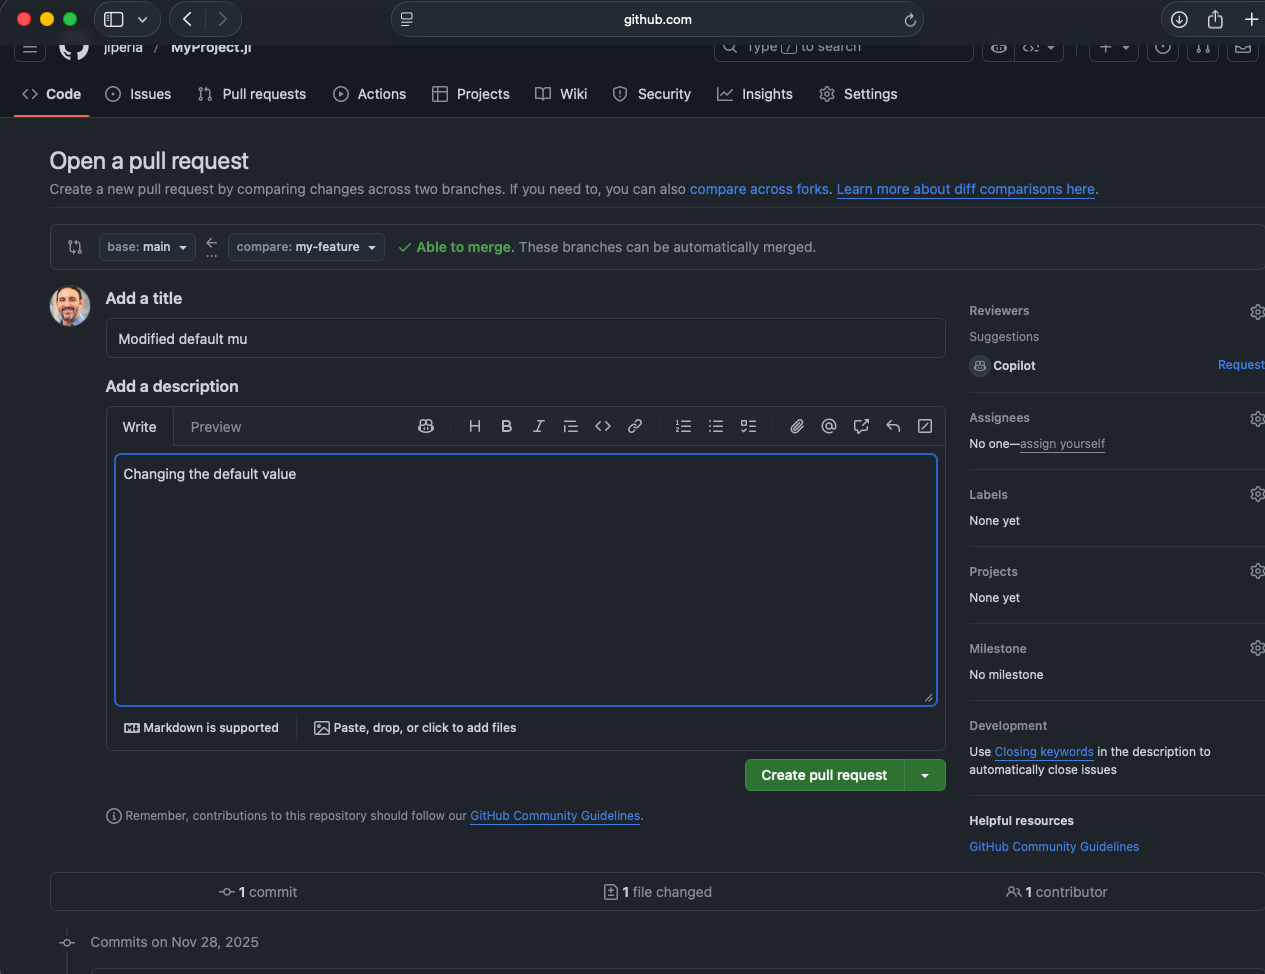
After publishing this to the server, go back to the GitHub webpage for the repository and refresh if necessary. The screen will now look something like
Click on the “Compare & pull request” button to create a new PR from the
my-featurebranch to themainbranch, add in an optional description, and then “Create pull request”.
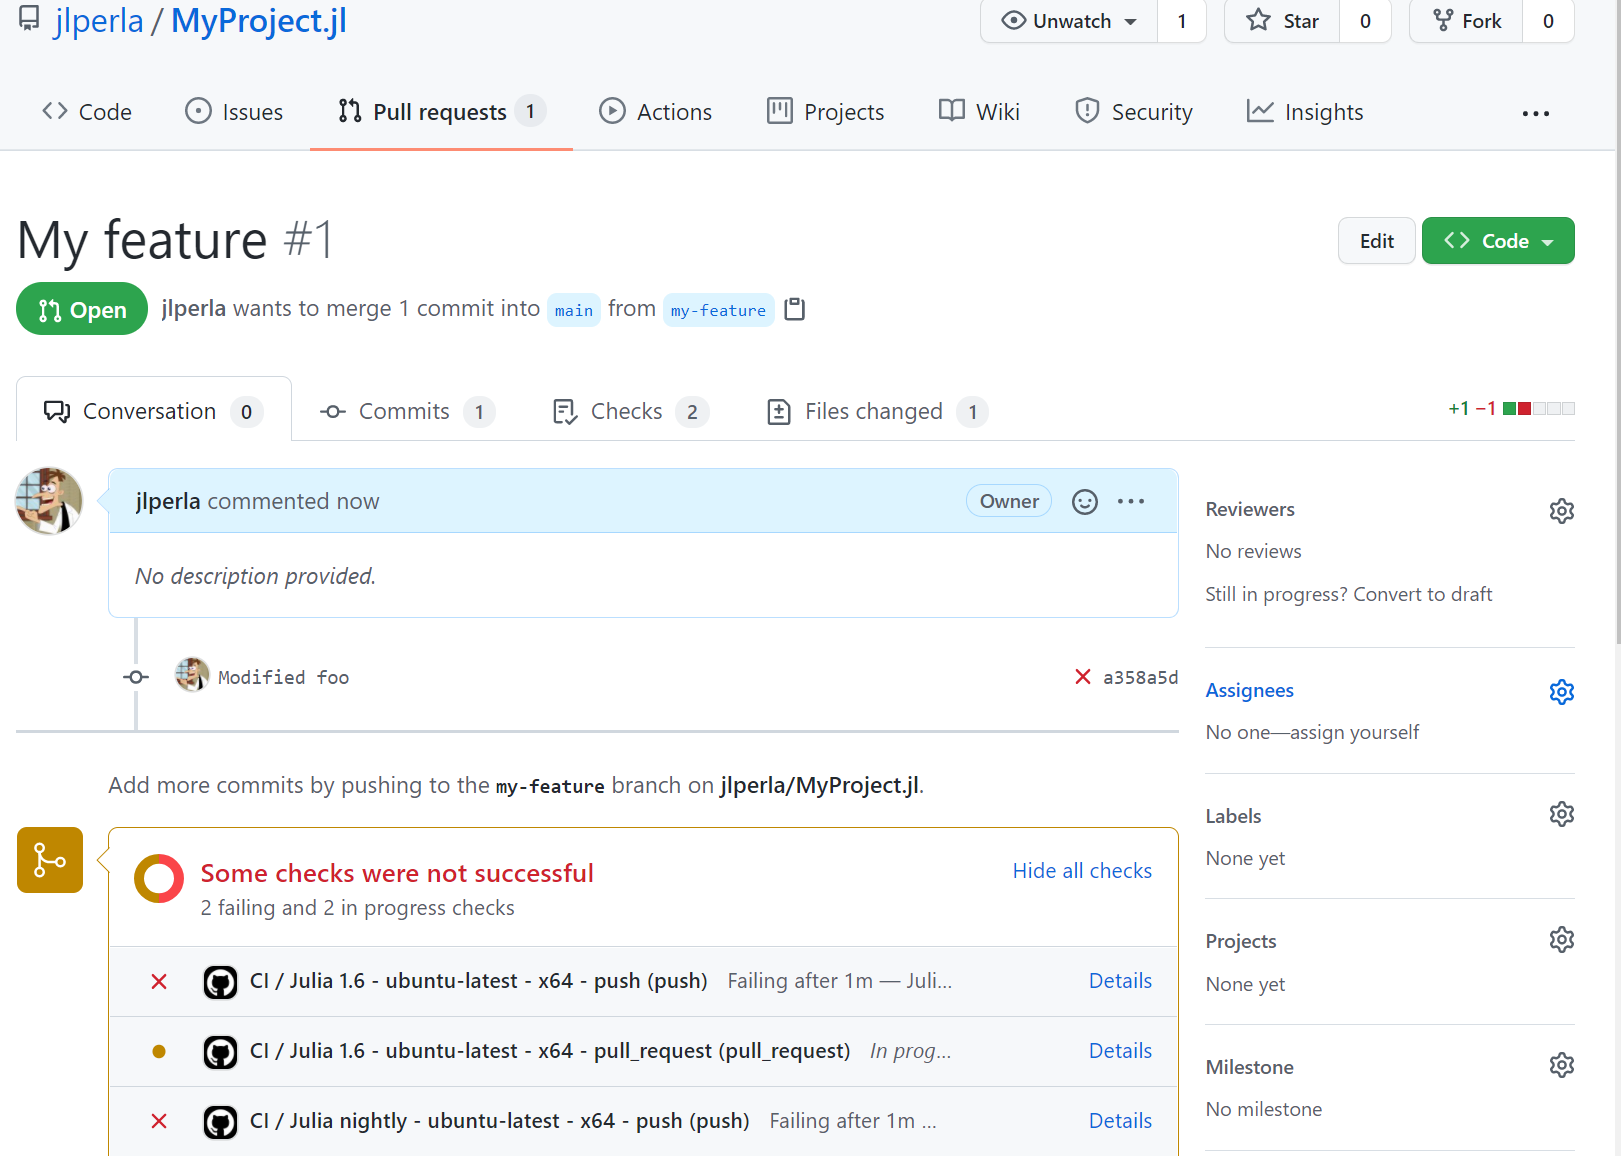
After the PR is created, it will automatically trigger the CI to run the tests on the branch. Unlike in the previous example, the pull request will have a red X indicating that one of the actions failed.
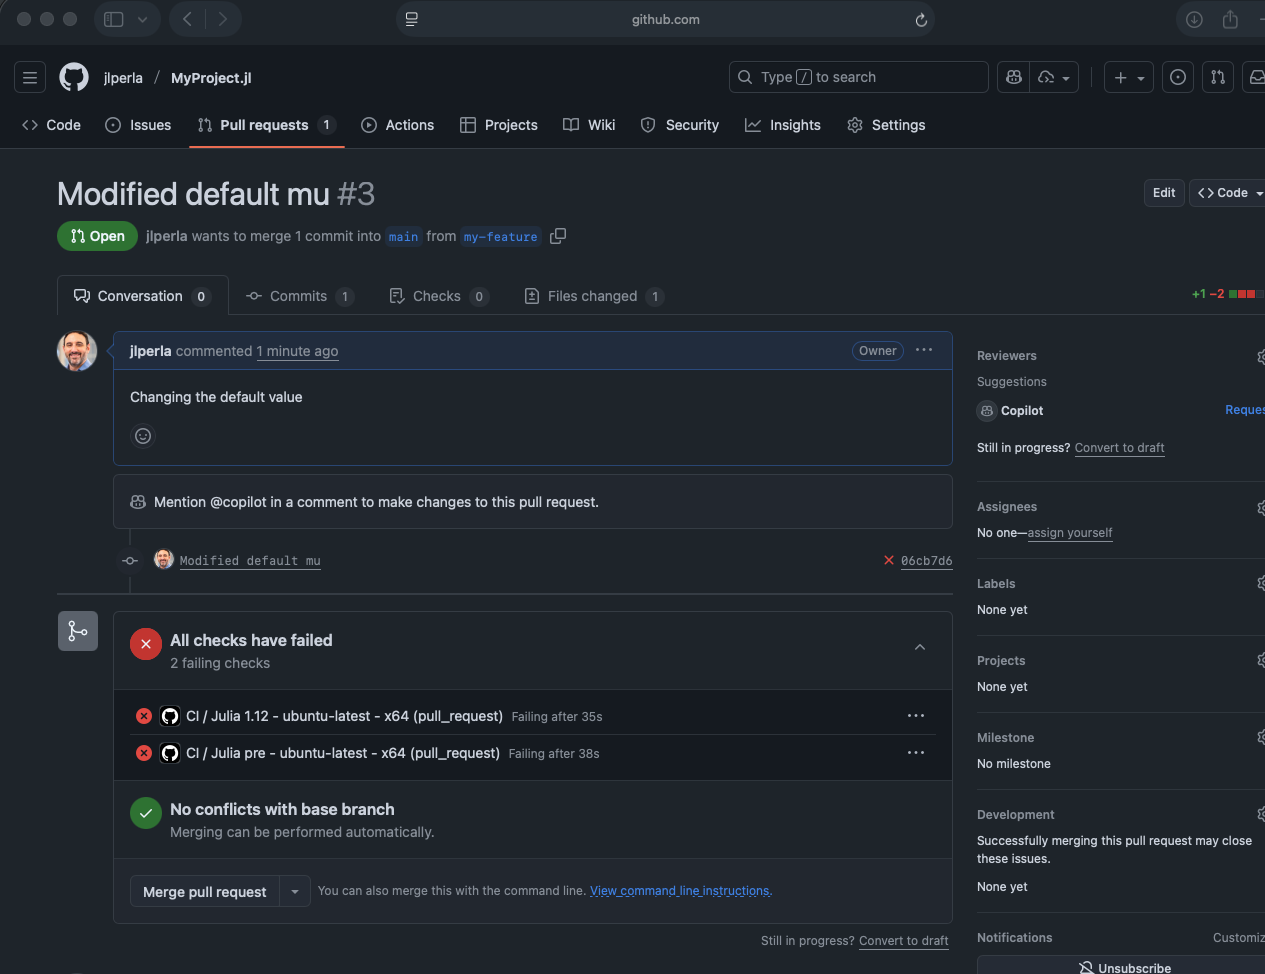
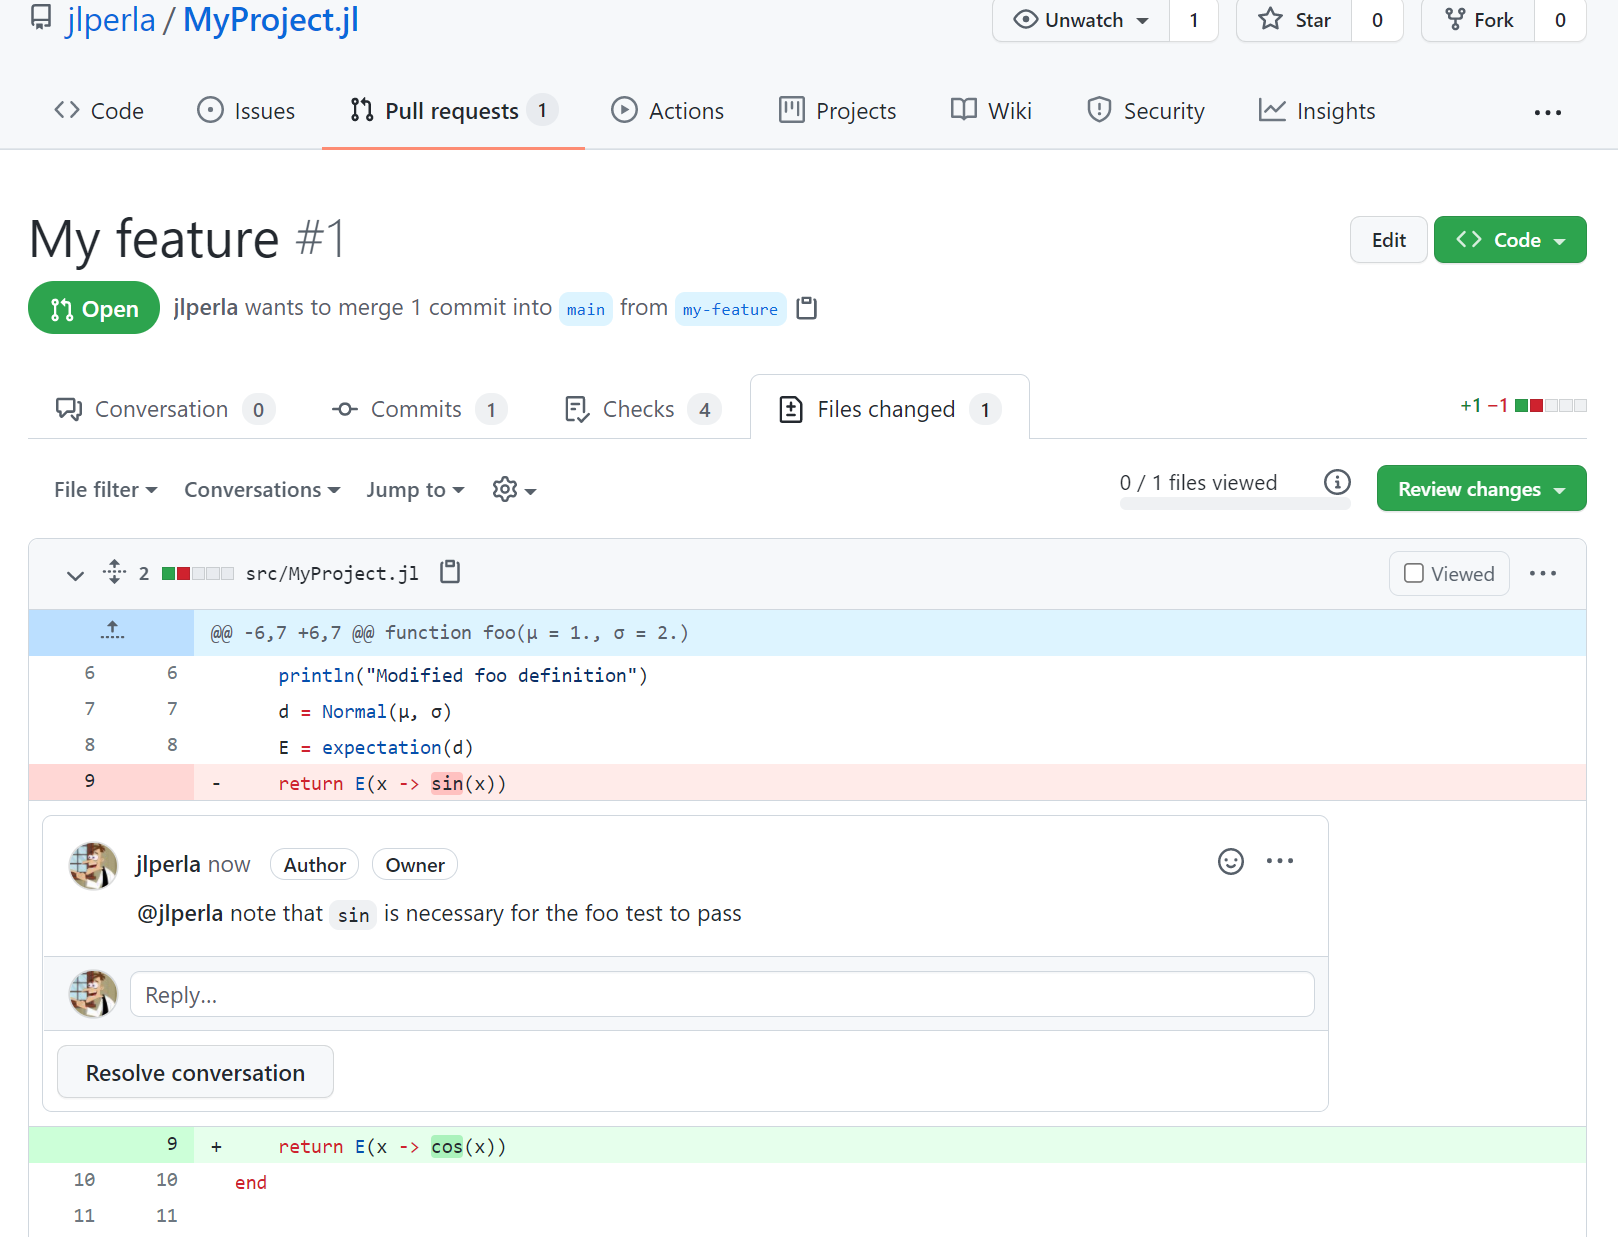
If this were done by a collaborator, you could go to the “Files Changed” tab, see the code modifications for commits in this PR, and then add a comment on these inline for discussion (using the @ to tag an individual so they are emailed)
At that point, you or your collaborators can easily switch to the branch associated with the PR (i.e. my-feature in the above screenshot), make changes, remember to run ] test locally to ensure everything is working, and then Commit the change and sync to the server.
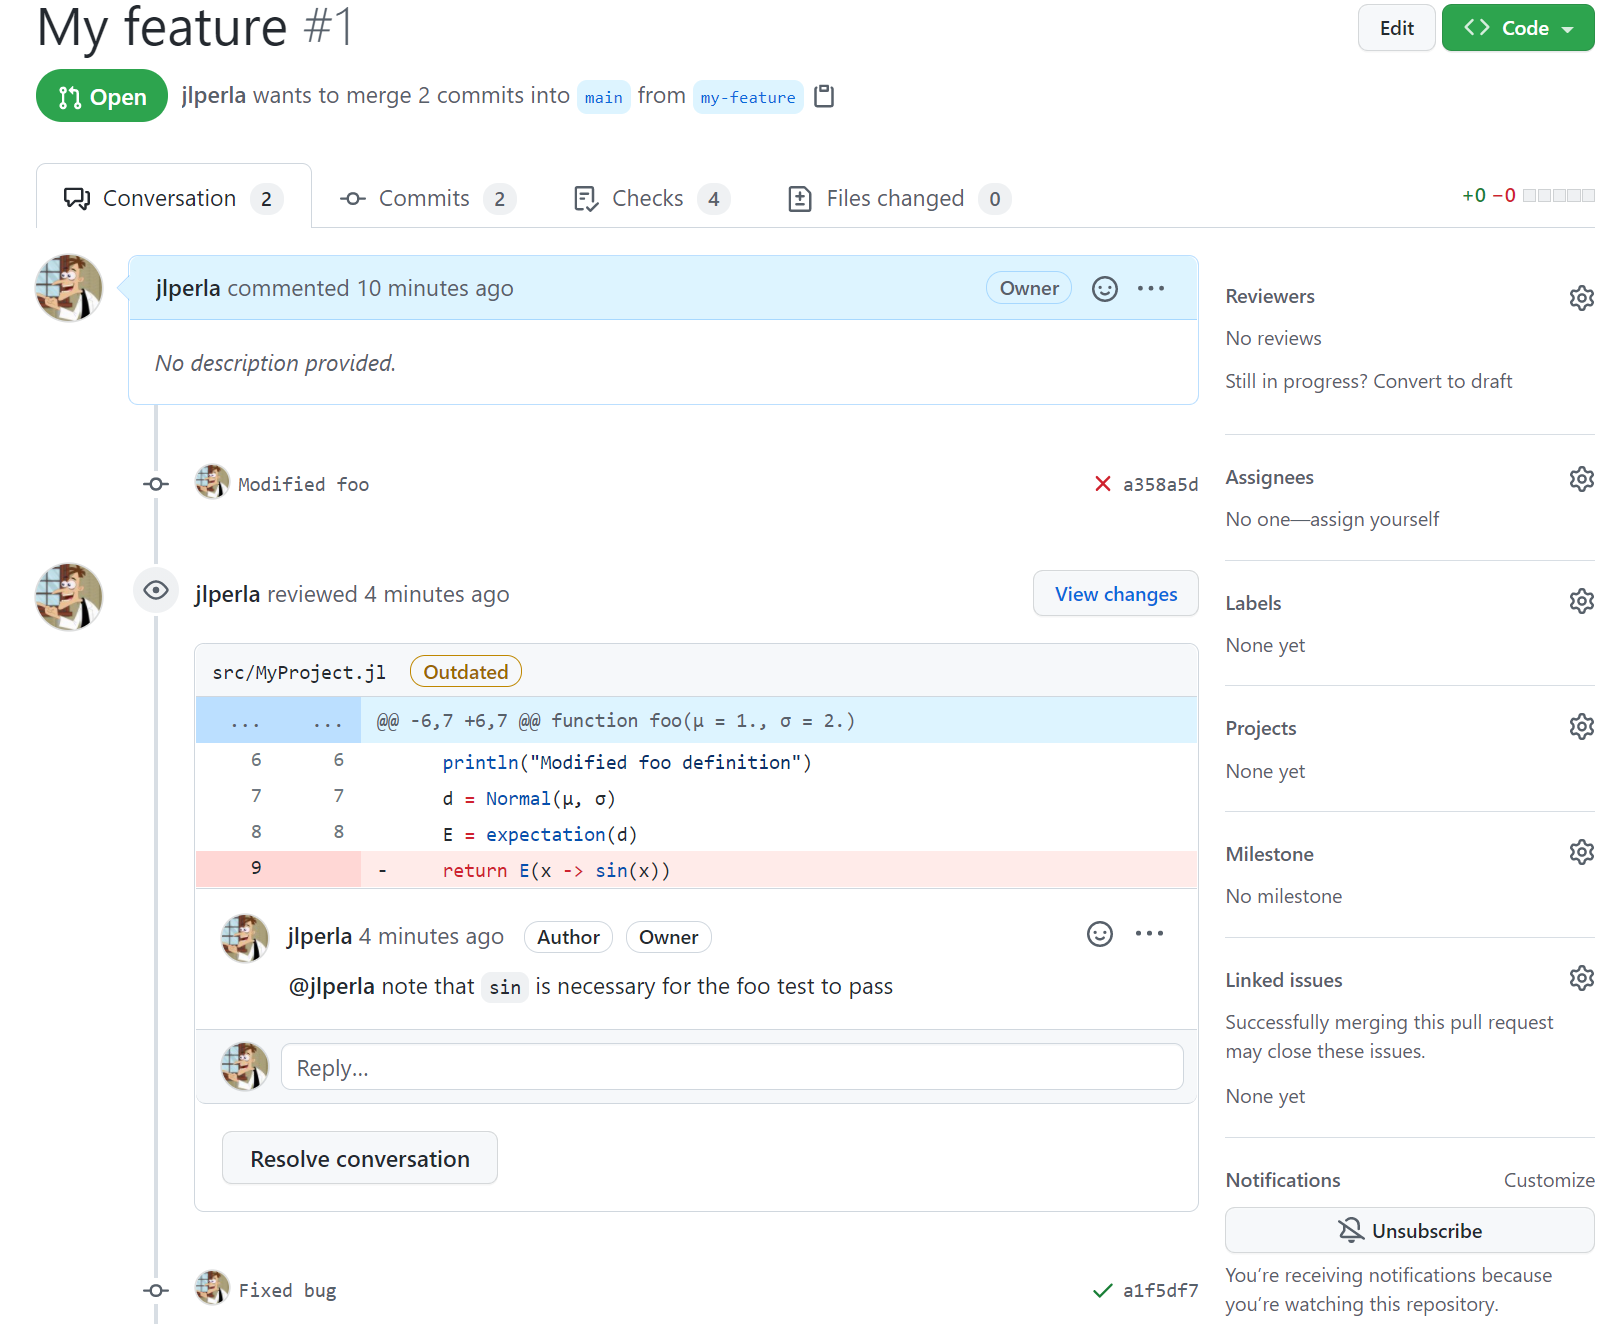
If you go back to the webpage of the PR, you will see that the new commit has triggered the CI to run again and it is now passing the tests.
At this point you could “Merge the pull request” and delete the branch. Ensure you reselect your main branch in VS Code to make further changes there rather than on the my-feature branch.
13.4.7. Code Coverage#
At this point, the Codecov badge in the README likely says codecov | unknown since the repository has not been added there.
Click on that badge, which should take you to the Codecov website where you can login with GitHub (and authorize access if necessary).
If you do not see your repository listed, you may be able to search for it.
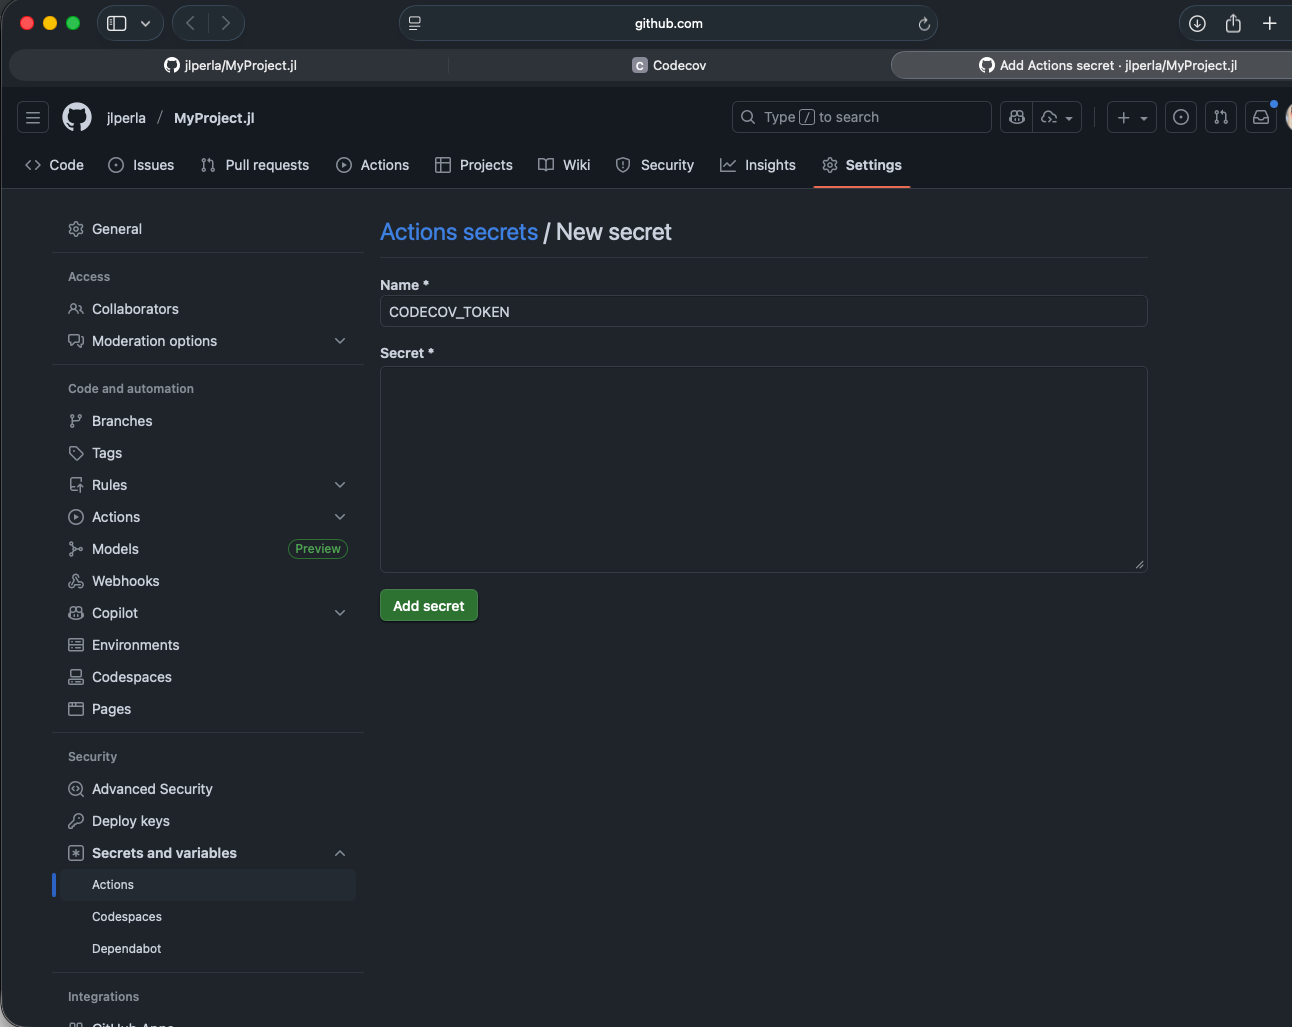
Choose “Configure” and use GitHub Actions. Scroll down to Step 3 to see a token (blurred out below)
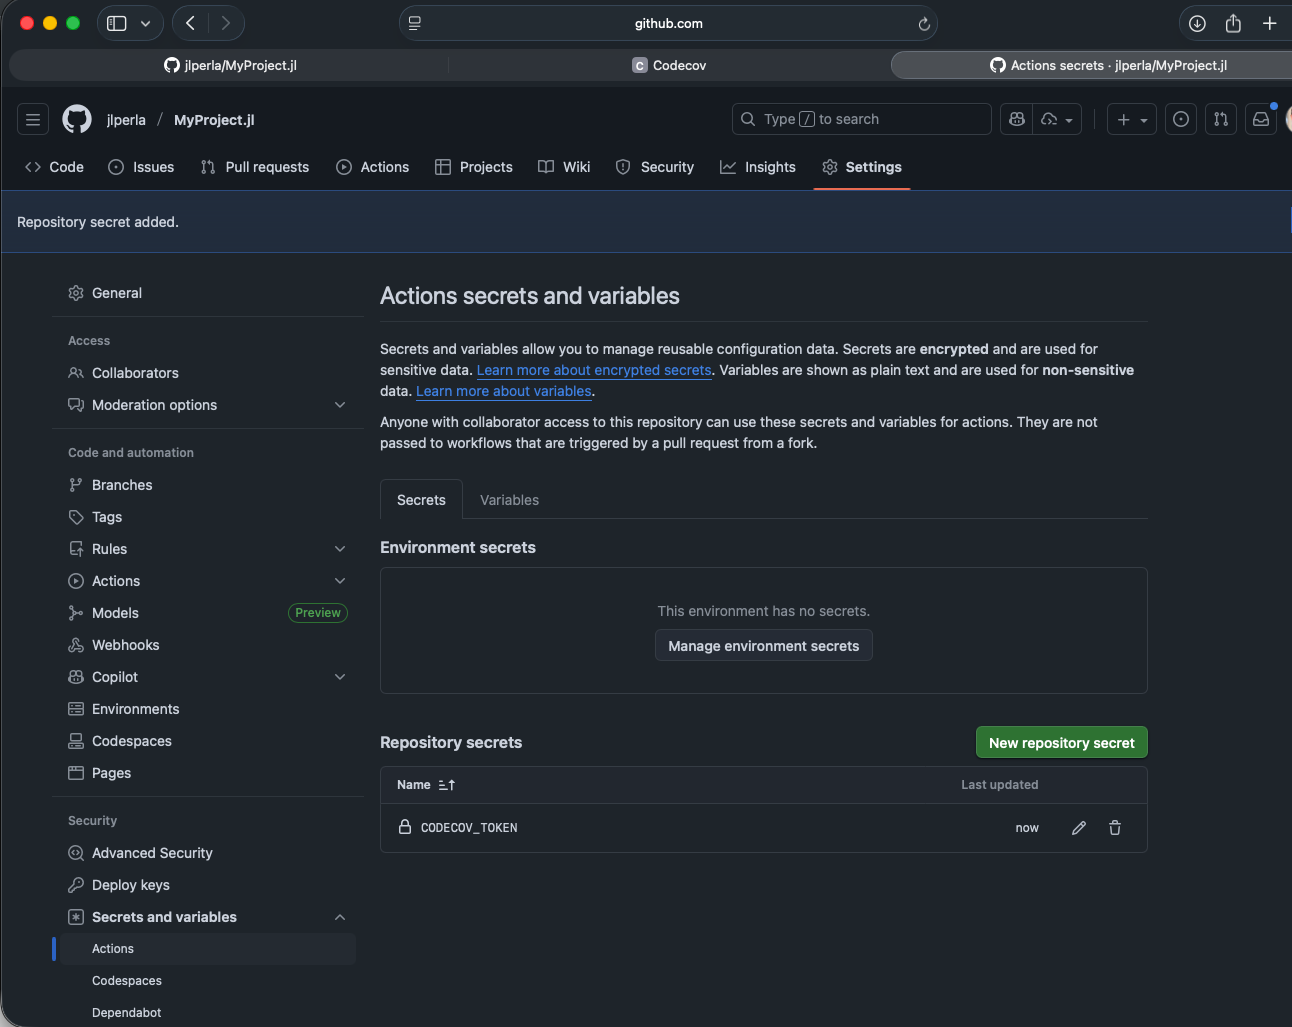
Click on the “add token as repository secret” link which will bring you to the correct place in the github webpage to type in the CODECOV_TOKEN and associated value.
After saving the token, the github repository will show something like
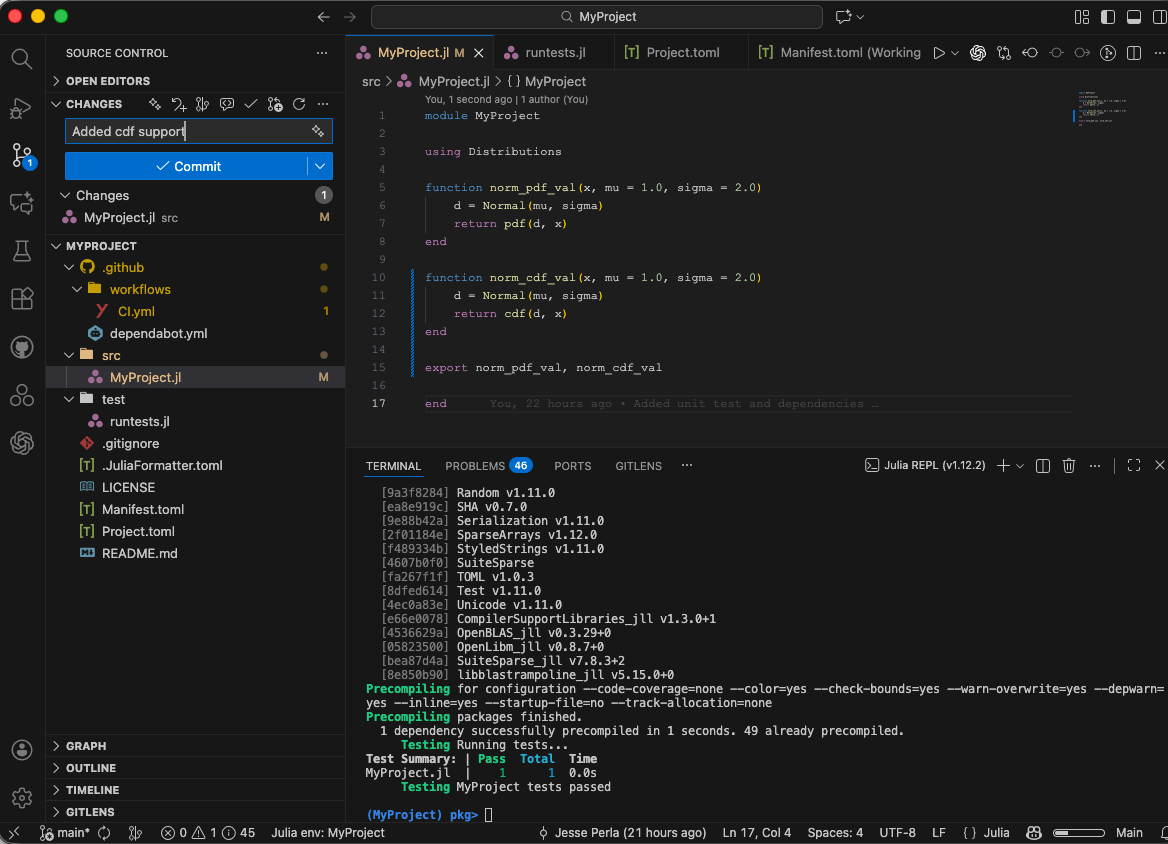
To trigger the code coverage, we can now make a small change directly to the main branch which adds a function without any associated tests.
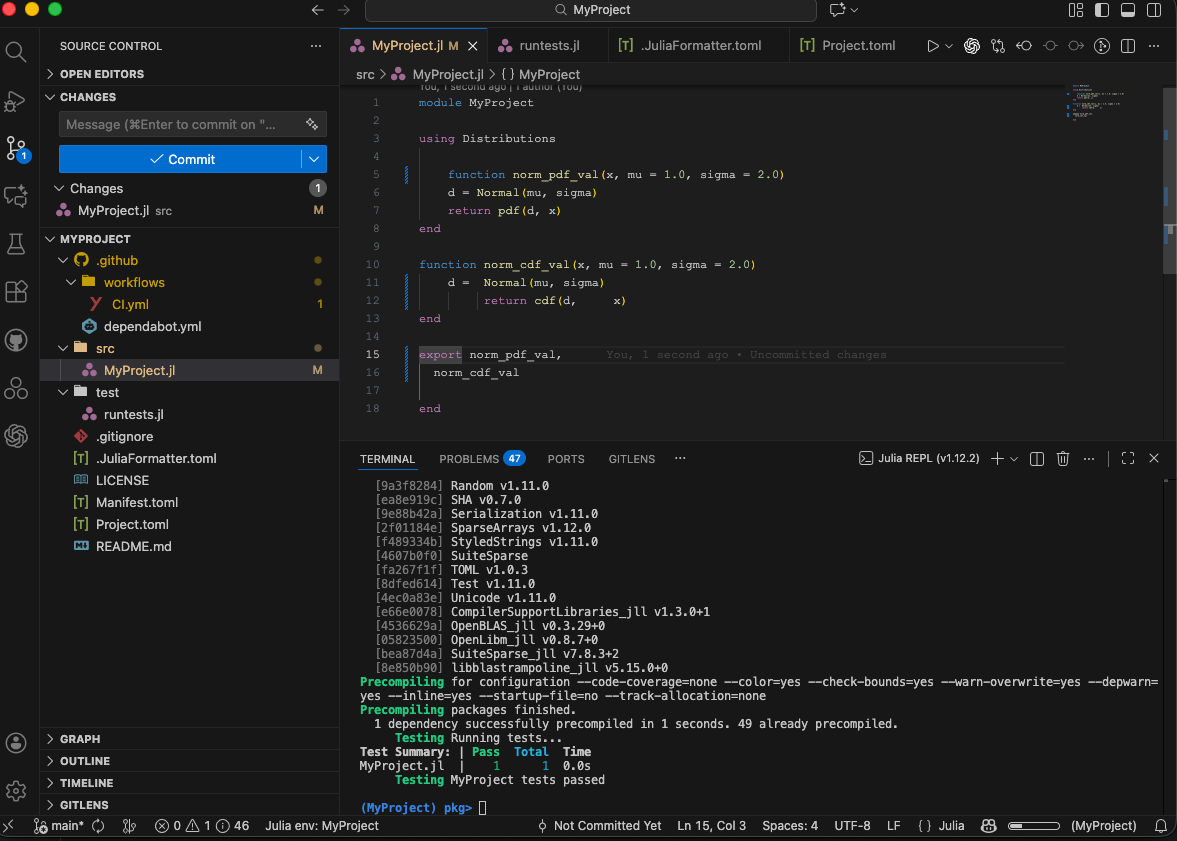
Go back to VS Code, and ensure you are in the main rather than my-feature branch. Then change the src/MyProject.jl file to add in a new function
module MyProject

using Distributions

function norm_pdf_val(x, mu = 1.0, sigma = 2.0)
    d = Normal(mu, sigma)
    return pdf(d, x)
end

function norm_cdf_val(x, mu = 1.0, sigma = 2.0)
    d = Normal(mu, sigma)
    return cdf(d, x)
end

export norm_pdf_val, norm_cdf_val

end
Add a Commit message such as “Added cdf support” and Sync Changes
After the CI executes, you will notice that the unit tests still pass despite the additional function.
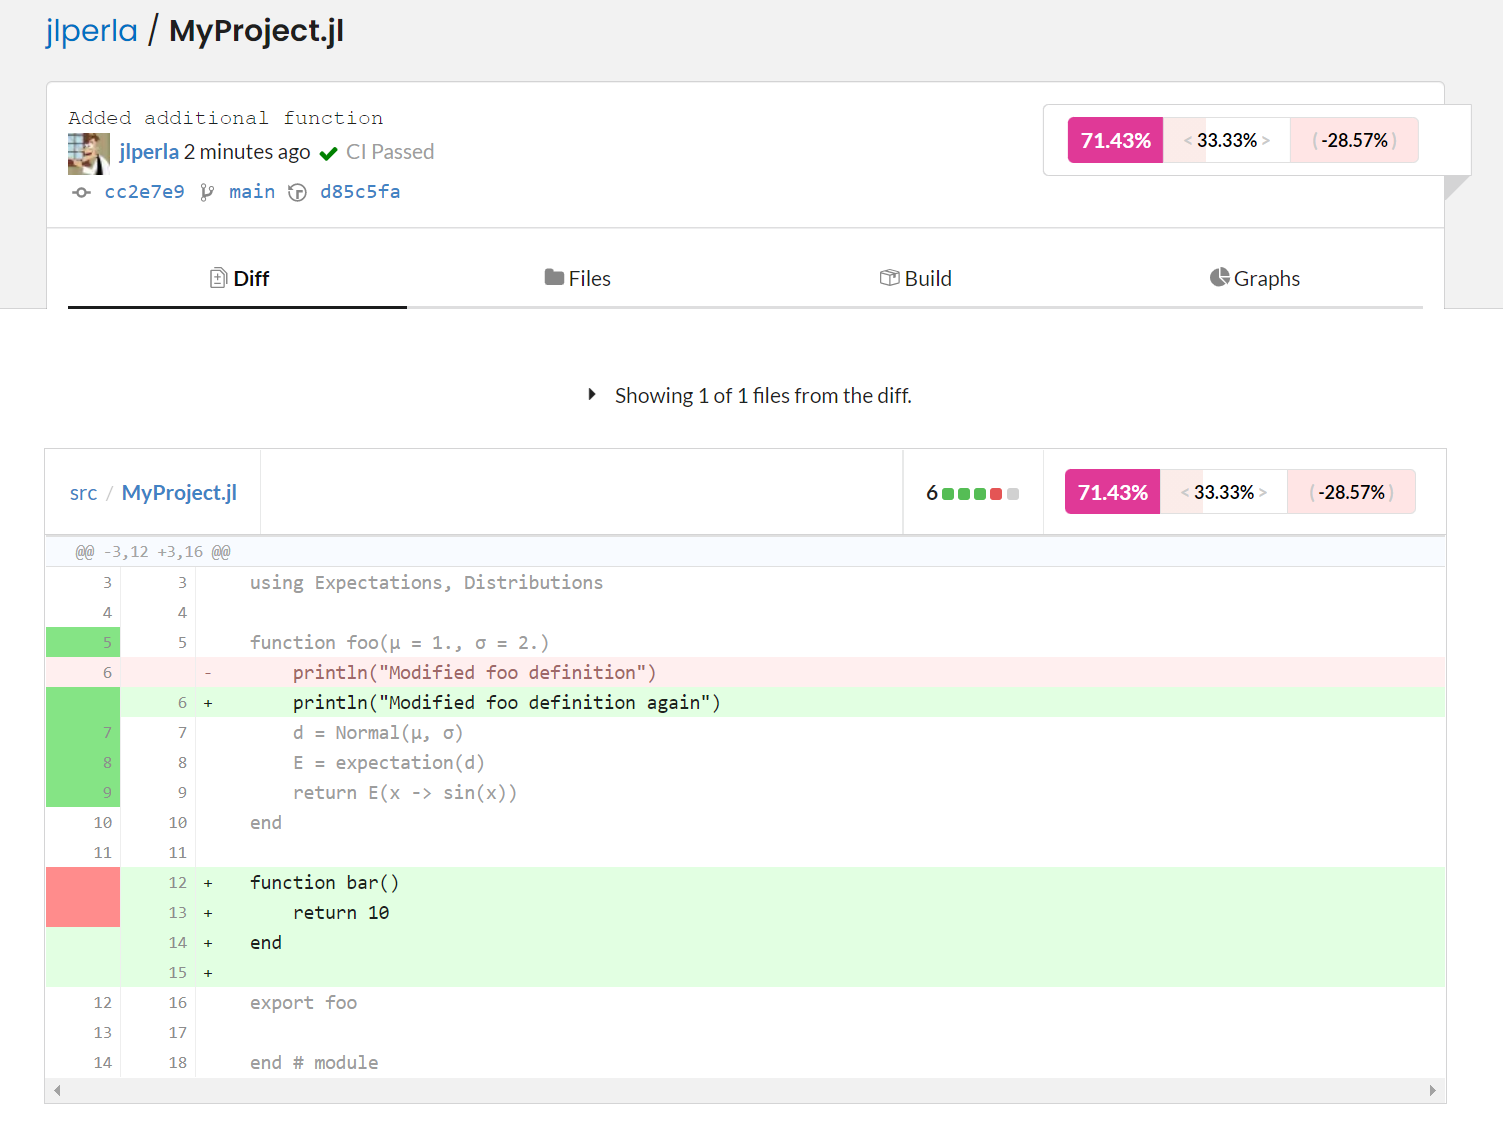
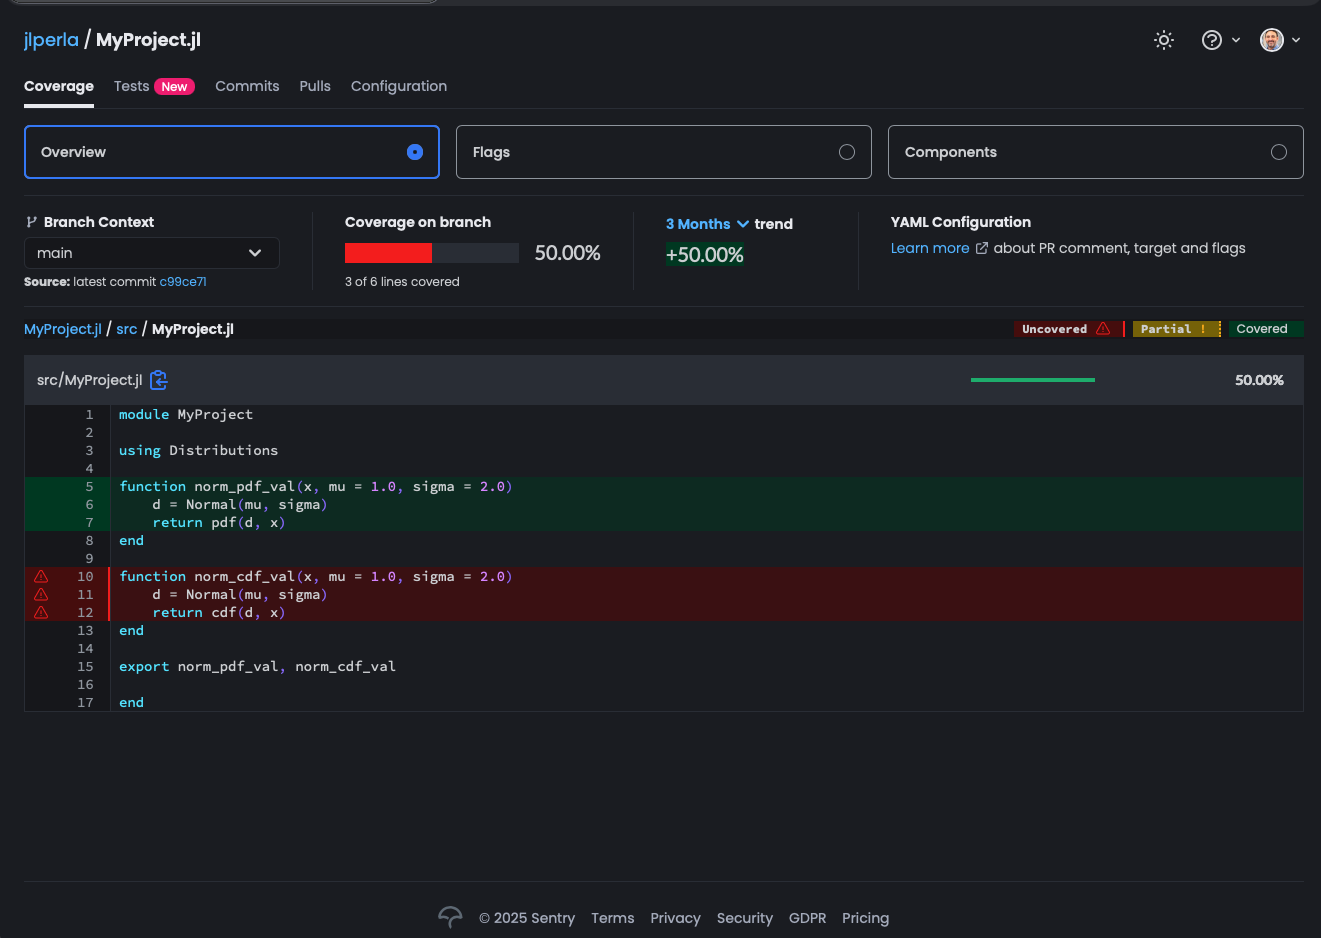
However, if you click on the code coverage badge again and look at the main branch (or that particular commit) you will see that the code coverage has only 50% coverage total.
If you click on the file itself, it highlights which lines were executed (in green) and which were not (in red).
To fix this issue, the unit testing file can be modified to add an additional test as in
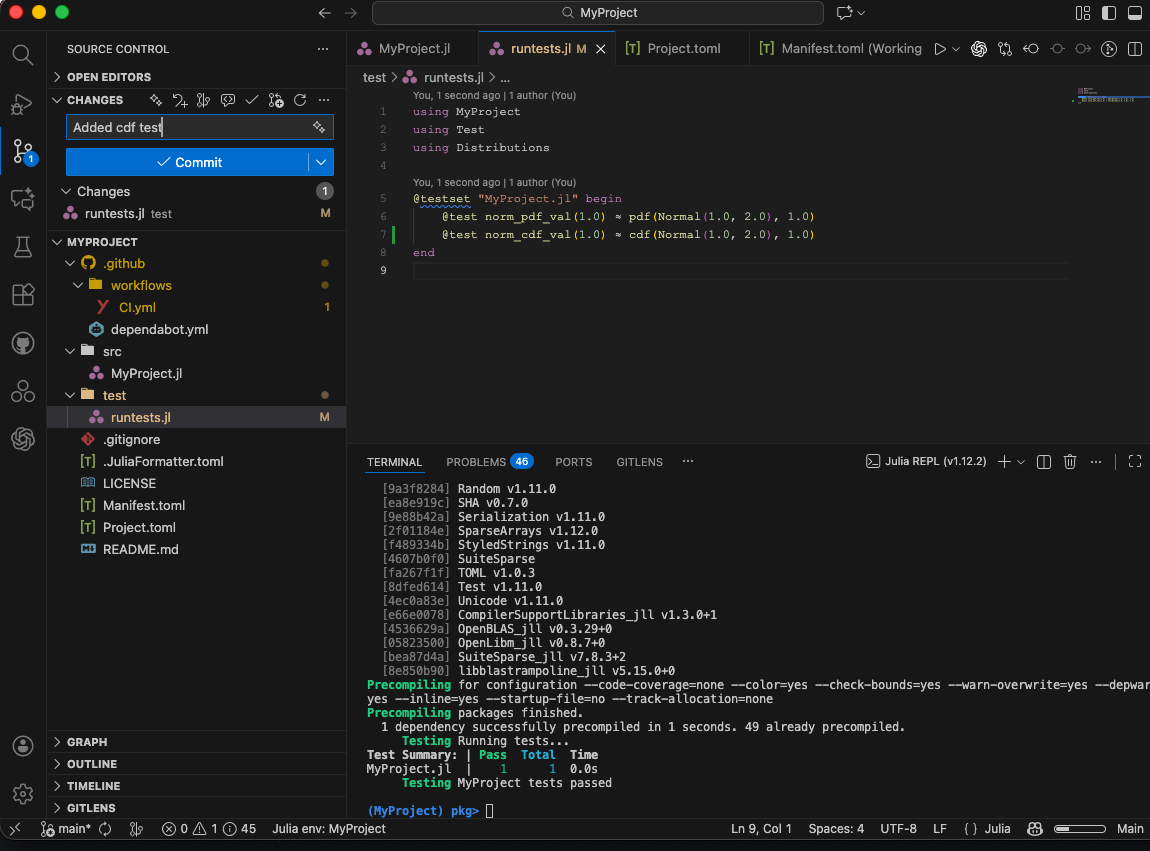
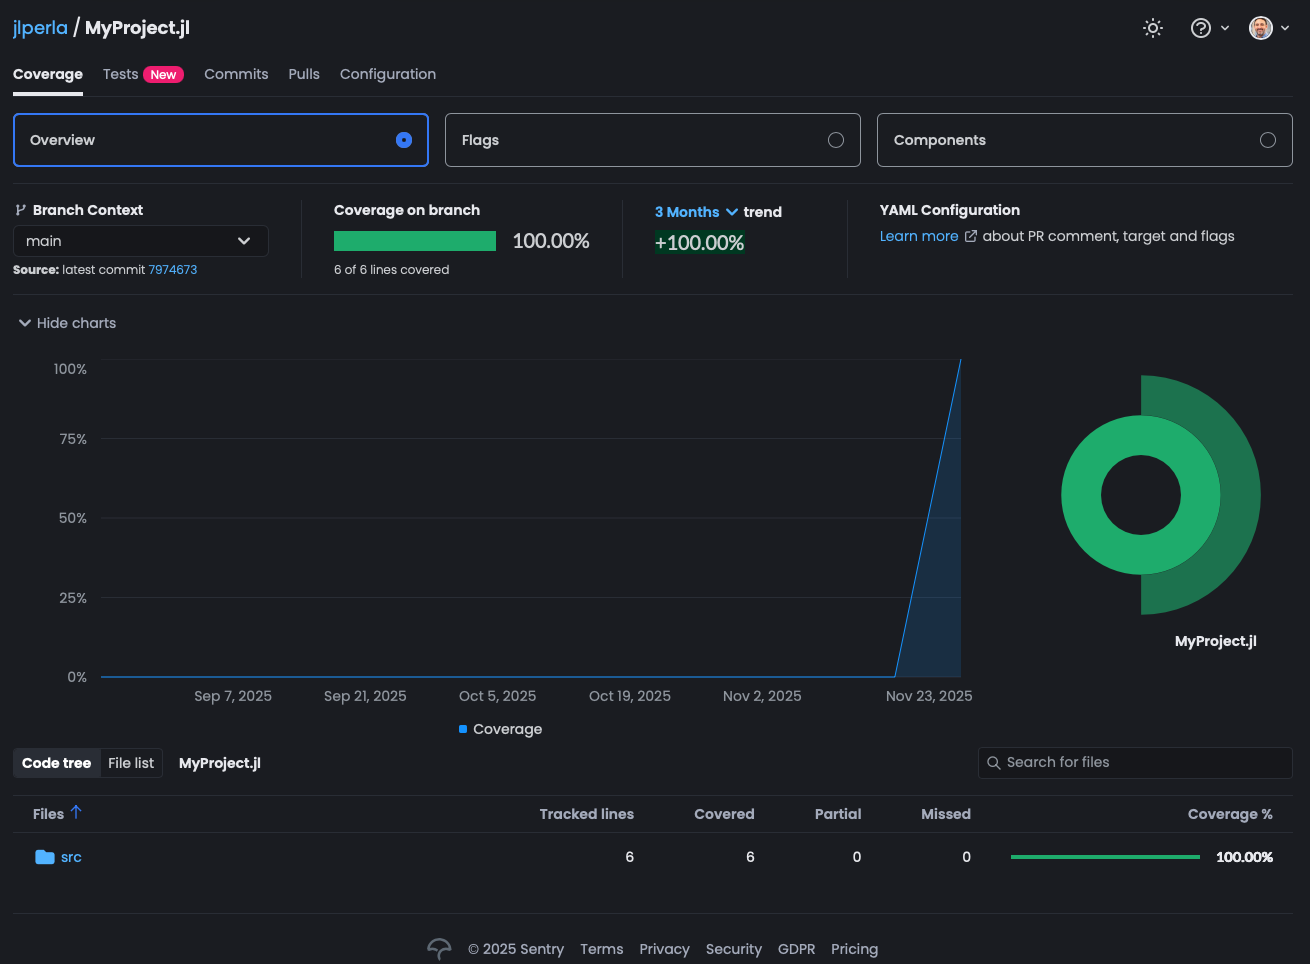
After pushing this to the server and waiting for CI to execute the unit test and the code coverage, click again on the codecov badge (which will eventually say codecov | 100% in green) to see that now all lines are covered.
13.5. More on Writing Tests#
As discussed, there are a few different kinds of test, each with different purposes
Unit testing makes sure that individual pieces of a project work as expected.
Integration testing makes sure that they fit together as expected.
Regression testing makes sure that behavior is unchanged over time.
In general, well-written unit tests (which also guard against regression, for example by comparing function output to hardcoded values) are sufficient for most small projects.
13.5.1. The Test Module#
Julia provides testing features through a built-in package called Test, which we get by using Test.
The basic object is the macro @test
using Test
@test 1 == 1
Test Passed
Since floating points can often only be compared within machine precision, you can typically only compare these approximately with either isapprox or ≈ (which can auto-completed in VS Code with \approx<TAB>)
@test 1.0 ≈ 1.0
x = 2.0
@test isapprox(x, 2.0)
@test x ≈ 2.0
Test Passed
The default comparison for isapprox is that the relative tolerance (i.e. \(\|x - y\| \leq rtol \max(\|x\|, \|y\|)\)) depends on the particular type, but defaults to the sqrt rate of the machine epsilon.
For example,
@show √eps(Float64)
@show √eps(BigFloat);
√(eps(Float64)) = 1.4901161193847656e-8
√(eps(BigFloat)) = 4.156000133564589919546802616566101790707151631732974255008686036787230203508115e-39
For cases where you want to change the relative tolerance or add in an absolute tolerance (i.e. \(\|x - y\| \leq atol\)) use the appropriate keywords
x = 100.0 + 1E-6  # within the tolerance
@test x≈100.0 rtol=1E-7  # note < the 1E-6 difference passes due to relative scaling
y = 1E-7
@test 0.0≈y atol=1E-6  # absolute tolerance!
Test Passed
Note
The relative tolerance is always preferred for comparisons since it is dimensionless, whereas the absolute tolerance is related to the norm of the objects themselves. As the documentation for isapprox says: x - y ≈ 0, atol=1e-9is an absurdly small tolerance if x is the radius of the Earthin meters, but an absurdly large tolerance if x is the radius of a Hydrogen atom.
Because of this, there is no default atol if the norms of the values are zero. And rtol is undefined, so you will need to use judgement on the specific problem to form a threshold.
The isapprox comparison works for any datatypes that implement a norm, for example
x = [1.0, 2.0]
@test x ≈ [1.0, 2.0]
Test Passed
Tests will pass if the condition is true, or fail otherwise. Failing tests will be highlighted in both the CI and output within the terminal,
@test 1 == 2
Finally, sometimes you will have broken tests which are known to fail, but you do not want to remove.
This is good practice for code in progress that you intend to fix, but do not want to forget about, as commented out tests are easily forgotten.
To do this, flag it with @test_broken as below
@test_broken 1 == 2
Test Broken
  Expression: 1 == 2
This way, we still have access to information about the test, instead of just deleting it or commenting it out, but the CI will not fail.
There are other test macros, that check for things like error handling and type-stability. Advanced users can check the Julia docs.
13.5.2. Test Sets#
By default, the runtests.jl folder starts off with a @testset.
This is useful for organizing different batches of tests, and executing them all at once.
@testset "my tests" begin
    @test 1 == 1
    @test 2 == 2
    @test_broken 1 == 2
end;
Test Summary: | Pass
Broken  Total  Time
my tests      |    2       1      3  0.1s
By using <Shift+Enter> in VS Code or Jupyter on the testset, you will execute them all. You may want to execute only parts of them during development by commenting out the @testset and end and execute sequentially until the suite passes.
To learn more about test sets, see the docs.
13.5.3. Formatting#
Most modern programming languages have software to automatically format code to a consistent style. This is useful for readability, but it also ensure that the diffs in version control are not polluted by changes in whitespace or other formatting.
For Python, common choices are black or the lightning fast Ruff - which is black compatible.
For Julia, the primary choice is JuliaFormatter.jl which you would have installed in the global environment above with ] add JuliaFormatter. Ensure this is at the global rather than project level since it is a tool run by VS Code rather than within the project itself.
In the generated package above, you will see a .JuliaFormatter.toml file which contains only a line to use style = "sciml". See here for more information on configuration options.
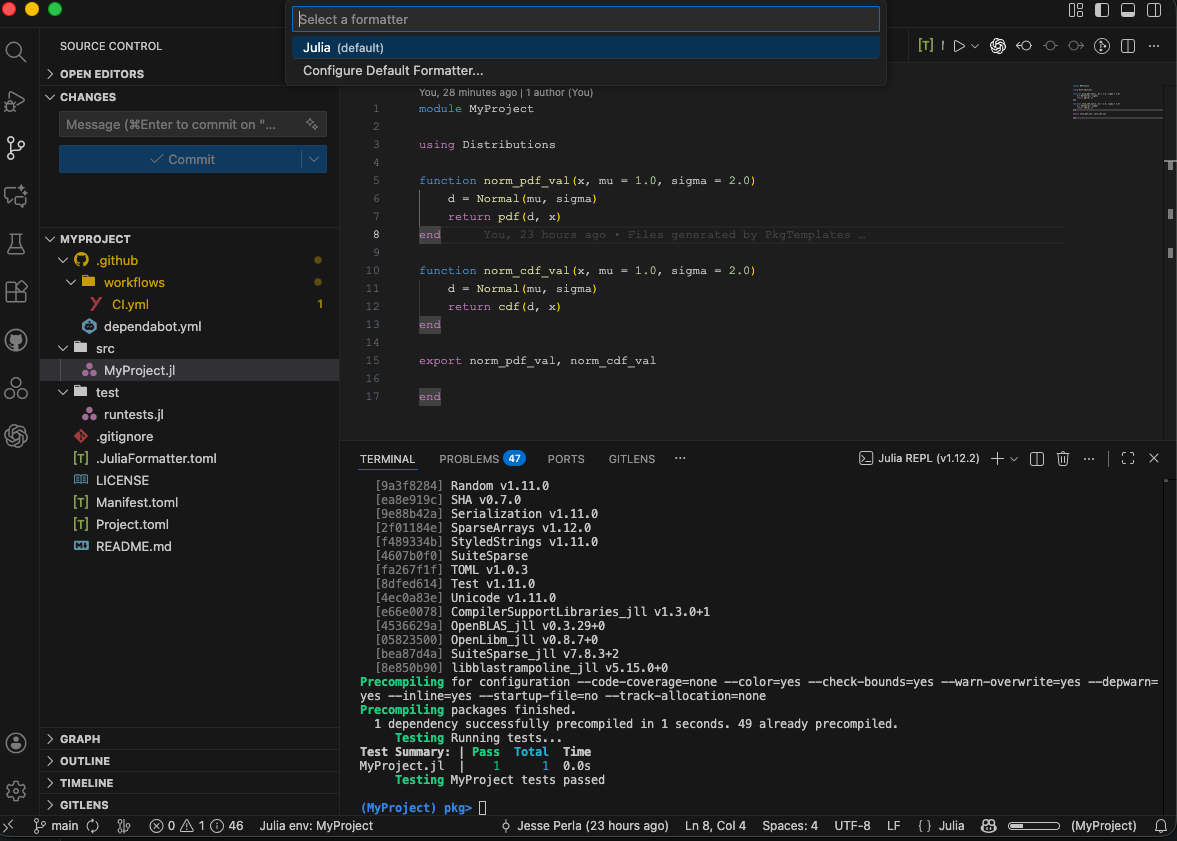
To use the formatter in VS Code with the Julia Extension, open up the src/MyProject.jl file, and then use the command palette (Ctrl+Shift+P or Cmd+Shift+P on Mac) to select Format Document. Choose Julia (default) as in
Next, in the source file modify the code to have inconsistent spacing, such as
Then again use the > Format Document command, which will reformat the code to be consistent with the style specified in the .JuliaFormatter.toml file.
Optionally, you can:
Set the formatter to run automatically on save by going to the settings (
Ctrl+,orCmd+,on Mac), searching forformat on save, and enabling theEditor: Format On Saveoption.Add in a Github action to automatically check formatting on pushes and PRs. See here
13.6. Exercises#
13.6.1. Exercise 1#
Following the instructions for a new project, create a new package on your github account called NewtonsMethod.jl.
In this package, you should create a simple package to do Newton’s Method using the code you did in the Newton’s method exercise in Introductory Examples.
In particular, within your package you should have two functions
newtonroot(f, f′; x₀, tol = 1E-7, maxiter = 1000)newtonroot(f; x₀, tol = 1E-7, maxiter = 1000)
Where the second function uses Automatic Differentiation to call the first.
The package should include
implementations of those functions in the
/srcdirectorycomprehensive set of tests
project and manifest files to replicate your development environment
automated running of the tests with GitHub Actions
For the tests, you should have at the very minimum
a way to handle non-convergence (e.g. return back
nothingas discussed in error handling)several
@testfor the root of a known function, given thefand analyticalf'derivativestests of those roots using the automatic differentiation version of the function
a test of finding those roots with a
BigFloatand not just aFloat64a test of non-convergence for a function without a root (e.g. \(f(x) = 2 + x^2\) )
a test to ensure that the
maxiteris working (e.g. what happens if you callmaxiter = 5)a test to ensure that
tolis working
And anything else you can think of. You should be able to run ] test for the project to check that the test-suite is running, and then ensure that it is running automatically on GitHub Actions CI.
Push a commit to the repository which breaks one of the tests and see what the GitHub Actions CI reports after running the build.